

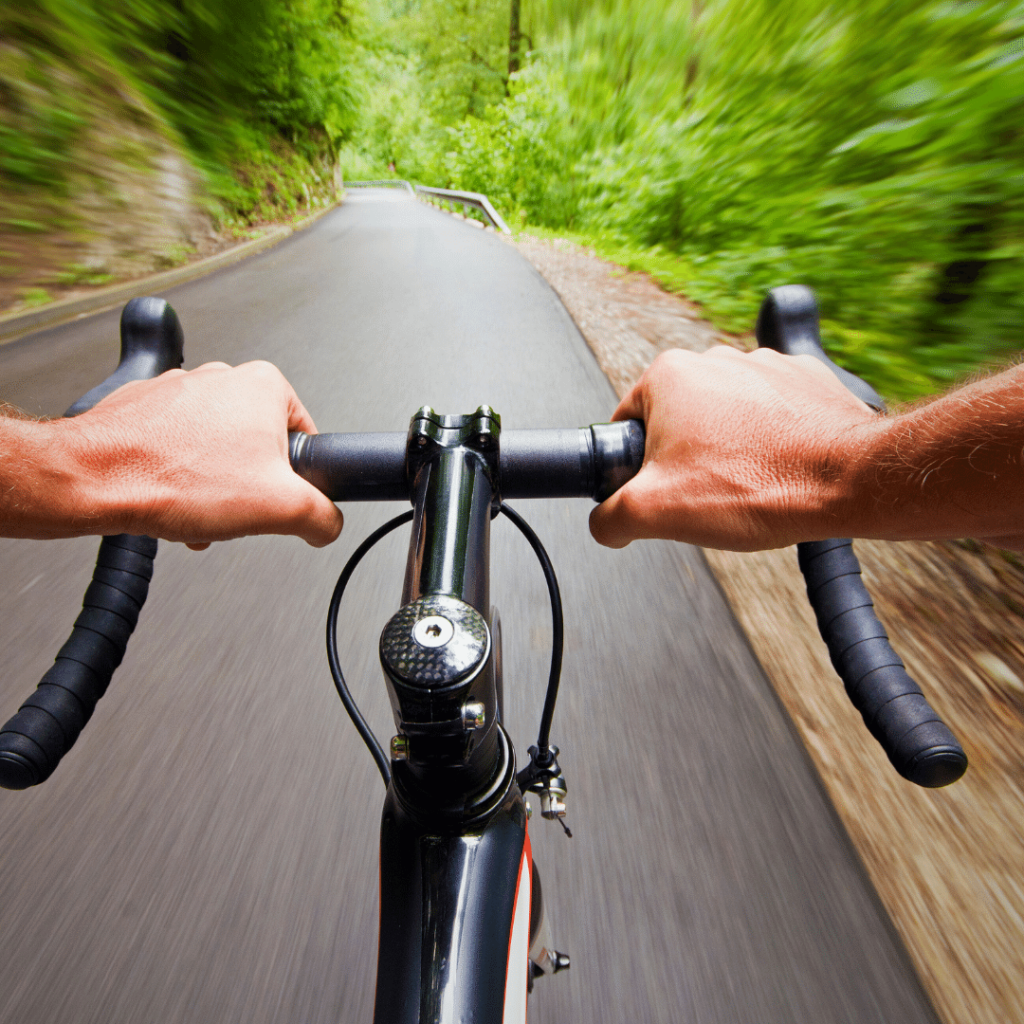
Road bike trials involve riders navigating challenging obstacles and terrain. During these trials, riders must hop over obstacles, balance on narrow surfaces, and maneuver through tight turns, all requiring control and precision.
In this article, we will explore the ten road bike trial techniques and how they help you conquer obstacles, improve your balance, and navigate tricky terrain like a pro. Whether you’re a beginner or a seasoned rider, these techniques will take your road bike trials to the next level.
10 Essential Road Bike Trial Techniques
1. Trackstand
2. Side Hop
3. Pedal Hop
4. Front Wheel Pivot Turn
5. Rocking Balance
6. Wheelie Gaps
7. Rolling Down
8. The Three Pedal
9. Front Wheel Placement
10. Pedal Pressure And Timing
10 ESSENTIAL ROAD BIKE TRIAL TECHNIQUES:
Bike trial techniques demand a combination of physical and mental skills, technical knowledge, and fearless commitment. However, the rewards of mastering these techniques make the effort worthwhile.
1. Trackstand
The track stand is when you balance your bike stationary without putting your foot down. It’s a great way to maintain balance, especially when encountering obstacles or waiting your turn during a trial.
Learning the Trackstand:
Here are some tips for mastering the track stand:
- Start on flat, open terrain: Find a grassy area or empty parking lot to practice it initially. This provides a stable surface without the added challenges of slopes or bumpy surfaces.
- Get in the right gear: Shift into a low gear that allows you to pedal easily and maintain balance—one that feels comfortable and requires less effort to pedal.
As a reference, you can try starting with a gear combination like the small chainring in the front (usually the innermost one) and one of the larger cogs in the rear (towards the middle or outer side).
This combination will give you a lower gear ratio, making it easier to pedal and maintain balance during the trackstand. Everyone’s preference may vary, so feel free to adjust and find the gear combination that works best for you.
- Positioning: Sit on your saddle with horizontal cranks and your strongest foot forward. Lean slightly forward and engage your core muscles. Then, turn your handlebars about 45 degrees (towards your leading foot) for additional stability and easier weight shifting.
- Initial Lift: During your ride, you might encounter an incline. If you decide to perform the track stand over the incline or an uphill slope, here is what you must keep in mind: As you roll gently towards the incline, you’ll feel the front wheel contact the upward slope. That’s when you want to quickly rise out of the saddle and apply gentle pressure on the forward pedal to maintain your balance and prevent rolling backward.
Find your balance point:
Use a combination of subtle weight shifts and chain tension through your pedals to maintain balance. Look for a neutral point where minimal adjustments are needed. Don’t use beaks, as you may lose balance.
- Left-to-Right Sway: When performing track stands, swaying left and right helps you maintain balance and make small adjustments to keep your bike upright. It’s a natural movement that allows you to counteract any weight shifts or momentum changes. By gently swaying, you can find the sweet spot where your bike remains stationary without rolling forward or backward.
Gently shift your weight left and right to counterbalance the bike’s natural tendency to tip. Imagine steering with your body, not just the handlebars. Remember to keep your eyes fixed on a point several meters ahead to maintain stability and avoid looking down at your front wheel, which can throw you off balance.
- Keep Practicing subtle control: Instead of making large, jerky movements, focus on small, precise adjustments with your weight and pedals. This will result in a smoother and more controlled track stand.
- Appropriate Gears: Opt for flat pedals over clipless ones for easily unclipping your foot. This means that instead of using clipless pedals (which require special cycling shoes that attach to the pedals), you must use flat pedals. Flat pedals allow you to easily put your foot down in case of a sudden stop or loss of balance, providing security during tricky maneuvers.
This can be particularly helpful when practicing track stands or needing to react quickly. Also, wear comfortable clothes and protective gear, such as a helmet and gloves.
Comfortable clothes, such as moisture-wicking fabrics and padded shorts, can help prevent chafing and keep your body cool during your ride. Wearing a helmet is crucial for protecting your head in case of a fall or accident. Gloves provide grip, cushioning, and protection for your hands, especially during longer rides.
Specific skill development that track stands help with:
- Obstacle maneuvering: It allows you to fine-tune your bike position before tackling obstacles, giving you better control and precision. Imagine needing to hop onto a ledge or balance on a narrow platform—the trackstand lets you find the perfect footing before committing.
- Momentum control: It helps you control your bike’s movement in tight spaces—you can adjust your position subtly without rolling backward or forward, keeping things neat and controlled.
- Body weight control: Maintaining the track stand requires shifting your weight subtly to counterbalance the bike’s movements. This translates to better body awareness and weight distribution on the bike, making you a smoother and more responsive rider.
- Pedal finesse: You learn to use your pedals delicately to maintain balance and initiate small adjustments. This translates to smoother gear changes and better power transfer, especially in technical sections.
2. Side Hop
A side hop technique is used in bike trials. Riders hop sideways by pushing off with their feet and pulling up on the handlebars to clear obstacles instead of jumping straight over them. It’s like a bunny hop with a twist, allowing you to navigate ledges, climb platforms, and maneuver around tight spaces with agility.
Learning the Side Hop
There are two main approaches to the side hop:
- One-Two Method : This requires lifting your front wheel first and then pushing off with your rear wheel to jump sideways. It’s a good starting point for beginners as it requires less body contortion.
- Spring Method: This requires squatting low and using a powerful leg extension to propel yourself simultaneously up and sideways. It offers more height and control but requires more practice and coordination.
Now, let’s break down the Side Hop into steps:
- Setting Up: Find a flat, open area with an obstacle you can hop onto sideways, like a platform, bench, or curb. Start low and gradually increase the obstacle height as you progress.
You must start with a small curb as your first challenge for side hopping. Once you can easily hop onto it from a standstill, find a slightly higher curb or platform to conquer next.
- Initiation : In case of an obstacle, approach it at a moderate speed. As you reach the obstacle, initiate a bunny hop, but instead of lifting your front wheel straight up, push your handlebars slightly away from the obstacle, directing your momentum sideways.
- Mid-Air Magic: After lifting the front wheel and when you’re in the air, focus on shifting your weight towards the obstacle. Balance your body weight with your hips centered over the saddle to keep your bike level. Use your pedals to adjust your position and ensure you land squarely on the obstacle.
- Smooth Landing: Remember to keep your arms and legs slightly bent and your grip on the handlebars firm but not tense. Then, absorb the impact by moving with the bike with your elbows and knees bent.
Then, shift your weight—if the impact comes from the front, shift your weight slightly back. If it’s from the rear, shift your weight slightly forward. This helps to maintain balance and control. Keep your eyes on the path ahead and anticipate any upcoming impacts or obstacles. This allows you to react and adjust accordingly.
Be prepared to adjust your body position and weight distribution to maintain balance on the landing platform. Look where you want to land, not at your front wheel. This lets your body naturally adjust to keep you on the right path. Staring at your front wheel can throw off your balance and make it harder to navigate obstacles or changes in terrain.
Benefits Of Side Hops:
- Obstacle Conqueror: The side hop allows you to navigate obstacles too wide for a straight jump, like narrow ledges, fallen logs, or ditches.
- Line Flexibility: It opens up new lines on familiar trails, allowing you to choose the path that best suits your skills and preferences.
- Control and Precision: Mastering the side hop hones balance, body awareness, and bike control. You learn to shift your weight quickly and precisely, which improves handling and confidence on any terrain.
3. Pedal Hop
The pedal hop is a popular technique in bike trials. In this technique, one uses legs and body to generate enough power and momentum to lift the front or rear wheel off the ground while keeping the other wheel planted.
Mastering the Pedal Hop
- Approach and Positioning: Standing up on the pedals, ride at a moderate speed that’s neither too fast nor too slow. This comfortable and controlled pace allows you to maintain balance and react to obstacles effortlessly.
As you prepare to lift the front wheel, shift your weight slightly back to generate the upward force needed to clear the obstacle smoothly.
- Lifting the Front Wheel: Then, it’s time to lift the front wheel up. When lifting the front wheel, you must do it quickly and explosively while pushing down on the handlebars—simultaneously shifting your weight forward and kicking the pedal and the bottom of the pedal stroke. This action helps propel the rear wheel upward. Straighten your legs to help lift the bike and maintain balance.
Once you lift your front wheelompress the front suspension by bending your arms and legs before reaching the obstacle. As the front wheel reaches the obstacle, explosively extend your legs while simultaneously pulling up on the handlebars. This action lifts the front wheel upward.
- Landing: Bring the rear wheel down smoothly once the obstacle is cleared by releasing pressure on the handlebars and allowing the bike to level out. Absorb the impact by bending your arms and legs to cushion the landing.
Why Pedal Hop?
When you don’t have enough space for a run-in or a side hop, the ability to lunge forward from a stationary position, also known as the pedal hop, comes in handy. Here are a few more reasons:
- Obstacles in Disguise: Not all obstacles require a grand leap. The pedal hop shines when dealing with bumps, small ledges, or uneven surfaces. It lets you maintain momentum and control without losing speed or sacrificing line choice.
- Technical Finesse: Mastering the pedal hop requires fine-tuning your pedal control and weight distribution. This translates to smoother riding, improving your ability to handle bumps, corners, and technical sections precisely.
- Stamina Saver: The pedal hop is relatively economical compared to the energy-intensive bunny hop. This comes in handy during long trail sections or competitions where conserving energy is key.
4. Front Wheel Pivot Turn
A front-wheel pivot turn, also known as the “Pivot Turn” or “Wheelie Pivot,” is a cornerstone technique used in bike trials where you rotate the bike around the front wheel. You can navigate through narrow spaces or make sharp turns with agility by keeping the rear wheel off the ground and pivoting on the front wheel.
The front wheel pivot turn is also known as the endo turn because it is similar to the trick where you balance on your front wheel without going over the bars (or ‘end over’). This technique can be executed when you’re moving forward or even stationary.
Mastering the Pivot Turn
- Start Slow: Find a flat, open space and practice shifting your weight over your front wheel while maintaining balance. Start by coming to a complete stop or moving at a very slow speed. Then, turn your handlebars fully in the direction you want to pivot. Shift your weight slightly forward and keep your feet level.
Moreover, use subtle rear brake pressure to finesse your turns and improve control, especially in tight spaces.
As you pivot, use your body and arms to help guide the bike around the front wheel.
Once comfortable, add slow turns with gentle handlebar movements.
- Progress Gradually: As you gain confidence, increase the speed and tightness of your turns. Experiment with different angles and practice pivoting around obstacles.
- Body Positioning: Keep your core engaged and your arms slightly bent for better balance and maneuverability. Imagine yourself as one with the bike, not just holding onto it.
Beyond the Basics
- Once comfortable, combine the pivot turn with other techniques:
Chain it with track stands for controlled stops and turns or bunny hops for added height and clearance.
- Navigate technical terrain:
Use pivot turns to maneuver around rocks, roots, and other obstacles while maintaining momentum and flow.
- Style it up:
Add variations like no-handed pivot turns or even 180-degree or 360-degree spins for an extra dose of flair and technical finesse.
Why is it essential?
- Cornering Champion: The pivot turn shines in tight switchbacks or narrow alleyways. You can execute sharp, controlled turns without losing momentum or sacrificing line choice. Imagine spinning your bike on a dime, making impossible curves on your playground.
- Obstacle Conqueror: Need to maneuver around a rock or tight gap? The pivot turn comes to the rescue. You can navigate obstacles without much space by shifting your weight and pivoting on your front wheel.
5. Rocking Balance
Rocking balance is an important technique in bike trials where you shift your body weight back and forth while keeping your bike balanced on its wheels. You maintain control by rocking your body and adjusting your balance, especially when tackling tricky obstacles.
Rocking in Action
Rocking balance isn’t just about balancing on one wheel; it’s about dynamically shifting your weight and body position to maintain stability while countering the bike’s natural tendency to tip. It is all about constant micro-adjustments around your center of gravity. Here’s how it works:
Mastering Rocking Balance
- Start Slow : Find a flat, open space and practice rocking your bike gently, focusing on maintaining your center of gravity and keeping your line straight. Gradually increase the rocking amplitude and speed as you get comfortable. Challenge yourself to maintain balance over longer periods.
- Body Movement: Shift your weight forward and backward in a rhythmic motion, engaging your core muscles by tightening your abdominal muscles and maintaining good posture. As you rock forward, shift your weight towards the front of the bike, allowing your arms to extend slightly. As you rock backward, shift your weight towards the back of the bike, bending your elbows slightly.
- Handlebar Tweak: As you rock, subtly turn your handlebars left and right to compensate for the weight shift and maintain your line. By making these subtle adjustments with your handlebars, you can keep your bike on the desired path and prevent any unwanted veering or wobbling.
- Pedal Finesse: Play with subtle pedal strokes to adjust your center of gravity and initiate small forward movements.
- Obstacle Course: Once confident, introduce bumps, logs, or small ledges to navigate while rocking. This will test your ability to adapt and maintain balance on uneven terrain.
Why is it essential?
- Control Maestro: Rocking balance hones your core strength, agility, and micro-adjustments, making you a stable and adaptable rider on any surface. Imagine being able to shift your weight effortlessly to counter bumps, uneven terrain, and sudden changes in direction.
This skill refines your pedal control and braking finesse. You learn to modulate pressure on the pedals and brakes, allowing you to manipulate your bike’s movement precisely.
- Obstacle Conqueror: Rocking balance opens doors to new lines and makes you a master of finesse. You can navigate tight spaces, hop over obstacles at angles, and even land jumps with control, subtly shifting your weight and bike position.
6. Wheelie Gaps
Wheelie gaps are a technique in bike trials where you use a wheelie to clear a gap or obstacle. The idea is to lift the front wheel off the ground and maintain balance while rolling over the gap, requiring good control and timing.
Deconstructing the Wheelie Gap
The core elements of a wheelie gap are:
- The Wheelie: You must lift your front wheel off the ground and maintain balance on your back wheel. This requires a powerful leg extension, precise timing, and good core strength.
- The Jump: As you reach the peak of the wheelie, you need to initiate a small jump to clear the gap. Think of it as a controlled extension of your wheelie rather than a full-fledged bunny hop.
- The Landing: A smooth landing is crucial. Control your descent with your brakes, adjust your weight distribution, and prepare to absorb the impact with bent knees and arms.
Mastering the Wheelie Gap
- Start Small: Don’t attempt death-defying gaps immediately. Begin with low obstacles and gradually increase the height as you gain confidence and control. So, instead of attempting really big jumps or gaps immediately, it’s better to start with smaller obstacles like small curbs or logs and gradually work your way up.
- Practice the Wheelie: Before tackling gaps, ensure you can maintain a stable and controlled wheelie for several meters. This forms the foundation for a successful jump. You must start at a moderate speed to build momentum. Then, shift your weight slightly by leaning backward and pulling up your handlebars. As you reach the balance point, use a combination of pedal pressure and body movements (like shifting your weight) to maintain the wheelie. Remember to keep your focus on a fixed point ahead to help with balance. When you’re ready to come down, gently lower the front wheel by easing off the pedal pressure and shifting your weight forward.
- Timing is Key: Learn the sweet spot for initiating the jump. Too early, and you won’t clear the gap. Too late, and you might land awkwardly or even crash. The key is to time the jump just right so you have enough speed and height to clear the gap comfortably. To know the timing to initiate the jump, look for visual cues on the trail or track that can indicate the ideal timing for the jump. This could be a particular feature or landmark that signals when to initiate your jump. You can even experiment with different timings and approaches. Take note of what works and what doesn’t. Over time, you’ll better understand what works best for you. Another approach is to watch experienced riders or videos online to get a sense of the timing other riders are using when approaching and jumping gaps. Pay close attention to their speed, position, and the moment they leave the ground, and adapt those approaches into your own training sessions.
- Safety First: Always wear protective gear like a helmet, gloves, and knee pads. Practice in a safe environment with soft landing surfaces.
Why Wheelie Gaps Matter:
- Obstacle Conqueror: Wheelie gaps allow you to hop over obstacles that are impossible with bunny hops alone, like walls, ledges, or even other bikes. Imagine clearing a narrow gap between buildings or jumping onto a platform high above the ground.
- Line Expander: They open up new lines and possibilities on familiar terrain. Suddenly, that seemingly impassable ditch becomes a launchpad for a thrilling wheelie gap.
- Technical Master: Mastering wheelie gaps strengthens your overall balance, control, and timing. You learn to fine-tune your weight distribution, pedal strokes, and body position, making you a smoother and more adaptable rider on any surface.
7. Rolling Down

Rolling down is navigating steep slopes, steps, or other challenging terrain while maintaining balance on your bike. The key is to shift your weight back and keep your body relaxed. This helps to maintain traction and stability as you roll down.
Deconstructing the Roll
Rolling Down isn’t just about letting gravity take its course. It’s about:
- Body Position: Lean back slightly, lowering your center of gravity for stability and control. As you descend, push your chest towards the handlebars.
This forward position helps you maintain stability and keeps your weight properly distributed. It’s all about finding that sweet spot between leaning back and pushing forward.
- Brake Control: Use controlled braking to regulate speed and maintain traction. Start by gently squeezing the brakes, increasing pressure gradually as needed. Remember to distribute your weight evenly between the front and rear wheels to maintain stability.
Avoid slamming on the brakes, as this can lead to loss of control and even crashes. You must practice feathering the brakes and applying gentle pressure to modulate your speed.
- Line Choice: Choose your line carefully, looking ahead to anticipate obstacles and choose the smoothest path. Imagine reading the terrain like a map, selecting the best route for a controlled descent.
- Shifting: Adapt your gears to maintain a comfortable pedaling cadence. Avoid using too high a gear, making brake and control difficult.
Mastering the Roll
- Start by riding off a curb, then find a slightly bigger one. You can also look for a steep hill to ride down. The idea is to challenge yourself to tackle steeper and steeper slopes.
- Another important tip is to ride at a slower pace. Whether you’re riding up onto something or riding off it, try to do it as slowly as possible. I understand that it can get tempting to speed down obstacles, but challenging yourself to ride as slowly as possible is where the real balance and control come into play.
Riding slowly requires much more finesse and balance than just ripping down. That’s why rolling techniques are so important in bike trials. By slowing down, you’re getting closer to the static movement of starting from a stop and then going.
- Another useful tip is to position your knees as wide as possible and shift your weight back on the bike. Doing this allows the front wheel to navigate the obstacles while you naturally stay off the handlebars and let it all happen. If you lean too far forward, it can limit your ability to ride steeply and even cause you to go over the bars.
Why is Rolling Down Important?
- Conquering Steep Slopes : This technique lets you tackle steep descents with composure and control. You learn to manipulate your body weight, brake power, and line choice to maintain traction and avoid crashes.
- Technical Terrain Maestro: Rolling Down isn’t just for straight downhill sections. It empowers you to navigate technical descents with drops, rocks, and uneven surfaces. You learn to adapt your body position, braking, and shifting to handle any obstacle precisely.
- Stamina Savior: Compared to constantly braking and maneuvering on steep descents, Rolling Down allows you to conserve energy. You learn to utilize momentum and terrain features to maintain speed efficiently, saving your legs for challenging climbs and technical sections.
8. The Three Pedal
It’s called a “three-pedal” because you use all three pedals to perform the move. Each pedal has a specific role. You start with your strong foot on the top pedal to generate momentum, whether you’re starting from a rolling or dead stop.
The first pedal gets things going. Then, the second pedal helps you lift the front wheel, and finally, the third pedal pushes the bike forward and onto the obstacle.
How to do it?
- The first step is to get that initial momentum. You start with your strong foot on top, and it’s all about getting the wheels rolling. You can start from a slow rolling pace or a complete stop if you prefer.
The key is to find your balance and push off with your strong foot to generate momentum. As you start rolling, use your other foot to find its place on the pedal quickly. This technique allows for a smooth and controlled start.
- The second pedal is where the magic happens. You lift the front wheel up as you push down with the opposite foot. The more comfortable you are with this move, the higher you can lift that front wheel, allowing you to ride up onto higher obstacles.
As you push down with the opposite foot, you’re using your body weight and pedal stroke to lift the front wheel off the ground. By shifting your weight back and applying pressure on the pedals, you can lift the front wheel while keeping the rear wheel on the ground.
- Finally, the third pedal completes the process. It helps you maintain momentum and power as you ride up onto the obstacle.
What makes the three-pedal technique so convenient is that you can do it in a tight space and still generate a lot of momentum. It’s perfect for tackling gaps or getting up onto obstacles.
Some additional thoughts
- It requires good balance and timing to execute smoothly.
- It’s a good way to practice pedal control and brake modulation.
- It can be used to navigate tight spaces or change direction quickly.
- It’s a fun and challenging trick, but it might not be suitable for beginners.
If you’re interested in learning this trick, I recommend starting with three components: pedal kickstand, bunny hop, and rear wheel pivot. Once you’re comfortable with each one, combine them into the full sequence.
Also, let’s say you don’t have enough room to bunny-hop onto something. In that case, the three-pedal technique is a great option. With just three pedals and the space they cover, you can create a lot of power and momentum to get up to something successfully.
9. Front Wheel Placement
Front-wheel placement in the trial technique refers to the position of the front wheel when navigating obstacles. It is when strategically placing the front wheel in a specific spot to ensure a smooth and controlled maneuver.
During road bike trials, wheel placement is crucial in maintaining balance and navigating obstacles effectively. Proper wheel placement helps you tackle various challenges with confidence. By strategically placing the front wheel, you can navigate tight spaces, maneuver over obstacles, and maintain control.
Deconstructing the front wheel placement:
Front-wheel placement combines:
- Body Positioning: Your posture and stance play a vital role. A low center of gravity provides stability while engaging your core muscles allows for quick reactions and adjustments. Start by standing up on your pedals with your knees slightly bent. Keep your weight centered and distributed evenly between your arms and legs. As you approach the obstacle, lean slightly forward and lift the front wheel by pulling up on the handlebars. This helps you maintain control and precision as you place the front wheel where you want it.
- Weight Shift: You apply gentle pressure on the handlebars by leaning your body in the desired direction and guiding the front wheel where needed. For example, if you’re trying to lift the front wheel over an obstacle to the right, you lean your body slightly to the right and guide the front wheel in that direction.
- Handlebar Tweaks: Subtle adjustments to your handlebars fine-tune your line. By gently turning the handlebars, you can fine-tune the direction of your front wheel and ensure a spot-on landing. Here are a few examples:
- Landing a jump: When you’re in the air after a jump, you can use the handlebars to fine-tune your front wheel’s position for a smooth and controlled landing. If you notice that you’re slightly off-course, a subtle turn of the handlebars can help you align with the landing spot.
- Navigating obstacles: Whether it’s a rock, a root, or a small feature on the trail, turning the handlebars can help you maneuver your front wheel precisely around the obstacle. You can make slight adjustments to ensure your wheel clears the obstacle without hitting it.
- Cornering: When taking a turn, you can use the handlebars to guide your front wheel along the desired path. You can maintain control and find the optimal line through the corner by leaning into the turn and gently turning the handlebars.
Mastering the Placement
Here’s what you can do regarding front wheel placement in road bike trials.
- First, position your hips slightly over the back wheel and lean your body back rather than pulling the handlebars into your chest. This helps you lift the front wheel off the ground. You can practice this while rolling without needing to be completely still. Just roll along and occasionally lift the front wheel to get a feel.
- Once you’re comfortable with that, try doing it from a standstill. Lock your back wheel, lift the front wheel, and put it back down. But let’s take this up a notch. As you slow down, grab the rear brake and lift your front wheel like before. But this time, lean to the left or right and move the front wheel back and forth. Doing this lets you use the front wheel to help maintain your balance.
Beyond the Basics
Experiment with different lines:
Don’t just follow the obvious path. Use your front wheel placement skills to find creative and efficient ways to navigate obstacles and terrain. Here are a few examples:
- Riding skinnies or narrow features: Skinnies are narrow trails or elevated platforms that require balance and precision. With your front wheel placement skills, you can find the sweet spot on the skinny and keep your front wheel centered to maintain stability and control.
- Choosing alternate lines: Instead of following the obvious path, look for alternative lines that allow you to use your front wheel placement skills. This could involve hopping onto a ledge, maneuvering around a tight turn, or even bunny-hopping over a section to save time and energy.
Style it up:
Add variations like no-handed placements or even front wheel pivots for an extra dose of finesse and technical prowess.
Visualize your line:
Imagine the ideal path for your front wheel before tackling an obstacle. This visualization helps you anticipate the necessary adjustments and execute them smoothly.
10. Pedal Pressure And Timing
When it comes to pedal pressure and timing in bike trials, you want to apply just the right amount of pressure on the pedals to maintain control and power. Here is why:
- Control: By applying the correct amount of pressure on the pedals, you can control your bike’s balance and stability. Too much pressure can cause your bike to become unstable, while too little pressure may result in losing control. Finding the right balance is key.
- Power Transfer: Proper pedal pressure ensures efficient power transfer from your legs to the bike. By applying the right amount of pressure, you can maximize the force exerted on the pedals, generating more power and propelling yourself forward effectively.
To achieve the right pedal pressure and timing, consider the following tips:
- Body Positioning: Maintain a balanced and centered position on the bike. This will help distribute your weight evenly and allow for better control and pedal pressure.
- Practice and Experience: As with any skill, practice makes perfect. Experiment with different pedal pressures and timings to find what works best for you. Over time, you’ll understand how much pressure to apply in various situations.
- Adapt to Terrain: Adjust your pedal pressure based on your riding terrain. Steep inclines or technical sections may require more pressure to maintain control, while smoother surfaces may allow for lighter pressure.
Moreover, pedal pressure and timing are all about:
Pressure Points:
The force you apply to the pedals determines your acceleration, power output, and balance. A gentle push can maintain momentum, a strong burst can launch you over an obstacle, and a controlled tap can help stabilize your bike.
Timing is Key:
Timing your pedal strokes is crucial for maximum efficiency and control. A well-timed push can propel you over a bump, a delayed stroke can help you balance on a steep climb, and a quick tap can initiate a smooth turn.
As you roll toward a crack, curb, or obstacle, ensure your feet are level with your strong, dominant foot forward. As you approach the obstacle, give your pedals a little crank back.
When you reach the obstacle, grab your brake to stop and balance in place. It’s all about syncing up your pedal movement with the timing of your brake grab. It’s time to move after you’ve stopped and balanced in place. Slowly release the back brake and push on the pedal to lift your front wheel onto that ledge.
Body Coordination:
Your feet and legs work in unison with your core and upper body. Lean into your turns, shift your weight for balance, and use your whole body to amplify the power of your pedal strokes.
Beyond the Basics
- Once comfortable, combine pedal pressure and timing with other techniques:
Bunny hops for clearing larger obstacles, track stands for controlled stops, and wheelies for navigating drops and ledges.
- Style it up: Add variations like no-handed riding or pedal taps for an extra dose of finesse and technical prowess.
- Train your coordination: Practice exercises that improve leg-body coordination, such as jumping rope or dancing. This can enhance your ability to control and synchronize your pedal strokes with your body movements.
Why Pedaling Prowess Matters
- Obstacle Conqueror: Precise pedal pressure and timing allow you to control your bike’s momentum and power over obstacles. Imagine using your pedals like levers, propelling yourself over bumps, ledges, and even gaps with calculated precision.
- Technical Finesse: With masterful pedaling, tight turns, switchbacks, and uneven surfaces becomes your playground. You can adjust your speed on the fly, maintain traction on climbs, and even use subtle pedal strokes to maneuver around obstacles with elegance.
- Confidence Booster: Mastering pedal pressure and timing builds confidence in your ability to handle anything the terrain throws your way. You learn to anticipate challenges, react quickly with your feet, and trust your body’s coordination to overcome them.
Conclusion:

Mastering bike trial techniques requires skill, practice, and determination. Whether you’re a beginner or an experienced rider, these essential techniques will take your road bike trials to the next level.
When it comes to learning new techniques in trials, repetition is key. Doing something three times in a row helps solidify your skills. The first try might be a fluke, the second could be luck, but when you nail it three times consecutively, you know you’ve got it down pat.
So, for the ten techniques we discussed in this blog post, aim to perform each flawlessly thrice in a row. Once you’ve achieved that, you’ll feel confident and ready to take on new challenges. Keep practicing, and you’ll keep progressing!
Frequently Asked Questions
1. Do I need a trial-specific bike to perform bike trial techniques?
No, you don’t necessarily need a trial-specific bike to perform bike trial techniques. While trial-specific bikes have specific features for optimal trial performance, you can still practice and perform techniques on a hybrid bike or other suitable bikes. It’s more about mastering the fundamental skills and techniques rather than relying solely on the bike.
2. How can I protect myself from injuries while practicing bike trials?
To protect yourself from injuries during bike trials, it’s important to wear proper safety gear. This includes a helmet, knee pads, elbow pads, and gloves. Additionally, wearing sturdy shoes with good grip can help prevent slips and falls.
3. Should I do any specific warm-up exercises before attempting bike trials?
Warming up before bike trials is essential to prevent injuries and perform at your best. Dynamic stretches, such as leg swings, arm circles, and lunges, can help loosen up your muscles and increase blood flow. Additionally, taking a few minutes to ride around and get your body warmed up is always a good idea.
4. Can I use flat pedals for bike trials, or do I need clipless pedals?
Both flat pedals and clipless pedals can be used for bike trials. It ultimately comes down to personal preference and what you feel most comfortable with. Some riders prefer the secure connection of clipless pedals, while others prefer the freedom and maneuverability of flat pedals.