

Are you itching to breeze past your previous cycling speeds? Whether you’re a casual rider aiming for a swifter pace or an enthusiast eyeing competitive cycling, there’s always room to enhance your speed.
And increasing your average cycling speed isn’t just about pedaling harder; it’s a culmination of smart techniques, training, and finesse.
This article will explore some effective strategies to up your cycling game.
What Should Be Your Average Cycling Speed?
Increase Your Average Speed By Training To Build Power And Endurance
Improve Your Riding Technique To Increase Your Average Speed
Increase Your Average Speed By Optimizing Your Equipment
Ride Smart To Increase Your Average Speed
What Should Be Your Average Cycling Speed?
Your average cycling speed can vary widely depending on various factors such as experience level, terrain, weather conditions, fitness level, type of bike, and personal goals.
To establish specific goals for your rides, you can start by identifying what you want to achieve. It could be a distance goal, like riding a certain number of kilometers or miles. Alternatively, you could set a speed goal to increase your average speed over a specific route. Duration goals are common, where you aim to ride for a long time (four hours or more).
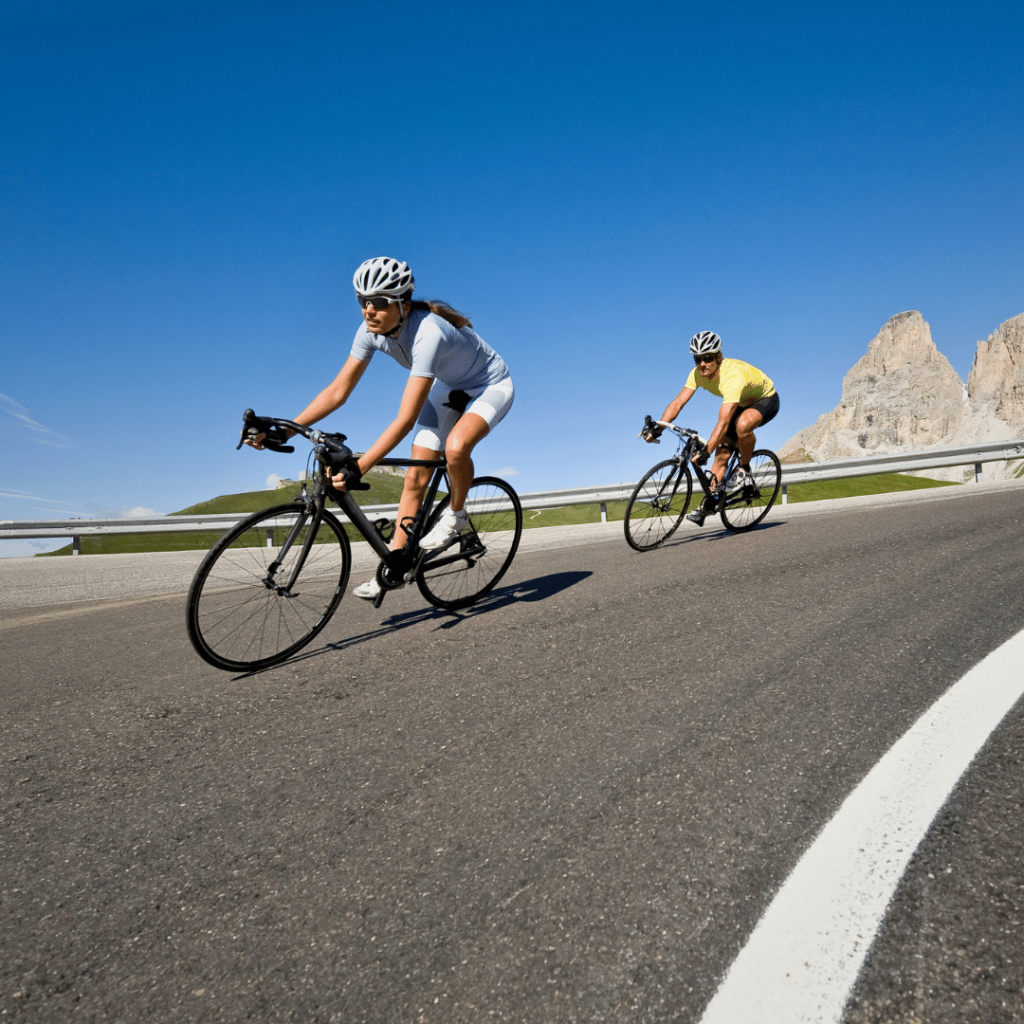
For instance, for recreational cyclists, an average speed can range between 9-15 mph (14-24 kph). Beginners might start at the lower end of this range, i.e., at an average speed of 10 – 12 mph (16 – 19 kph), gradually increasing speed with practice and improved fitness.
However, experienced cyclists can sustain speeds between 15-18 mph (24-29 kph) or even higher. For example, the winner of the men’s Tour de France consistently averages 25 mph/40 kph, riding more than 2,000 miles/3,500km over three weeks, although they do so with the
the help of teammates and by riding in a group.
Also, according to Strava Data, the average male cyclist rides at an average speed of 12.7 mph (20.4 kph), while the average female rides at 11 mph (17.7 kph).
Once you have your goals, you can track your progress using a cycling computer or a smartphone app that records your rides. Start by downloading a cycling app like Strava or MapMyRide on your smartphone. These apps use GPS to track your rides and provide you with detailed information like distance, speed, and elevation.
You can also connect a cycling computer to your bike, giving you real-time data during your rides. Just make sure to start the app or turn on the cycling computer before you start riding; it will take care of the rest. You can see how consistent you are and identify areas for improvement by regularly reviewing your data and comparing it to your goals.
However, always remember that focusing on your progress and improvement is important rather than comparing yourself to others. Factors like consistency, endurance, and enjoyment matter more than just speed. As you train and cycle regularly, you’ll naturally see your average speed improve over time.
Increase Your Average Speed By Training To Build Power And Endurance
Boosting your average speed through training demands building both power and endurance, a potent combination for conquering any terrain.
Here’s a breakdown of different methods, with details and variations:
1. Building Fitness
The most important factor in cycling speed is your overall fitness, such as aerobic and anaerobic capacity, strength, and endurance. Also, structured training plans can help you progressively build your fitness and target specific weaknesses.
Aerobic and Anaerobic Capacity
- Aerobic:
Aerobic capacity is the ability of our body to use oxygen efficiently to produce energy. This comes into play during longer, steady-state rides, where we rely on our cardiovascular system to sustain our efforts.
For instance, long, steady rides at moderate intensity build your aerobic base, allowing you to maintain a comfortable pace for extended periods(e.g., 10-minute workouts, 1-minute recovery, gradually increasing speed every 1-2 minutes). Aim for below 85% of your maximum heart rate.
- Anaerobic:
Anaerobic capacity is the ability to produce energy without relying on oxygen. This is important for shorter, high-intensity efforts like sprints or intense climbs.
For instance, short, intense bursts build your anaerobic capacity, bringing your heart rate to 85% to 100% of your maximum heart rate, enabling you to sprint, climb hills, and accelerate quickly. Include interval sessions with high-intensity efforts (e.g., 30 seconds max effort, 1 minute recovery) repeated 3-7 times.
Structured Training Plans
Structured training plans are pre-designed programs that outline specific workouts and training sessions to help you achieve your cycling goals. These plans provide a systematic approach to your training, ensuring you’re targeting the right areas and making progress by incorporating combinations of different types of rides, such as endurance, interval, recovery, and rest days.
This balanced approach helps prevent plateauing and allows for gradual improvements in your cycling performance. They also provide a roadmap for progressive improvement, incorporating different types of workouts (base rides, interval sessions, hill repeats) and gradually increasing intensity and duration. Popular platforms like “Zwift” and “TrainerRoad” offer beginner-friendly plans.
Following a structured training plan can help you stay focused, track your progress, and ensure that you’re training in a balanced and effective way. Here is a handy guideline for some of the structured training plans:
- Base Rides:
These are longer (typically 6 hours), steady-paced rides focusing on building endurance and aerobic capacity. They help you develop a strong foundation for your cycling fitness.
Base rides are typically done during the early phase of a training plan to establish a solid fitness base before progressing to more intense workouts. They provide a solid foundation for future training and help prevent injury by gradually preparing your body for higher-intensity rides like interval training, tempo rides, and hill repeats.
- Interval Sessions:
Interval sessions alternate between periods of high-intensity effort and recovery periods. This helps improve your power, speed, and overall cardiovascular fitness.
- Hill Repeats:
As the name suggests, hill repeats involve repeatedly climbing a hill or incline. This type of workout helps to build strength and improve your ability to handle challenging terrain.
To start with hill repeats, find a hill that suits your fitness level and goals. Begin by riding up the hill at a steady pace, pushing yourself but still maintaining good form by keeping your upper body, like your shoulders, arms, and chest, relaxed and your core engaged. Once you reach the top, take a recovery period by descending back down, allowing your heart rate to come down and your muscles to recover.
Repeat this process for several sets, gradually increasing the intensity or duration as you become more comfortable. Over time, you’ll notice improvements in your climbing ability and overall cycling fitness.
2. Interval Training
Interval training is alternating periods of high-intensity effort with recovery periods, as we discussed earlier. The idea behind interval training is that by pushing yourself to your maximum effort during intense intervals, you challenge your body and stimulate improvements in cardiovascular fitness, speed, and endurance.
This can be a great way to boost your power and speed and be adapted to fit your fitness level and time constraints. For example, if you have limited time for your workout, you can modify your hill repeats by reducing repetitions or shortening each effort’s duration.
Alternatively, if you have more time, you can incorporate longer hill repeats or add additional sets. The key is to adapt the workout to fit within your available time while still challenging yourself and working towards your goals.
Variations: Mix up your intervals based on duration, intensity, and recovery. Examples include:
- Tabata Intervals:
20 seconds all-out effort, 10 seconds rest, repeat for eight rounds.
You must pedal at a high intensity for 20 seconds, pushing yourself to go as fast as possible. This can be done by increasing your resistance or pedaling speed. Take a 10-second active recovery period by pedaling easily or slowing down your effort.
Repeat the intense and rest intervals for a total of 8 rounds, which will give you a 4-minute Tabata interval.
- Pyramid Intervals:
In pyramid intervals, you gradually increase the intensity or duration of your exercises and then decrease them in a pyramid-like fashion.
Gradually increase effort for a set time, then gradually decrease back down (e.g., From 30 seconds easy, 45 seconds moderate, 60 seconds hard to 60 seconds hard, 45 seconds moderate, 30 seconds easy).
- Tempo Intervals:
During tempo intervals, you ride at a sustained effort level that is challenging but sustainable.
Prolonged durations of tempo riding, about 10 to 20 minutes, can be a great idea. But, even if you periodically did more 2-minute intervals in there because of extremely rolling terrain, that can also work.
You must begin with shorter, less intense intervals and gradually progress to longer and harder ones as your fitness improves. And remember to listen to your body. Adapt your intervals based on your needs and recovery. Don’t push yourself into overtraining.
3. Hill Repeats
Hill repeats are a great way to build strength and improve your cycling performance. During hill repeats, you’ll ride up a hill at a challenging effort level and recover on the way down. Follow this handy guideline when performing hill repeats:
- Target Specific Hills:
Find climbs that match your current fitness level and gradually progress to steeper or longer ones. It could be improving your climbing speed and endurance or tackling steeper inclines.
If you want to work on speed, find shorter, steeper hills. For endurance, longer, gradual inclines are ideal. Pick hills that challenge you but are still within your ability level. Start with a 5-10 minute warm-up on flat terrain to prepare your muscles for the effort ahead by focusing on maintaining a comfortable pace and gradually increasing your heart rate.
Begin with an easy-pedaling cadence and gradually build up to a slightly higher intensity. This warm-up will help increase blood flow to your muscles, loosen up your joints, and mentally prepare you for the upcoming hill repeats.
- Technique Matters:
Maintain a smooth pedal stroke by focusing on pedaling in a circular motion and applying force throughout the entire pedal stroke. Avoid pushing down too hard on the pedals or relying solely on your quadriceps. Engage your hamstrings, glutes, and calves to create a balanced and efficient pedal stroke.
Then, anticipate the changes in terrain and shift gears proactively. As you approach a hill, shift to a lower gear, the smallest chain ring in the front and the largest cog on your cassette (rear gears), to maintain a comfortable cadence. This will prevent your legs from fatiguing too quickly and helps with an efficient pedal stroke throughout the hill.
You maintain a comfortable cadence, which means pedaling faster but with less force applied to each pedal stroke.
And finally, use your entire body to power up the climb. Climbing hills requires more than just leg power. Engage your core muscles, like abdominal muscles and lower back, by maintaining a strong and stable upper body position to transfer power efficiently from your legs to the pedals. Additionally, use your arms to provide extra support and stability when needed.
- Mental Toughness:
Hill repeats can be challenging, but pushing through the discomfort builds mental resilience and lactate threshold (the point where fatigue sets in).
4. Focus On Maintaining A Smooth Cadence
Cadence refers to the number of pedal revolutions per minute (RPM). Cadence focus means paying attention to and intentionally controlling your pedaling speed. It’s important to find a cadence that works best for you, as it can impact your efficiency, power output, and overall performance on the bike. Follow this handy guideline to maintain consistent cadence:
- Maintain Smoothness:
Aim for a consistent, circular pedal stroke around 80 to 90 rpm. This optimizes muscle engagement, allows you to distribute the workload evenly between your muscles, and reduces the risk of fatigue or strain on specific muscle groups.
- Power output:
Finding the right cadence can also optimize your power output. Depending on the type of riding or terrain, you should adjust your cadence to generate more power or maintain a steady pace.
For example, a higher cadence (80-100 RPM) is often used for faster, more aerobic efforts, while a lower cadence (60-80 RPM) may be preferred for climbing or generating more force.
- Injury prevention:
Paying attention to your cadence can help prevent injuries. Pedaling at a cadence that is too low or too high for your fitness level and riding style can unnecessarily stress your joints and muscles. Finding a cadence that feels comfortable and sustainable for you can reduce the risk of overuse injuries.
5. Strength Training
Strength training is a form of exercise that focuses on building and strengthening your muscles. You must use resistance, such as weights, resistance bands, or your own body weight, to challenge your muscles and promote growth and development.
Supplement your cycling with strength training 2-3 times a week. Focus on exercises that target major cycling muscles (legs, core, glutes) and improve overall stability and power output, allowing you to push harder and go faster. Here are a few examples of strength training:
- Leg Focus:
Prioritize exercises like squats, lunges, deadlifts, and calf raises to build leg strength and power. By incorporating these exercises into your leg-focused workouts, you can target and strengthen the major muscle groups in your legs, improving strength, power, and overall lower body development.
- Core Stability:
Engage your core with exercises like planks, side planks, and bridges to improve stability and power transfer. When your core is strong and stable, it is a solid foundation for your movements, allowing you to generate and transfer power more efficiently. This leads to improved performance, better posture, and reduced risk of injuries.
- Upper Body Strength:
Don’t neglect your upper body. Exercises like push-ups, rows, and pull-ups can improve overall posture and pedaling efficiency. You can achieve a more balanced and robust physique by incorporating these upper-body exercises into your training routine.
Improve Your Riding Technique To Increase Your Average Speed
Riding technique is about reducing energy waste, maximizing efficiency, and harnessing the power of your body and bike. Here’s a handy guideline for different types of techniques involved with cycling:
1. Aerodynamics
Aerodynamics is the study of how objects move through the air when cycling or driving, aerodynamics is about reducing air resistance or drag. The less drag you have, the easier it is to move through the air and the faster you can go!
Minimizing your frontal area and streamlining your posture can significantly reduce wind resistance, especially on flat roads and descents. Here’s how you do it:
- Head Down, Eyes Up:
Keeping your head down creates a more streamlined profile, allowing the air to flow smoothly around you. Tuck your chin slightly towards your chest, not burying it completely. Keep your gaze slightly elevated to maintain awareness of the road.
- Elbows In, Not Out:
Bend your elbows and bring them close to your torso. Imagine hugging yourself around the middle. This minimizes the wind-catching surface around your upper body.
Keeping your elbows in creates a more compact and efficient position on the bike. It allows the air to flow smoothly around you, minimizing turbulence and resistance. It can make a noticeable difference in your overall speed and efficiency, especially when riding at higher speeds or in windy conditions.
- Lengthen Your Spine:
Engage your core to lengthen and straighten your back. A slouched posture increases your frontal area and promotes fatigue. So, lengthening your spine promotes better breathing, reduces strain on your neck and back, and enhances your overall stability and control on the bike.
- Flatten Your Back:
Avoid hunching your shoulders. Instead, push your chest slightly forward while keeping your core engaged to distribute your weight evenly and engage your core muscles for stability and power transfer.
- Relax Your Hands:
Grip the handlebars gently with your fingertips, not with your whole palms. Tense hands create unnecessary surface area for wind resistance. It allows for more flexibility and control, especially when navigating rough terrain or making quick adjustments.
2. Smooth Pedaling
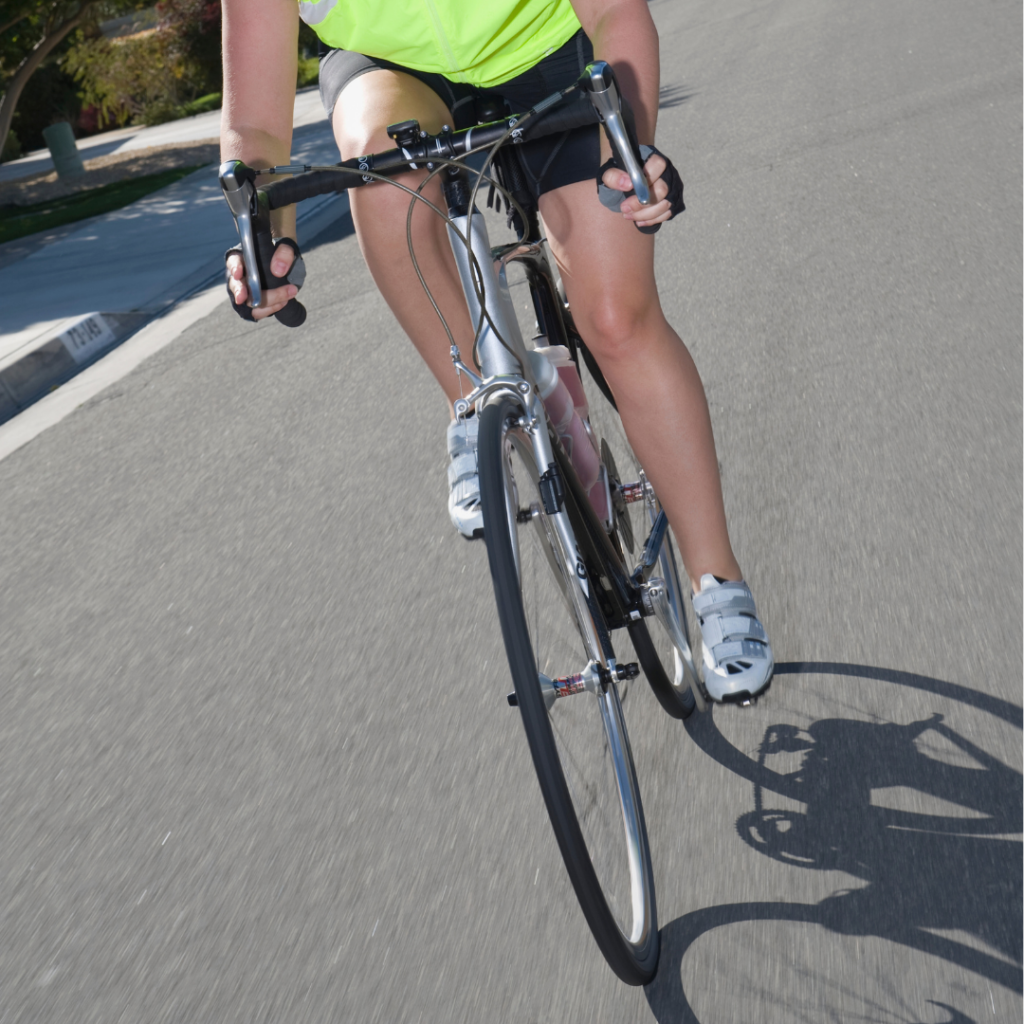
Smooth pedaling means maintaining a consistent and fluid motion while pedaling. Maintaining a consistent and fluid pedal stroke can maximize your power output and minimize energy wastage. This means you’ll be able to ride longer and faster without getting tired as quickly. Smooth pedaling also reduces the risk of strain or injury on your muscles and joints, promoting a more balanced force distribution throughout the pedal stroke.
Here is a handy guideline you can follow for smooth pedaling:
- Circular Pedal Stroke:
Aim for a fluid and consistent pedal stroke that engages all muscle groups. Instead of just pushing down on the pedals with your legs, you want to engage your leg muscles, such as the hamstrings, to pull up and push down by engaging the quadriceps to complete the full circle. As your foot reaches the top of the pedal stroke, you push down, then start pulling back and up as your foot moves towards the bottom.
- Avoid Dead Spots:
A dead spot in pedaling is the point in your pedal stroke where there is a lack of power or efficiency. You can avoid dead spots by ensuring continuous pressure on the pedals throughout the rotation.
- Saddle Stability:
Minimize bouncing in your saddle, which can waste energy. Focus on stability and smoothness in your riding motion.
You must also check that your saddle is securely tightened to the seat post. Loose saddle bolts can cause unwanted movement and instability while cycling. Double-check the tightness before each ride using a wrench or an Allen Key.
Simply locate the bolts underneath your saddle, which attaches to the seat post. Give them a gentle twist to ensure they are securely tightened. If they feel loose, tighten them until they are snug, but be careful not to overtighten.
3. Shifting Gears And Braking
Gears and braking strategically can increase your average speed. Finding the right gear for the terrain and your desired speed is essential when shifting gears.
When approaching an incline or hill, shift to a lower gear, shifting to the small chainring in the front and a larger cog in the rear to maintain your cadence and make pedaling easier. This allows you to exert less effort and maintain a steady speed.
On the other hand, when going downhill or on flat terrain, shifting to a higher gear, a larger chainring in the front, and a smaller cog in the rear can help you generate more speed and maintain momentum.
Also, avoid cross-chaining—avoid extreme gear combinations (e.g., large front chainring with large rear cog or vice versa) to prevent excessive stress on the drivetrain and improve efficiency.
As for braking, it’s crucial to use your brakes efficiently. Instead of braking abruptly, anticipate the need to slow down or stop and gradually apply the brakes, 70% to the front and 30% to the rear brake. It helps you maintain a smoother and more consistent speed, minimizing the loss of momentum. Doing so can maintain stability and prevent sudden jerks or skidding as you apply the brakes smoothly and progressively, giving you more control over your speed.
Increase Your Average Speed By Optimizing Your Equipment
While fitness and technique are fundamental, optimizing your equipment can also significantly boost your average speed.
By optimizing your equipment, you can shave off valuable seconds and unlock your bike’s full potential. Here’s a look at various strategies for optimizing your equipment:
1. Bike Maintenance
- Lubrication Is Key:
A well-lubricated chain reduces friction and improves power transfer, translating to more efficient pedaling and faster speeds. Regularly clean and lubricate your chain, cassette, and derailleurs every 100-150 miles (160-240kms).
- Tire Pressure Matters:
Properly inflated tires (check manufacturer’s recommendations) offer a smooth ride, reduce rolling resistance, and prevent punctures. Check your tire pressure before every ride and adjust as needed.
For instance, a typical recommended tire pressure range for a road bike is between 80 and 130 psi.
- Fine-tuned Brakes And Gears:
Regularly adjust your brakes and gears to ensure smooth and precise shifting and braking. This prevents energy loss due to friction and allows you to maintain optimal cadence on varied terrain.
Brakes:
Start by inspecting the brake pads. Ensure they’re not worn down and properly aligned with the rim. Adjust the brake cable tension using the barrel adjuster near the brake lever or the brake caliper if needed.
Test the brakes by squeezing the brake levers. They should engage smoothly and bring your bike to a stop without any rubbing or excessive noise. Adjust as necessary.
Gears:
Begin by shifting your bike into the highest and lowest gears to assess if the chain is properly aligned. If the chain is rubbing against the front or rear derailleur, use the barrel adjuster near the shifter or derailleur to fine-tune the cable tension.
Make minor adjustments until the chain moves smoothly between gears without skipping or excessive noise.
2. Lightweight Components
Lightweight components are designed to reduce the overall weight of your bike, which can improve your speed, agility, and climbing abilities. Here is a handy guideline for lightweight bike components to refer to:
- Carbon Fiber Frames:
Carbon fiber frames are known for their excellent strength-to-weight ratio. They are 200-500 grams lighter than traditional steel or aluminum frames, providing a more responsive ride and better power transfer.
- Wheels Make A Difference:
Upgrading to lighter wheels can significantly improve acceleration and climbing performance. Consider more lightweight rims, spokes, and hubs for a noticeable weight reduction.
- Titanium Parts:
Titanium is a lightweight and durable material for various bike components like handlebars, stems, and seat posts. It balances strength and weight well, making your bike lighter without compromising durability.
- Tires For Every Terrain:
Choose tires that balance weight, grip, and rolling resistance based on your riding style and terrain. Lightweight tires are great for flat roads, while wider tires offer better grip on rougher surfaces.
- Go Tubeless:
Tubeless tires offer weight savings, improved puncture resistance, and a smoother ride. However, they require repair skills incase of a large punctures and specialized sealant when initially setting up the tubeless system. The sealant helps seal any small punctures, but it needs to be replenished periodically. Repairing larger punctures or cuts may require more involved techniques like using tire plugs or patches.
One common method is using tire plugs inserted into the hole to seal it. To use a tire plug, start by locating the puncture in your tire. Then, insert the plug into the hole using a specialized tool or a needle. The plug should be pushed in until it is flush with the tire’s surface. This creates a seal and prevents air from leaking out.
Once the plug is securely in place, you can trim any excess length sticking out of the tire. It’s important to note that tire plugs are considered a temporary fix, so it’s a good idea to have your tire inspected and repaired professionally as soon as possible.
Another option is using patches similar to those used for patching inner tubes. Start by locating the puncture in your tire. Then, clean the area around the puncture to ensure good adhesion. Next, apply a patch, typically a sticky adhesive-backed piece of material, over the puncture. The patch creates a barrier, preventing air from escaping the tire.
Pressing the patch firmly onto the tire ensures a secure bond. Once the patch is in place, you can trim any excess material sticking out.
3. Aerodynamic Accessories
Aerodynamic accessories are designed to reduce wind resistance and improve your cycling efficiency. Here are a few examples of aerodynamic accessories:
- Clip-on Aero Bars:
These extensions allow a more aerodynamic position, reducing wind resistance on flat roads and descents. Choose clip-on bars for a temporary solution or invest in integrated aero bars for a more permanent upgrade.
- Wind-resistant Clothing:
Tight-fitting, aerodynamic clothing minimizes wind drag, especially noticeable on longer rides. Choose breathable, moisture-wicking fabrics for comfort and performance.
- Helmets and Shoes:
Cycling helmets are designed with smoother shapes and integrated visors to reduce wind resistance. Consider an aero helmet if you prioritize speed and ride frequently in windy conditions. You can also invest in lightweight cycling shoes weighing 300 to 400 grams with stiff soles for efficient power transfer.
- Aero Seatposts and Seat Tubes:
These components are designed to minimize turbulence by optimizing the airflow around the seating area, reducing drag, and improving your overall aerodynamics. They are designed with aerodynamic shapes and profiles that minimize the disruption of air as it flows over and around the seatpost and seat tube.
- Wheel Covers:
For dedicated time trialists, aero wheel covers further streamline your wheels and save significant seconds on flat courses.
However, while they are most effective on flat courses where aerodynamics plays a significant role, they can still help reduce drag and improve overall efficiency in various riding conditions like rolling terrains or slight inclines. So, even if you encounter some hills or rolling sections during your trial, using aero wheel covers can save precious seconds.
Aero wheels are designed with deep rims and streamlined profiles to reduce drag. They can improve your bike’s aerodynamics, especially when riding at higher speeds.
Ride Smart To Increase Your Average Speed

Beyond just training and equipment, intelligent riding choices can significantly boost your average speed and make your cycling journey more enjoyable. Here’s a handy guide to various tips:
1. Route Planning
When you plan your route strategically, you can optimize factors like terrain, wind conditions, and traffic to your advantage to increase your average speed. Here’s how to plan your route effectively:
- Smooth Surfaces:
Choose routes with paved roads in good condition. Rough terrain and potholes can slow you down and increase wear on your bike.
- Minimize Traffic:
Opt for quieter roads with less traffic to avoid stop-and-go situations and maintain momentum.
- Embrace Tailwinds:
Wind can significantly impact your speed and effort. Checking the wind direction on your weather apps or a simple internet search before your ride and planning your route to utilize tailwinds on the way back gives you a natural boost.
To utilize the tailwinds on the way back, you must check the wind direction before your ride using a weather app or a simple internet search. Then, plan your route to take advantage of the tailwind on the way back by heading into the wind. On your return journey, enjoy the natural boost provided by the tailwind.
- Map Your Climbs:
If you’re incorporating climbs, research their difficulty and plan your pacing accordingly on Google Maps or GPS apps by searching for the location or area where you’ll be cycling. Look for elevation information or topographic maps that show the terrain and check for any marked or labeled climbs or hills in the area.
Then, if available, pay attention to the difficulty ratings or gradient information provided. Take note of the length and steepness of the climbs you’re interested in.
Knowing what to expect allows you to mentally and physically prepare for the climb. When you have information about the difficulty, gradient, and length of the climb, you can adjust your effort level accordingly like adjusting your effort level and gear selection to optimize your energy expenditure and maintain a consistent cadence throughout the climb.
Let’s say you plan to tackle a steep, long climb with a high gradient. Knowing this in advance, you can mentally prepare yourself for the challenge and adjust your effort level, like starting the climb at a slightly lower intensity to conserve energy for the steeper sections ahead. This helps you avoid going too hard initially and burning out quickly.
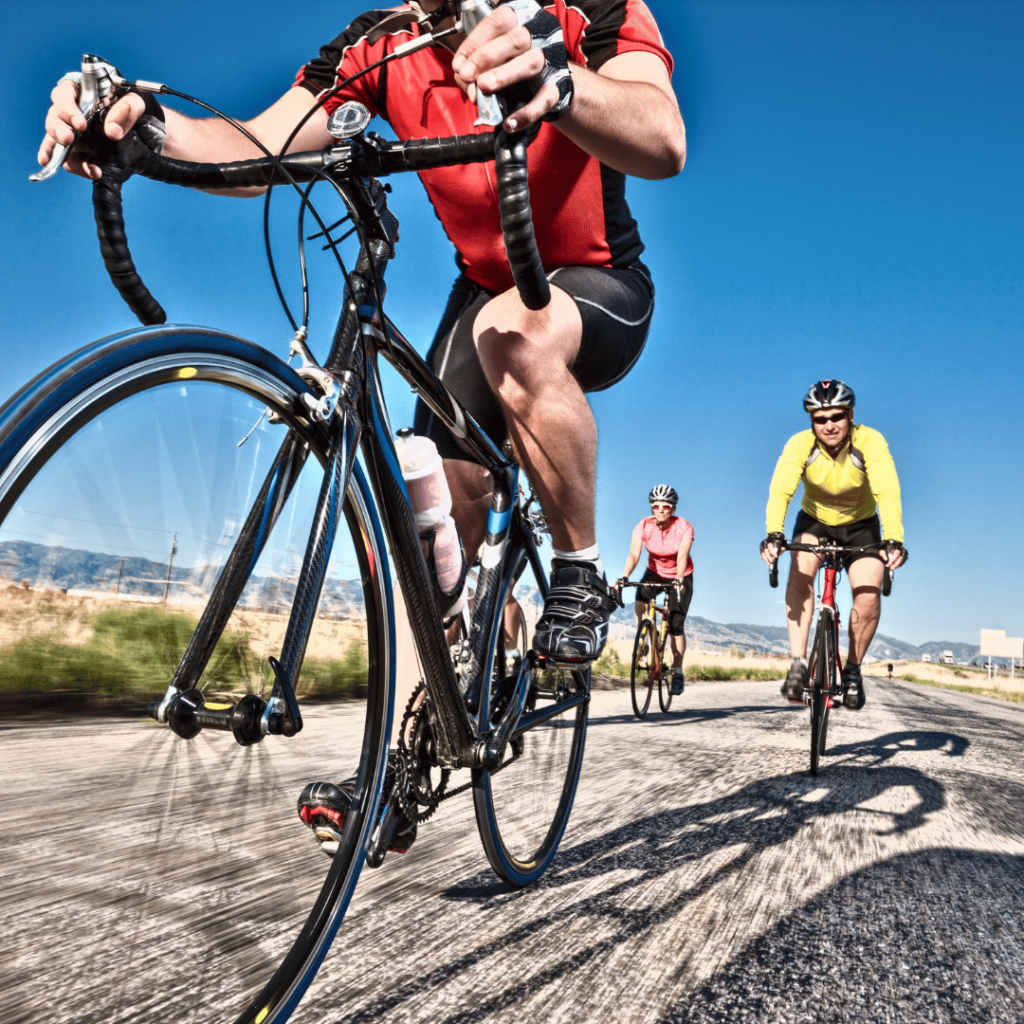
2. Drafting Power
Drafting power is all about using the slipstream created by another cyclist to increase your average speed. When you ride closely behind another rider, you experience a significant reduction in wind resistance, allowing you to conserve energy and ride faster. Here’s how drafting works:
- Find A Group:
Riding in a group can significantly benefit you because you can take advantage of drafting by riding closely behind other cyclists. This allows you to hide in their wind shadow, reducing wind resistance by up to 40% and making it easier to maintain a higher speed with less effort.
You can find a riding group through online cycling communities or forums where cyclists in your area gather. Cycling meetup groups like meetup.com or social media platforms like Facebook, Instagram, or Strava often organize riders at various skill levels, and you can easily find like-minded cyclists to draft with.
- Take Turns Leading:
Rotate positions within the group to share the workload of cutting through the wind. Offer to lead when you feel strong and take advantage of the draft when behind others.
- Etiquette Matters:
Maintain safe distances, signal your intentions clearly, and communicate with your fellow riders for a smooth and enjoyable group ride. One common way is through verbal communication. Use simple phrases or signals like “slowing,” “stopping,” or “car back” to alert other riders of potential hazards or changes in pace.
Hand signals are also used to indicate turns or obstacles on the road. Here are a few common hand signals:
- Left Turn: Extend your left arm straight to the side, parallel to the ground.
- Right Turn: Extend your left arm and bend it at the elbow, pointing your hand upward.
- Slowing or Stopping: Extend your left arm and bend it at the elbow, pointing your hand downward.
3. Fuel For The Ride

Fueling for your ride is important because your body needs the right energy to perform at its best. Follow this handy guideline:
- Eat Before You Ride:
A pre-ride meal with carbohydrates (like oats) and protein (like seafood and eggs) provides energy and prevents bonking (sudden energy depletion).
- Snack On The Go:
Carry easily digestible snacks like bananas, gels, or bars to replenish energy during longer rides.
- Hydrate Like A Pro:
Drink water regularly, even if you don’t feel thirsty. Aim for 16-24 ounces in the hour or two before riding, 4 ounces every 15 minutes during the ride, and 16 ounces after the ride to maintain optimal hydration.
Everyone’s fueling needs may vary based on ride duration, intensity, and personal preferences. It’s essential to experiment and find what works best for you. Stay hydrated, consume a mix of carbohydrates and protein, and listen to your body’s signals to ensure you’re fueling correctly for your rides.
4. Prioritize Recovery
During your rides, your muscles undergo stress and micro-tears. Proper recovery allows your body to repair and rebuild these muscles, making them stronger and more resilient. Also, when you give your body time to recover, it adapts to the cycling stress and becomes more efficient. This leads to improved endurance, power, and speed on the bike.
Cycling can also strain your muscles, joints, and connective tissues. Taking time to recover helps reduce the risk of overuse injuries and allows your body to heal and strengthen. It’s essential to listen to your body and address any signs of fatigue or discomfort to avoid long-term setbacks.
Here’s a handy guideline for prioritizing recovery:
- Listen To Your Body:
Don’t push yourself too hard, especially on consecutive days, because giving your body enough time to recover is crucial for avoiding overtraining and reducing the risk of injury.
When you engage in intense workouts back-to-back without adequate recovery time, your body doesn’t have enough time to repair and rebuild. This can lead to increased fatigue, decreased performance, and a higher risk of injury. This is why you must take rest days when needed to allow your muscles to recover.
- Get Enough Sleep:
Adequate sleep is crucial for muscle repair and overall performance. Aim for 7-8 hours of sleep per night.
- Warm-Up And Cool-Down:
Start your ride with a gentle warm-up and finish with a cool-down to improve circulation and prevent muscle soreness.
Conclusion
Elevating your cycling speed requires a holistic approach encompassing physical prowess and technical finesse. It’s not solely about increasing your pedal power but also refining your technique and embracing a continuous improvement mindset.
Through structured training, focus on building your fitness to lay a strong foundation for faster rides. Incorporate interval training, hill repeats, and strength workouts to enhance power and endurance, gradually pushing your limits for sustained growth.
So, saddle up, embrace the challenge, and embark on a journey to outpace your former self. With dedication and these strategic approaches, you’ll undoubtedly witness your cycling speeds soar.
Happy Cycling!
Frequently Asked Questions
Is 20 mph fast on a bike?
For casual cyclists, 20 mph is a respectable pace. It’s a solid average for seasoned riders, but not necessarily blazing speed. It depends on the terrain and individual fitness!
Will losing weight help me cycle faster?
Losing weight can help you cycle faster, especially on climbs, as you’ll have less mass to move. But focus on building strength and fitness alongside weight loss for optimal results.
How can I get fit faster for cycling?
High-intensity interval bursts and hill repeats build both power and endurance quickly, making you a fitter, faster cyclist in no time!
Why am I not getting faster at cycling?
Lack of training, inefficient technique, or ignoring recovery could slow you down. Analyze your rides, refine your skills, and prioritize rest. You’ll be flying past your current speed in no time!
Can I do specific drills or exercises to improve my pedaling technique?
Yes! One effective drill is the “one-legged drill.” By unclipping one foot and pedaling with just the other leg for short intervals, you can focus on smoothing your pedal stroke and eliminating dead spots, improving efficiency and speed.