
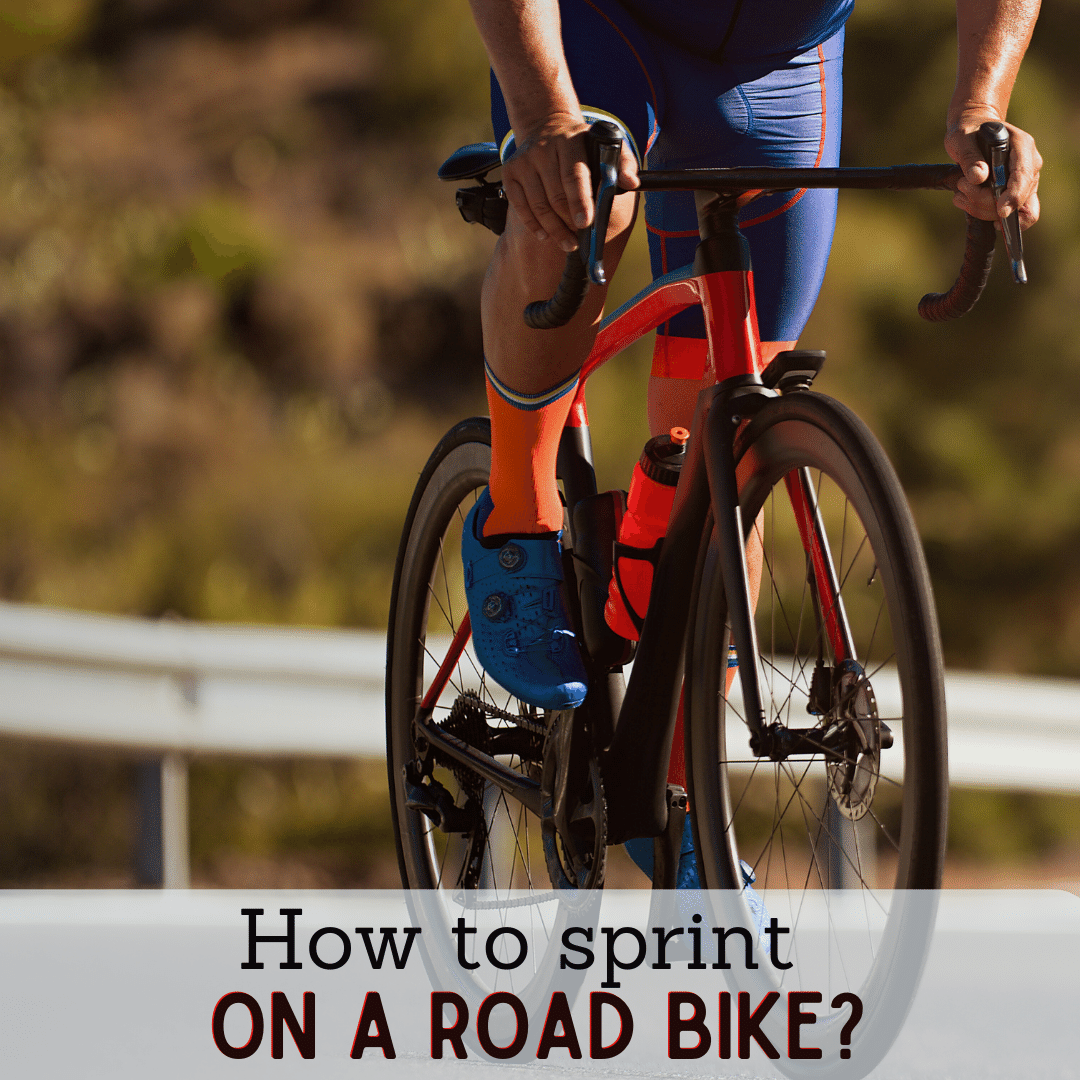
To sprint on a road bike, shift to a higher gear, like the 11th or 12th gear, then stand up and pedal with power and speed. Maintain focus on a smooth pedal stroke by keeping your shoulders relaxed and your core muscles, like the rectus abdominis, obliques, and transverse abdominis engaged to stabilize your torso.
This blog post will discuss eight advanced sprinting tips, body positions, settings to sprint faster, and how to improve your sprinting section.
Without any further ado, let us dive in.
8 Advance Tips
4 Body Positions
Settings To Sprint Faster
Other ways to Improve your Sprinting
8 Advance Tips:
1. Shift Before You Stand
Get into the appropriate gear (depending on the terrain) to ensure you have enough resistance to maintain momentum before you stand up on your bike.
Here are four tips that you need to keep in mind when shifting before standing:
- To maintain better control when sprinting on cobblestones, dirt, or gravel, use a lower gear like 2nd or 3rd gear, which allows you to navigate the rough surface smoothly without slipping.
- Sprinting on hilly terrain or steep inclines requires light pedaling and shifting gears to lower gears like 1st to 4th gears, and vice-versa for downhill or flat terrain.
- Before shifting gears, assess the road and watch out for potholes or debris. When approaching them, change to a lower gear like the 1st, 2nd, or 3rd gear for more control to maneuver around the obstacles. Then, change to a slightly higher gear, like 4th or 5th gear, and maintain a steady cadence.
- Remember to time your shifts with pedal strokes so the chain switches gears just before your cranks reach 12 o’clock.
Then, reduce the pressure on the pedals slightly to make it easier to shift gears smoothly and determine which gear to shift into depending on the terrain and road conditions at the “dead spot” of your pedal stroke, when your cranks are vertical, and you’re not using as much force.
The “dead spot” is the point in the rotation where minimal power is transferred to the bike. You will feel the dead spot of the pedal stroke when it’s harder to generate power during specific rotation points like the 12 o’clock and 6 o’clock positions.
This process coordinates your movement and ensures a smoother transition between gears. It promotes consistent power distribution over all four portions that make up 360 degrees during the rotation of the pedals.
2. Sprint From The Drops And Not The Hood
Sprinting from the drops instead of the hood provides a few advantages, like reducing wind resistance due to the aerodynamic position, as your body is lower and more tucked in, and upper body muscles, such as your core, chest, and arms are more engaged giving you additional stability during the sprint.
Start by putting your hands on the drops of the handlebar. The angles of your hands can vary, but a typical range of the angles of your hands in the drops is around 45 to 60 degrees.
Remember that a tight grip can increase muscle tension and fatigue in your arms, shoulders, and neck, so avoid gripping too hard and keep your wrists straight to prevent excessive strain or discomfort.
As for body position, lean slightly forward until your body points to around 2 o’clock position and your elbows are bent and tucked in. Remember to keep your core engaged and your body centered over the bike.
Remember to maintain a consistent pedal stroke and keep your body balanced over the bike’s frame because if your pedal stroke is erratic or uneven, it creates imbalances and sudden weight shifts.
Being in the drops helps ease that last bit of speed and improves bike control while sprinting.
In contrast, sprinting from the hood requires holding the handlebars close to the brakes, increasing wind resistance, which is less aerodynamic. However, the hoods provide a more upright position, which can be more comfortable for longer rides or when you need better visibility, in heavy traffic, or while riding in a group.
3. Shifting the Gears When Sprinting

Gear shifting plays an important role in sprinting, as when you shift to the right gear, you can adjust the resistance and cadence to match your sprinting and the terrain you’re riding on. The gear set up on a road bike is that the right shifter controls the rear gears (cassette), while the left controls the front gears (chainrings).
You must pull the right shifter inward or upward to shift to a higher gear and push the right shifter outward or downward to shift to a lower gear to control the rear gears. For the front gear, pull the left shifter inward or downward to shift to a lower gear and push the left shifter outward or upward to shift to a higher gear.
Finding the right gear and cadence combination is also important. It helps you generate the most power while sprinting.
An ideal gear and cadence combination is a lower gear (such as the 1st or 2nd gear) with a higher cadence (around 80-90 revolutions per minute), which means that with each pedal, you complete a full revolution on the pedals 80-100 times in one minute.
The gear combination is calculated by the chainring and cog diameters. For example, using the big chainring in the front and the smallest cog in the rear gives you a higher gear for faster pedaling. Vice-versa for using the small chainring in the front and the largest cog in the rear gives you a lower gear for easier pedaling on climbs.
Along with the gear combination, the gear ratios also affect the resistance and speed at which you pedal. Lower gear ratios provide easier pedaling but less speed, while higher gear ratios make pedaling harder but allow for faster speeds.
To calculate gear ratios, divide the number of teeth on the chainring by the number on the rear sprocket. For example, the gear ratio would be 3:1 if the chainring had 48 teeth and the rear sprocket had 16 teeth.
Now, here are some tips to follow when shifting gears:
Listen to your body:
As you sprint, you’ll notice your cadence quickening and your power output leveling off because you’re trying to maintain a fast speed. If you’re exhausted or feel any strain or pain, take it easy to prevent injury and shift into higher gears like the 6th or 7th to maintain a steady pedal stroke.
Adapt:
Shift gears or change your pedaling intensity to adapt to different terrains, such as shifting to a lower gear, like 3rd or 4th, on steep hills along with rough off-road trails and shifting to a higher gear, like the 7th or 8th on technical descents and flat sections.
Adapting to different gears gives you more control over different types of terrain by helping you find the right resistance.
Cross-chaining:
Cross-chaining simultaneously uses the corresponding chainring and the smallest or largest cassette sprocket (a set of gears located on the back wheel of a bicycle). It is when you use extreme gear combinations, such as the largest chainring with the largest cog or vice-versa.
This can cause the chain to run at an extreme angle, which puts unnecessary stress on the chain, leading to faster wear on your bike’s motor and causing shifting issues.
So, avoid cross-chaining and focus on gear combinations that provide smooth transitions instead—for example, shifting to a gear with a slightly higher ratio like the 8th gear on flat or downhill terrain, or lower balance like the 3rd or 4th gear, and vice-versa for uphill roads.
4. Use Opposing Tension
Opposing tension is applying force in opposite directions to create stability while sprinting. This tension in the opposite direction creates a counterbalancing effect that enhances your propulsion and improves your body’s power and efficiency by coordinating the movements of your arms and legs in opposite directions.
Pull up on one pedal while pushing down on the other to use opposing tension, generating more power in your pedal stroke. Pulling up on the pedals engages different muscles like hamstrings and hip flexors while pushing down activates your quadriceps and glutes.
Here are the three tips for using opposing tension while sprinting:
Maintain a solid grip on your handlebars:

When you are about to sprint, firmly grip the handlebars with both hands. Keep your grip firm but not overly stiff, enabling your hands to move and adapt as required.
Push and pull the handlebars using your arms:
This helps generate more power and improve your sprinting technique. By engaging your upper body, you transfer more force to the pedals and maximize your speed while maintaining control.
When you push the handlebars forward, use your chest and shoulder muscles to apply force. On the other hand, pull the handlebars back towards you, using your back and arm muscles to maintain control. This creates a side-to-side or swaying motion due to the opposing pressure through your handlebars and pedals.
For instance, as your left foot reaches its peak force on the pedal (around the 1:00 – 2:00 position), you’ll also apply peak force on the right handlebar by pulling it towards your hip. And as you approach the 5:00 and 6:00 positions, you’ll transition to making the same motion but mirrored on your right side to increase the downward force.
Clipless pedals and cycling shoes for sprinting:
Clipless cycling shoes have a cleat system that provides a strong connection between your feet and the bike to efficiently transfer power from your legs to the pedals, giving you better control.
The cleats, small metal or plastic attachments placed on the bottom of your cycling shoes, securely attach to the pedals, allowing for a direct power transfer. Some popular brands for clipless pedals include Shimano, Look, and Speedplay. As for cycling shoes, brands like Giro, Specialized, and Sidi offer many options.
Maintain a smooth pedaling motion while sprinting:
Instead of pushing down on the pedals with a sudden force, distribute your efforts evenly throughout the entire pedal revolution. This maintains a consistent and fluid motion with your legs and avoids abrupt jerks.
You must pedal in a circular motion and apply pressure evenly throughout the entire pedal stroke, including the downstroke, bottom, upstroke, and top. Aim for a smooth pedaling technique.
A smooth pedaling technique maintains a consistent cadence, typically measured in revolutions per minute (RPM). Aim for a cadence of around 80-100 RPM, which means each leg completes a full circle 80-100 times in one minute.
Coordinate your arm and leg movements to maintain balance and efficiency:
By synchronizing your pedaling with your arms, you generate more power and maintain a stable body position while sprinting. It also helps you stay balanced and put maximum force into your pedal strokes, resulting in a faster sprint.
This coordination helps distribute the workload evenly throughout your body by engaging multiple muscle groups in your arms and legs. It balances the effort between them, preventing the quadriceps from overworking.
A balanced and coordinated movement pattern could be a 1-2-3-4 rhythm. For example, when your right leg is at the top of the pedal stroke (1), your left arm will be extended forward (2). As your right leg pushes down (3), your left arm will pull back (4). Keep your arms relaxed and slightly bent while pedaling.55.
5. Maintain Body Tension
Maintaining body tension stabilizes your upper body by engaging your core muscles like the abdomen, lower back, and pelvis, minimizing energy loss.
Here are four tips on maintaining body tension while sprinting:
- Keep your abs braced while sprinting by pulling your belly button towards your spine and engaging your core muscles, like rectus abdominis (six-pack muscles), obliques (side muscles), transverse abdominis (deep abdominal muscles), and erector spine (lower back muscles).
It creates a solid foundation for your upper body, allowing for better control and power transfer on the pedals while riding.
- Squeeze your glutes while sprinting by tightening your buttock muscles and pushing down on the pedals with power.
You must incorporate exercises like squats, lunges, or glute bridges into your training routine. These exercises help engage the muscles in your lower body, such as the quadriceps, hamstrings, calves, and hip flexors.
- Keep your head steady and your eyes focused on the road or trail, and align your spine to maintain proper body posture with neutral spine alignment for balance. Your shoulders must also be relaxed, and avoid hunching or tensing them up. Maintain a straight and neutral back—avoid excessive rounding or arching.
You must prevent excessive movements or jerking of the head by looking around too much, as unnecessary head movements create wind resistance, slow you down, and compromise balance. This can lead to a loss of body tension.
6. Let The Saddle Brush Your Thighs While Sprinting
Allowing the saddle to touch your thighs lightly creates a stable connection between your body and the bike. This can help you maintain a centered and balanced position, especially when leaning into turns or navigating through bumps while sprinting.
To let the saddle brush your thighs while sprinting, ensure that your saddle height and fore-aft position are well-adjusted.
If the saddle is too far forward, it can cause your thighs to brush against it excessively, leading to discomfort and potential chafing. On the other hand, if the saddle is too far back, it can cause your thighs to not make proper contact with the saddle, affecting your pedaling efficiency while sprinting.
Here’s a handy guideline for adjusting your saddle height and fore-aft position:
The fore-aft position is the positioning of your body with your feet. Proper saddle and fore-aft positioning creates a balance by enabling you to use your legs and hips without putting too much strain on either.
By making small adjustments to the fore/aft position, you can find the balance where your thighs lightly brush the saddle without excessive contact. This helps ensure proper leg extension and pedaling mechanics while sprinting.
To adjust your saddle height, follow these steps:
- Start with a baseline measurement: Measure your current saddle height from the center of the bottom bracket to the top of the saddle. Start by finding the center of the bottom bracket.
- Then, measure from the center of the bottom bracket to the top of the saddle and note down the measurement so you don’t forget it. Make minor adjustments to the saddle height.
A good starting point is to set your saddle height at around 109% of your inseam length. For example, if your inseam is 80cm, multiply it by 1.09 to get a saddle height of 87.2cm.
- Test and fine-tune your bike: Take a ride and notice how your legs feel when you pedal. If your saddle is too low, you may experience knee pain or be unable to generate enough power. If it’s too high, you may feel unstable or experience discomfort in your hips or lower back.
- Refine the adjustment: Make minor adjustments (around 1-2mm at a time) until you find the spot where your legs feel comfortable and you can pedal efficiently.
Now, to adjust your fore-aft position on the saddle, here are some general guidelines:
- Determine the ideal body position: A good starting point is to have your knee directly over the pedal spindle when the crank arm is parallel to the ground. This optimizes power transfer and minimizes strain on your knees.
- Start with a baseline measurement: Locate the center of the bottom bracket, the cylindrical part where your bike’s crankset and pedals attach.
You must measure the distance from the center of the bottom bracket to the tip of your saddle using a measuring tape or ruler. and note down the measurements to make minor adjustments to your saddle.
Then, move the saddle back slightly if your knee is too far forward. Move the saddle forward if your knee is too far behind the pedal spindle. Start with minor adjustments (around 2-3mm at a time) to find the optimal position.
- Test and fine-tune your bike: Go for a ride and pay attention to how your legs and hips feel. If you feel discomfort, make further adjustments until you find a balanced and efficient position.
Remember that these are just suggestions, and individual preferences may vary. Consult a bike fitting professional for a more personalized adjustment based on your body mechanics and riding style.
7. Wear Proper Biking gears:
Be well-equipped with proper bike gear like a form-fitting jersey or a cycling skinsuit and shorts combo, cycling gloves with a good grip and padding, aerodynamic helmets with good ventilation, and cycling shoes with stiff soles. Make sure that your biking shoes are sprint-specific with a firm grip.
For cycling suits, purchase a suit with a close fit with a measured chest size of around 36-40 inches for men and 32-36 inches for women. Everyone has a different body type, and these measurements will vary.
For a comfortable fit and unrestricted movement, the inseam length of the suit should be around 8-10 inches for men and 6-8 inches for women. For the sleeve length, aim for approximately 7-9 inches for men and 5-7 inches for women. Make sure that there is unrestricted arm movement.
For cycling gloves, measure the circumference of your hand just below the knuckles.
For men, a hand circumference of around 7-8 inches typically corresponds to a small size, 8-9 inches for a medium size, and 9-10 inches for a large size. For women, a hand circumference of around 6-7 inches typically corresponds to a small size, 7-8 inches for a size medium, and 8-9 inches for a size large.
For cycling shoes, measure the length of your foot from heel to toe.
For men, a foot length of around 9-9.5 inches typically corresponds to a size 6.5 US, 9.5-10 inches for a size 6.5-8 US, and 10-10.5 inches for a size 44. For women, a foot length of around 8-8.5 inches typically corresponds to a size 36 EU, 8.5-9 inches for a size 36-38 EU, and 9-9.5 inches for a size 38- 39EU.
Keep in mind that these examples are just general guidelines. Body measurement and preference are subjective and differ from person to person. Try on different sizes to find the perfect fit.
8. Practices to improve your sprinting techniques:
By consistently working on your sprint technique, you can refine your form, increase your explosive power, and improve your speed endurance. Regular sprint training and practice help your muscles adapt and become more efficient at generating force, allowing you to create more power with each pedal stroke.
Here are a few practices to help you sprint faster on a road bike:
- Incorporate interval training into your cycling workouts to strengthen your body and increase your endurance. Interval training consists of alternating periods of high and low-intensity workouts.
Sprint for a certain distance or time, followed by slower-paced cycling by to recover. A popular interval workout might involve a 1:1 ratio of 30-second sprint efforts separated by another 30-second recovery period, repeated several times.
Remember to listen to your body and give it the rest it needs to support your training efforts and prevent overexertion.
Here are some more examples of interval training workouts:
- Tabata Intervals: Perform 20 seconds of all-out effort followed by 10 seconds of rest. Repeat this cycle for a total of 8 rounds.
- 4×4 Intervals: Cycle for 4 minutes at a high intensity (around 85-95% of your maximum effort), followed by 4 minutes of active recovery (easy cycling). Repeat this cycle for four sets.
- Pyramid Intervals: Start with a 1-minute effort at a moderate intensity, followed by 1 minute of rest. Then, increase the duration of the effort by 1 minute each time, with equal rest periods in between.
For example, 1-minute effort, 1-minute rest, 2 minutes effort, 2 minutes rest, 3 minutes effort, 3 minutes rest, and so on, until you reach your desired interval duration, and then work your way back down.
- Hill sprints are also effective for building power and strength, repeating the same sprint pattern for a short distance or time, followed by a recovery period.
For instance, a common approach is to sprint at a high intensity for around 20-30 seconds, followed by a recovery period of about 1-2 minutes. You can start with 4-6 repetitions and adjust the duration and intensity based on your fitness level and goals.
Along with that, plyometric exercises like jump squats or box jumps also help improve your explosive power.
- When sprinting, you must be mindful of your training zones. Training zones are specific intensity ranges that athletes use to guide their training. The most common training zones are based on a percentage of your maximum heart rate (MHR) or lactate threshold.
These zones include easy/recovery, aerobic/endurance, tempo, threshold, anaerobic, and sprint. Training in different zones improves your fitness, endurance, speed, and power. Remember that focusing on Zone 5 (VO2 max) or Zone 6 (anaerobic capacity) benefits sprinting performance.
4 Body Positions
Body position is how you position your body on the bike while riding. It is the alignment and posture of your upper body, arms, and legs.
Adopt suitable body postures like a low and aerodynamic stance during sprints or a relaxed position on the hoods to improve your biomechanics and engage the appropriate muscles for efficient pedaling.
Follow these guidelines to maintain proper body positions during your sprints:
1. Out Of Saddle:
Out of the saddle is standing up on your pedals while cycling, which engages muscle groups like the quadriceps, hamstrings, glutes, and calves to distribute the workload.
Getting out of the saddle is particularly beneficial while sprinting. You generate more power by using your body weight to push down on the pedals with extra force. This helps to accelerate faster and maintain a higher speed throughout the sprint.
Here are the steps to standing out of the saddle:
- Before you stand up while sprinting, shift to a 1-2 higher gear to maintain your momentum and transfer more power into the pedals as you accelerate.
- Then, gradually shift your weight from the saddle to your feet. Keep your upper body, like your chest and arms, relaxed while you engage your core muscles to maintain a smooth pedal stroke as you rise slightly off the saddle. Lift just enough of your weight off the saddle to enable your body to move freely.
- Then, focus on keeping your hips over the bottom bracket, the part of the bicycle that houses the bearings and spindle, connecting the crankset to the frame. When you pedal, the power from your legs is transferred to the drivetrain.
This happens as the crankset, connected to your pedals, rotates smoothly, ensuring an efficient power transfer with each pedal stroke without interruptions.
- Lastly, move your body forward and backward with your pedaling. Shift your weight smoothly from your hips and upper body. As you push down on the pedal with one leg, shift your weight slightly forward, and as you pull up on the pedal with the opposite leg, shift your weight backward.
2. Bent Elbows:
Bent elbows help absorb shocks from the road by allowing your arms to flex and absorb vibrations. It reduces the stress and pressure on your upper body, like arms and shoulders, and helps to avoid fatigue. It also makes you more aerodynamic, reducing drag and allowing you to cut through the air efficiently.
Here are a few tips to bend your elbows correctly while sprinting:
- Start by gripping the handlebars firmly but not too tightly, and keep your elbows close to your body.
- Keep your upper body relaxed and your shoulders down.
- As you begin to accelerate, shift your weight slightly forward.
- Align your elbows with your shoulders.
- Bend your elbows at approximately a 90-degree angle.
- Maintain a smooth and controlled pedal stroke while keeping your elbows bent throughout the sprint.
- Focus on generating power from your legs and core while using your bent elbows to stabilize your upper body.
- Remember to stay focused and maintain a firm yet relaxed posture during the sprint.
3. Flat Back:
A flat back provides an aerodynamic stance by limiting the surface area exposed to the wind. This helps you cut through the air more efficiently and reduces the drag force against you while sprinting.
Keep your back flat to streamline your body, reduce wind resistance, and improve your breathing.
Here are some tips for maintaining a flat back:
- Bend forward from your hips while keeping your back flat and lower your torso without putting too much strain on your lower back. Then, press firmly on the pedals and keep your core engaged to maintain balance.
- If your saddle tilt is around 10 degrees, aim for a slightly forward pelvis tilt of about 15-20 degrees to maintain a flat back while sprinting. This angle helps promote a balanced and comfortable riding position.
- Focus on keeping your chest down while maintaining a flat back. You can optimize your center of gravity by pulling your chest closer to the handlebars.
- Maintaining a forward focal point ensures you stay aware of your surroundings and prevent accidents.
- Take deep breaths into your diaphragm for efficient oxygen intake.
4. Look Up:
Always look up while sprinting to be aware of your surroundings. Looking up gives you more time to respond to changes and obstacles.
So, how should you look up while sprinting?
- Start by slightly raising your chin. This puts your head in a more comfortable position and helps maintain an upward gaze.
- Focus on a point in the distance to align your body and bike towards that point and prevent drifting off course. This keeps your bearings, which refers to the sense of direction, and helps maintain a straight line.
- Use your peripheral vision and scan your surroundings for hazards that could slow you down. Peripheral vision is seeing objects and movements outside our direct line of sight.
So, even if something is not right before us, we can still glimpse it with our side vision. It helps us be aware of our surroundings and detect motion or objects in our periphery.
Settings To Sprint Faster:
Mechanical issues can affect your performance and potentially lead to accidents, so check for gears, paddles, and brakes before sprinting and ensure they are in good condition. At the same time, the right road bike setting helps you optimize your bike’s performance.
Adjusting the gear ratios, tire pressure, chain tension, and handlebar width enables you to generate more power and speed during sprint.
Refer to the following guidelines on setting the proper bike settings:
Check the gears:
The gears should transition and shift smoothly without skipping or grinding. Your chain should stay aligned adequately on the gears without rubbing against the derailleur. It is recommended to have a gap of approximately 0.5mm between the two surfaces.
Then, set the limit screws to ensure the derailleur is positioned correctly and adjust the cable tension accordingly. The limit screws on a derailleur are small screws that control the movement range of the derailleur. They are typically labeled as “H” (high limit) and “L” (low limit).
To make sure your limit screw is set correctly, use your thumb to move the derailleur into the largest cog. While holding it there, start pedaling forward. If you notice any chain jumping or skipping, you should loosen the “L” limit screw by a quarter turn at a time until the chain runs smoothly without any jumping.
And, if the chain is making noise or rubbing the next cog when you pedal forward, loosen the “H” screw a quarter turn until the noise/rub disappears. You must also look for damaged or worn-out links and clean and lubricate your chain regularly to remove dirt, grime, and debris that can accumulate over time.
By adjusting both of these screws, you ensure that the derailleur is appropriately aligned and that it stays within the proper range of movement, preventing the chain from shifting off the gears or rubbing against the derailleur.
Gear Ratio:
For an optimal gear ratio, you must adjust the chain position on the front and rear gears before a sprint. The gear ratio determines how many times the rear wheel rotates for each rotation of the pedals. Higher gear ratios provide more speed, while lower gear ratios offer more power for climbing or accelerating.
Here are some gear ratios in short:
- 53/11: High gear for fast riding on flat terrain.
- 34/28: Low gear for easier climbing on steep hills.
- 50/25: Moderate gear for a balance of speed and power on rolling terrain.
If you want to maximize your speed and power output while sprinting, shift to a higher gear ratio, which means using a bigger chainring in front and a smaller cog in the back.
Check your road bike’s paddles:
Ensure the paddles are securely attached, not loose or damaged, and spin smoothly without unusual noises or resistance. When you push or pull them for a fast gear change, they should have a crisp feel.
In case of a loose paddle, tighten them using an Allen wrench, turn the wrench clockwise to tighten it, but make sure not to overtighten them and damage the threads. If they continue to feel loose, have them inspected and repaired by a professional bike mechanic.
Check the brakes:
Ensure the brakes engage smoothly and provide consistent stopping power. The brake pads should not feel loose. They should make even contact with the rim or disc of the bike without any rubbing or dragging against the surface.
If the pads feel loose, they won’t contact the rim sufficiently, leading to less effective braking. There should also be no excessive noise or vibrations when you apply the brakes.
In case of worn-out brake pads, loosen the brake caliper, which is the mechanism that holds the brake pads, and remove the old pads by loosening the retaining bolt or pin that holds them in place to install new ones. Then, tighten the retaining bolt or pin to secure the new brake pads and give them a gentle tug to ensure they are securely attached.
Check the seat level:
Sit on the bike and ensure your feet are flat for proper weight distribution and comfort. Look at the position of your knees and adjust the seat height accordingly. Your seat should be leveled, neither tilted forward nor backward.
Use a 4-5mm Allen wrench to loosen the seat clamp, adjust the seat angle, and then tighten the clamp securely. The height of your seat should allow for a slight bend in your knee when the pedal is at the bottom of its stroke to optimize power transfer and prevent strain on your knees.
Tire Pressure:
Increasing your tires to the proper pressure reduces rolling resistance, the force that occurs when your tires roll on a surface, and maximizes the tire’s grip on the road.
To check the pressure range, look for the suggested tire pressure on the side of your tire and use a tire pressure gauge to measure the current tension and adjust it before sprinting.
The ideal tire pressure varies depending on tire width, rider weight, and terrain. For example, for a road bike with narrow tires, a common tire pressure range could be around 80-120 psi (pounds per square inch). The range of a road bike with wider tires might be approximately 30-50 psi.
Inflate your tires to the higher end of the recommended range for a smoother ride on paved roads while opting for slightly lower pressure for more traction on rough terrains.
Chain Tension:
Chain tension is the tightness of the bicycle chain. Proper tension for smooth pedaling means that your bike’s drivetrain, including the chain, gears, and derailleurs, is properly adjusted. When the chain tension is set correctly, it allows for a smooth and efficient power transfer from your legs to the pedals.
Check your chain for slack or wear. When applying moderate pressure to the chain, aim for around 0.5-0.7 inches (12-18mm) of vertical movement in the center of the chain for ideal chain tension. This measurement ensures proper engagement with the gears while allowing for smooth shifting and minimizing wear on the drivetrain.
Handlebar Width and Stem Length:
The handlebar width refers to the distance between the two ends of the handlebar, but it varies depending on personal preference and riding style. Handlebars on road bikes are commonly 38cm to 46cm.
Meanwhile, stem length refers to the distance from the handlebar clamp’s center to the steerer tube’s center. For road bikes, stem lengths usually range from 80mm to 130mm, while mountain bikes can range from 40mm to 100mm.
Select a narrower handlebar for better aerodynamics and adjust your stem length to balance comfort and control. It’s crucial to find the right combination of handlebar width and stem length that suits your body proportions and riding style.
For example, if you prefer an upright riding position for better visibility and comfort, flat handlebars are a great choice as they provide a wide grip. And suppose you’re into more aerodynamic riding. Drop handlebars are ideal in that case as they allow you to get into a lower and more streamlined position.
The optimal numerical combination of handlebar width and stem length might vary based on variables such as body dimensions and riding style.
However, a common starting point is to match the handlebar width to your shoulder width and choose a stem length that provides a comfortable reach to the handlebars. For example, if your shoulder width is 40cm, consider a handlebar width of 40cm and a stem length of 90mm.
Other ways to Improve your Sprinting?
- One way to evaluate your sprint is by using a video camera to record yourself sprinting from different angles. Analyze your technique by looking for critical elements like body position and arm movement.
For example, record a sprint from the side to check if you maintain a robust and forward-leaning position and check your knees and arm’s position. Review the footage and identify areas for improvement.
- You can also assess your sprint by getting a coach to review it. Get your coach to examine your technique and give you feedback.
- Feel free to compare yourself with other riders or even professionals, as it can be a source of motivation and inspiration. Compare your riding technique and specific aspects like speed, endurance, or climbing ability. Observe the performance of other riders in those areas and draw inspiration.
This will motivate you to set new objectives and provide insight into what works and doesn’t.
- Focus on one aspect at a time when breaking down your sprint. Give attention to each element, like speed, endurance, technique, and position. Make targeted improvements and track your progress more effectively by isolating and refining individual aspects, such as technique and power.
Refer to the sections above, such as the opposing tension, body tension, saddle position, and body position, for more insight.
- Consume a balanced diet with various nutrient-rich meals to sustain yourself before and after sprints or exercises.
Prioritize carbohydrates for energy, such as whole grains, fruits, and vegetables. Include lean proteins such as chicken, fish, and tofu for muscle repair and recovery. Remember, healthy fats are found in sources like avocados, nuts, and olive oil.
And, for longer rides, incorporate energy-rich snacks like energy bars to maintain energy levels. Don’t forget to stay hydrated by drinking plenty of water throughout the day.
- Lastly, incorporate different hand positions into your regular training sessions, like sprinting from the drops and hoods, or even body positions like seated sprints and scenarios ranging from short accelerations to longer sprints to mimic various race situations.
Conclusion:

Remember that every cyclist is different, so continue tweaking and refining your technique to find what works best. Before you know it, you’ll be flying down the road like a pro!
Next time you hit the road, show those pedals who’s the boss and sprint away like a champ!
Frequently Asked Questions:
1. Should I focus on pushing harder on the pedals during a sprint?
Pushing harder on the pedals during a sprint is key to generating more power and speed. Applying more force to the pedals engages your leg muscles and transfers that energy into propelling the bike forward. Finding the right balance between pushing hard and maintaining a smooth pedal stroke for optimal efficiency is important.
2. How do I stay mentally focused and motivated during a sprint?
Set small goals for yourself, like reaching a particular landmark or maintaining a specific speed. Visualizing the success and imagining the exhilaration of crossing the finish line can also help motivate you. And remember to find your own personal mantra or positive affirmation to repeat to yourself when the going gets tough.
3. How do I choose the right moment to sprint during a ride?
If you’re riding solo, pick a specific section of your route, like a straight stretch of road with a clear path without any obstacles or sharp turns that could disrupt your sprint. Another option is to sprint when you’re feeling strong and motivated.
If you’re in a group, sprint when you notice a gap opening up or want to break away from the pack. Ensure you have enough energy and power to sustain your sprint until the end.
4. Are there any specific breathing techniques that can help during a sprint?
Many cyclists find it helpful to take deep breaths through the nose and exhale forcefully through the mouth. This can help supply your muscles with oxygen and release tension. Some riders even synchronize their breaths with their pedal strokes, taking a deep breath in as they start the pedal stroke and exhaling as they push down.
5. How can I practice sprinting on a stationary bike or turbo trainer?
One option is to do interval sprints, setting a specific time or distance for your sprints and then recovering before repeating. Another option is to increase the resistance on your bike to simulate sprinting against a headwind or uphill.
You can also focus on increasing your pedaling cadence or practice standing up on the pedals to mimic sprinting scenarios.