
Cycling is a fantastic way to improve your physical fitness and mental well-being and do your part in reducing carbon emissions.
Cycling as a new form of exercise or an eco-friendly means of daily commuting, learning the proper techniques, safety measures, and maintenance practices to set you up for a smooth and enjoyable journey.
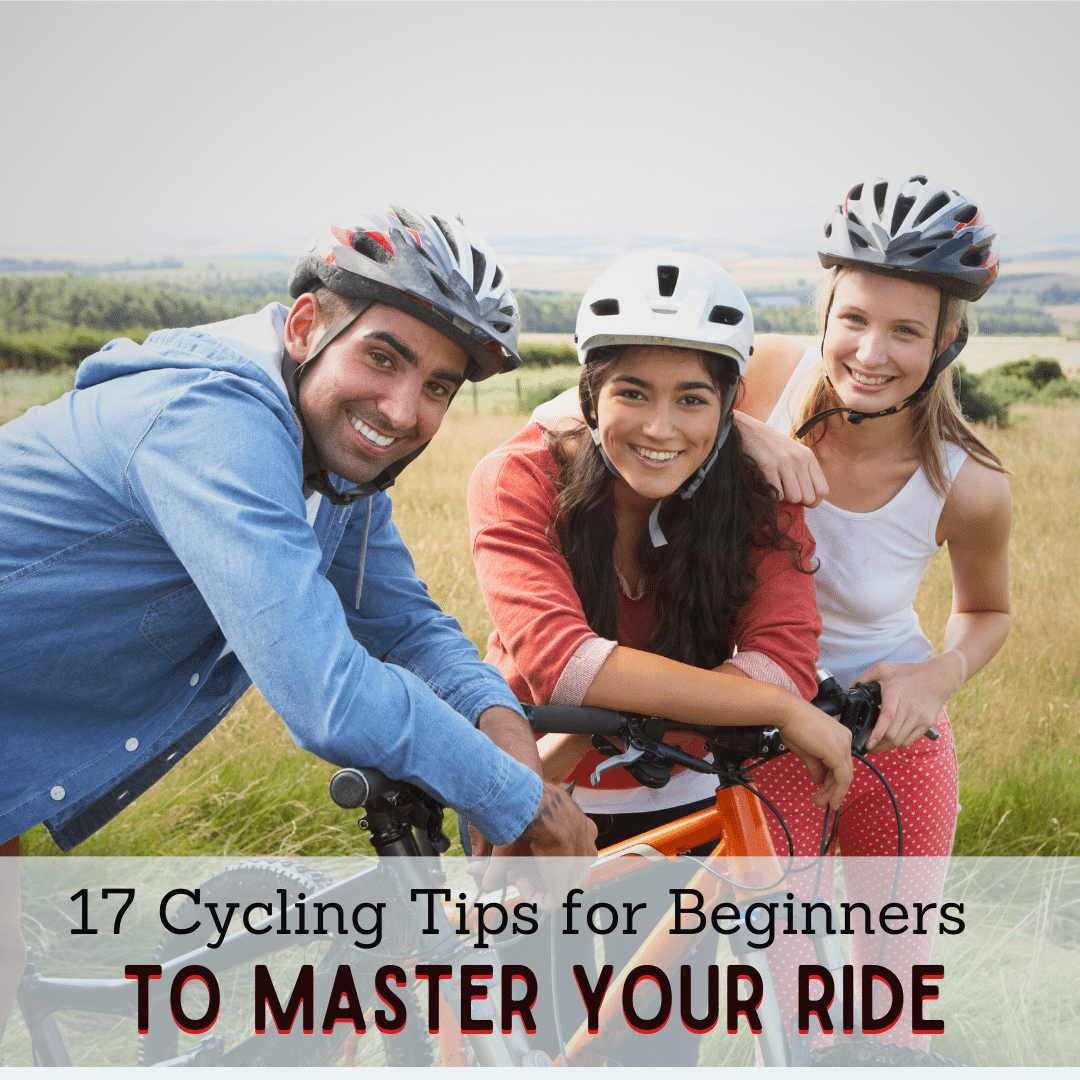
It might feel intimidating for a beginner to hop on a bike and hit the road, but with this blog post’s 17 essential tips and guidance, you’ll quickly gain the confidence to master your ride.
Let’s get started
Cycling Tips For Beginners To Master Your Ride
1. Finding The Right Bike
2. Get Your Seat Height and Handlebar In The Right Position
3. Pump Your Tires To The Right Pressure
4. Appropriate Clothing and Gear
5. Plan Your Journey
6. Learning To Use Gears
7. Pedal At A Steady Pace
8. Learn To Corner Properly
9. Learn To Brake Properly
10. Learn To Bike In A Group
11. Start Small And Build Up The Distance
12. Carry A Spare Tube Or Patch Kit
13. Keep Your Bike Well-maintained
14. Carry A Lock And Lights (Just In Case)
15. Treat Other Road Users With Care
16. Proper Energy Consumption
17. Winning the Mind Games
Cycling Tips For Beginners To Master Your Ride
Are you new to cycling and looking for ways to make your ride smoother, faster, and more enjoyable? Well, guess what? You’ve come to the right place! I’m here to help you master your ride with these beginner cycling tips.
1. Finding The Right Bike
Finding the right bike is a beginner’s first and crucial step to learning how to cycle correctly. There are different types of bikes: road bikes, mountain bikes, and hybrid bikes.
If you need to know which one to choose, follow these steps:
Determine what type of riding you will be doing:
Whether cruising on smooth roads or exploring off-road trails, knowing your preferred style will help you find the right bike.
If you prefer long-distance rides, group rides, and racing on smooth surfaces, Road Bikes are a better fit as they have lightweight frames, skinny tires, drop handlebars, and are great with speed.
On the other hand, mountain bikes are the way to go if you enjoy off-road adventures such as trails, dirt paths, technical downhill descents, and tackling rugged terrains. They have sturdy frames, wide knobby tires, and suspension systems to absorb shocks.
And lastly, hybrid bikes are suitable if you want a versatile option that can handle both city streets and rough trails. They typically have a combination of features from road and mountain bikes, such as wider tires for stability and a more upright riding position, which means your back is straighter and torso is more upright, giving you a forward-leaning position—increasing control yet again.
Where to buy from:
Check out specialist bike stores with a wide range of options and knowledgeable staff to help you. You can also explore online retailers on places like Facebook marketplace or make a few Google searches to look at online bike shopping sites.
However, suppose you’re working with a tighter budget. In that case, you might find some good deals at general sporting goods shops, or buying a used bike from online marketplaces like Craigslist or websites like eBay and OfferUp can also be a cost-effective choice.
Additionally, some more popular cycling forums and communities where you can find used bikes are Bike Forums (bikeforums.net), Cyclingnews Forum (forum.cyclingnews.com), and Reddit’s r/bicycling and r/cycling subreddits.
These platforms have dedicated sections for buying and selling bikes, where you can connect with fellow cyclists and find great deals.
Establish a price point:
Figuring out your budget for the bike is crucial—you want to make sure you’re comfortable with how much you’re willing to spend.
Beginner mountain and road bikes usually start at around US $800, but plenty of options go beyond that price range. Some bikes can get quite pricey ranging from up to a whopping $11,000, depending on the features and brand. It’s quite a wide range, so there’s something for every budget and preference.
2. Get Your Seat Height and Handlebar In The Right Position
Getting your seat height and handlebar position right on the bike is essential for ergonomic cycling and avoiding discomfort. Knowing how to set bike fittings correctly is also helpful for setting up your new bike.
Here is a handy guideline to correctly set your saddle height and handlebar position:
Saddle Height:
One popular method to set your saddle height is the heel-to-pedal technique. Hop on your bike and sit on the saddle. Then, place your heels on the pedals and cycle backward until one leg is at its lowest point—your heel should barely be able to touch the pedal when your leg is fully extended.
If your heel easily touches the pedal, raise your saddle height. But, if your saddle is too high and your heel can barely touch the pedal, lower the seat height. Once adjusted, you should be able to fully extend your leg with your heel on the pedal for efficient power transfer and to prevent unnecessary strain on your knees.
Another simple method is the inseam method. To find your inseam, stand barefoot against a wall and measure the distance from the floor to the highest point of your inner thigh or crotch area. Once you have this measurement, multiply it by 0.883. The result will give you an approximate seat height from the bottom bracket’s center to the saddle’s top.
Handlebar Position:
Now, for the handlebar position, remember that it should be at a level that doesn’t cause strain on your back and neck. You must position the handlebar at a height that allows you to maintain a relaxed and natural riding posture. It’s a personal preference, so you may need to experiment with different heights until you find the one that works best for you.
Begin positioning your handlebar by locating the stem, which connects the handlebars to the bike’s fork steerer tube. Then, use a 4mm or 5mm Allen wrench to loosen the bolts on the stem located on the front of the stem. Once you loosen the bolts, you can raise or lower the stem to your desired height, which ensures the handlebars are positioned correctly and aligned with the front wheel.
Experiment with the handlebar—if you feel too stretched out, try a shorter stem length to bring the handlebars closer. Conversely, if you feel too cramped, a longer stem may help you achieve a more comfortable reach.
Finally, align the stem with the front wheel by ensuring the bolts on the side of the stem are tightened. If there are two bolts, tighten them alternately, a little at a time. Aim for a 5-6 NM torque unless specified differently on your stem. Be careful not to overtighten them, as it can damage the components. It will help ensure a secure and properly aligned handlebar setup.
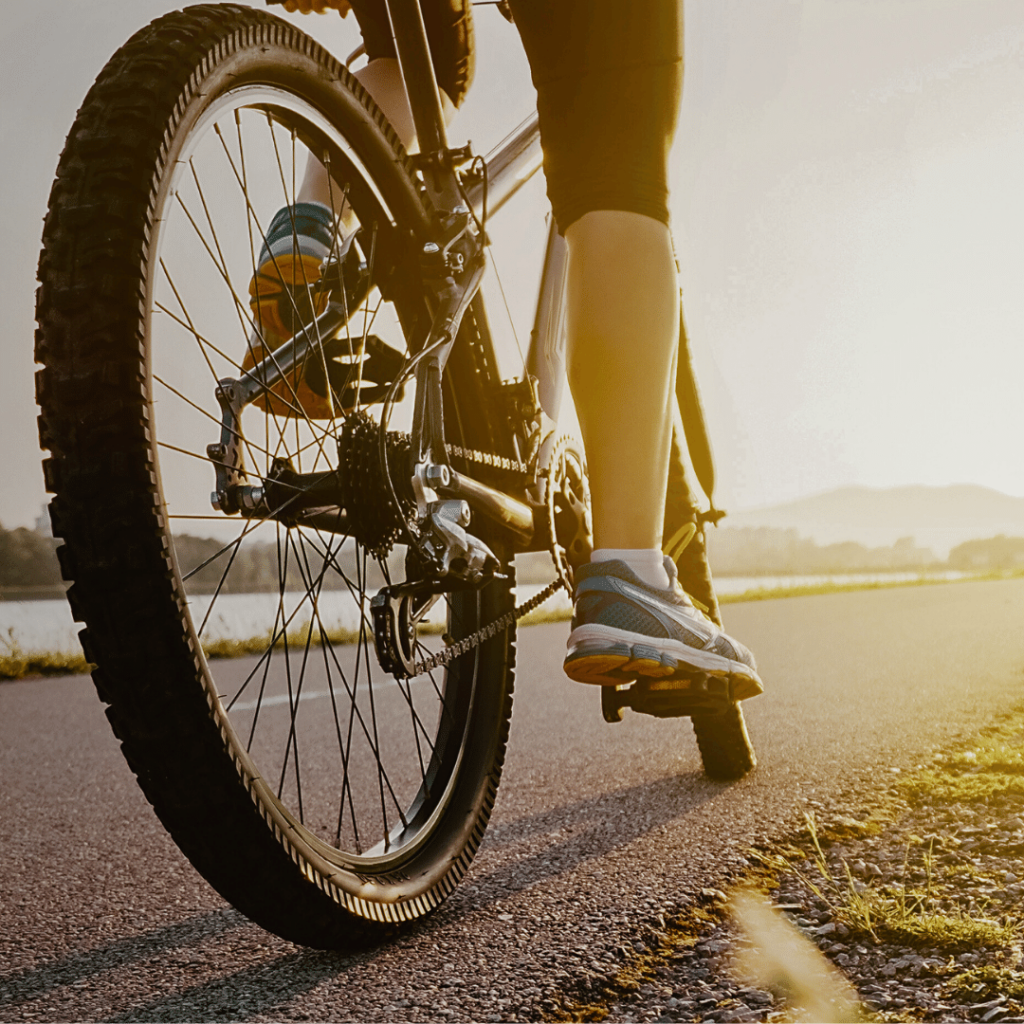
3. Pump Your Tires To The Right Pressure
Over-inflating tires lead to a harsh ride and reduced grip while under-inflating tires decrease efficiency and put additional strain on your rims.
You’ll need a pump with a built-in gauge or an external tire pressure gauge to check and adjust tire pressure.
First, locate the recommended pressure range printed on the side of your tires, which will be marked as PSI (Pounds per Square Inch). As a general guideline, road tires typically require 65 to 95 psi (pounds per square inch); mountain bike tires, 15 to 25 psi; and gravel tires, 25 to 40 psi. This range will differ depending on the type of bike, tire width, and rider weight.
Then, attach the pump head to the valve on your tire and pump until you reach the desired pressure within the recommended range. If you accidentally overinflate the tire, gently release air to achieve the correct pressure.
4. Appropriate Clothing and Gear
Your clothing while cycling affects your body temperature, visibility, and protection. It also helps regulate your body temperature.
For instance, wearing layers helps with efficient heat transfer and precise temperature regulation while riding in colder weather. If you start feeling too warm, remove a layer of clothing to cool down. On the other hand, if you feel chilly, add a layer to stay warm.
Visibility is also crucial when cycling. In low-light conditions or when it’s foggy, wearing brightly colored clothing or garments with reflective materials makes you more visible to motorists, promoting safety on the road.
Lastly, protection from external elements is essential in creating a comfortable ride. Wearing sunglasses can shield your eyes from glare, dust, and debris, while gloves provide grip and warmth. Hats or headbands can protect your ears and head from the cold or intense sun.
Here’s a list of essential clothing you must keep in mind for riding in cold weather:
- Moisture-wicking base layer that pulls sweat from your skin and evaporates it through your jersey and outerwear
- Insulated long-sleeve jersey
- Cycling-specific outerwear
- Arm warmers
- Thermal bib tights
- Warm socks
- Gloves and rain jacket
- Sunglasses with UV protection
- Bright colors and reflective materials for visibility
Here’s a list for dressing in hotter weather:
- Moisture-wicking and breathable base layer
- Lightweight and ventilated cycling jersey
- Cycling-specific shorts or bib shorts
- Arm sleeves or sun sleeves
- Lightweight and breathable cycling socks
- Fingerless cycling gloves
- Cycling cap or visor
- Sunglasses with UV protection
- Light-colored and breathable helmet
- Sunscreen
- Bright colors and reflective materials for visibility
While cycling, handy accessories such as gloves and helmets might not seem important initially, but they can make all the difference in your comfort and safety.
Gloves are your best bet for cycling—where dexterity is essential. They protect your hands from blisters, keep you comfortable, and give you extra grip on your handlebars. Short-fingered gloves, known as track mitts, are a favorite among cyclists. However, In colder weather, consider investing in a winter glove option.
As for where to purchase it, ultimate cycling gloves, like the one offered by Amazon.com, are available for $11.97, ranging up to gloves priced at $34.50. Look for padded gloves to reduce pressure on your hands and provide comfortable cushioning during your ride.
Wearing a helmet also protects your noggin from severe injuries in a fall or accident. They are designed to absorb impact and distribute the force, reducing the risk of head trauma. When choosing a helmet, make sure it’s specifically designed for cycling. Look for one that meets safety standards, such as CPSC or EN 1078 certification.
As for the cost, cycling helmets can vary depending on the brand, features, and quality. On average, you can find decent helmets ranging from around $40 to $300 plus. You can also find helmets for as cheap as $9 on Amazon, Walmart, or Dicks. Of course, there are also high-end helmets that can cost more than $300.
5. Plan Your Journey
Planning is essential, especially for beginners, as it helps you navigate efficiently and avoid getting lost.
First, choose a route matching your skill level by checking online forums, cycling communities, or local cycling clubs for recommendations. Some routes may have difficulty ratings or descriptions that can give you an idea of what to expect. Start with routes that are labeled as beginner-friendly or have a lower difficulty rating.
Consider the type of terrain you’re comfortable with. If you’re new to descending, start with routes that have smoother and less technical terrain. Take into account the distance and elevation of the route, too. Choose a route that aligns with your fitness level and ability to handle descents easily.
Similarly, consider your fitness level and ability to handle climbs when ascending. Start with routes that have manageable gradients and gradually increase the difficulty as you build strength and endurance. Choosing routes that align with your goals and preferences is also helpful, whether tackling steep climbs or enjoying a more gradual ascent.
Next, remember to check the weather forecast before heading out using weather apps on your smartphones or popular websites like the Weather App, AccuWeather, The Weather Channel, Weather.com, or BBC Weather.
Then, equip yourself with a navigation app like Google Maps or a good old-fashioned map to help you stay on track. Familiarize yourself with the route, significant landmarks, and turns – it’ll help you know what to expect on your journey. Getting lost isn’t fun for a beginner.
Now, here is a list of essential items to carry with you while planning your journey:
- Helmet
- Water bottle
- Snacks
- Spare inner tube
- Puncture repair kit
- Multitool
- Mini pump
- Phone (loaded with your navigation app or a backup map)
- Bike lock
Always inform someone about your planned route and expected return time in case of unexpected situations. In case you get lost, encounter mechanical issues, or face unfavorable weather conditions. Someone must know when to expect you back and where to look for you if you don’t return on time. Safety first, after all!
6. Learning To Use Gears
One essential skill you’ll want to hone before hitting the road is using your gears. Here is a handy guideline for learning the basics of gear shifting:
Start with the basics
Familiarize yourself with your bike’s gear setup first. Most bikes have gears on both the front and back wheels. The left-hand shifter controls the front chainrings, while the right-hand shifter controls the rear cogs.
However, the setup of gears on bikes can vary depending on the country or region. While it’s common for most bikes to have gears on both the front and back wheels, the specific configuration and shifting mechanisms may differ. In some countries like the United States, Canada, and most of Europe, the left-hand shifter controls the rear cogs, while the right-hand shifter controls the front chainrings.
Don’t cross the chain
Avoid using opposite extremes of your gears, such as the smallest cogs on both the front and back or the largest cogs on both ends. It puts unnecessary strain on your chain and can lead to premature wear.
Shift before you need it
Anticipate upcoming hills or changes in terrain. Shift gears before you start riding uphill or downhill so you’re not struggling to change gears mid-climb (or descent).
For instance, let’s say you’re cruising along a flat road and see a hill coming up ahead. Instead of waiting until you’re already on the hill and struggling to pedal, you can anticipate the change in terrain and shift to a lower gear with a smaller chainring in the front and a larger cog in the rear before climbing.
Practice smooth gear changes
Ease up on your pedaling slightly when shifting to reduce the load on the drivetrain, allowing the chain to move smoothly between gears without unpleasant clunks or interruptions.
Then, shift the gears when you’re in a comfortable cadence and avoid forcing the shifters or making sudden, jerky movements.
7. Pedal At A Steady Pace
A steady pace or cadence, the number of revolutions per minute (RPM) of your pedals, helps you maintain a consistent rhythm while enjoying a relaxed and efficient ride. Top cyclists swear by a smooth pedaling technique called “souplesse.” It is a fluid pedaling technique where you maintain a high cadence while exerting minimal effort.
To enhance your souplesse, try different cadences, such as fast spin-ups and slow cadence climbs, while maintaining a consistent rhythm. Also, engage your core muscles using a circular motion rather than just pushing down on the pedals while keeping your upper body relaxed. Tension in your upper body can hinder your souplesse.
As you become more comfortable with a higher cadence, gradually increase the resistance to enhance your souplesse.
Now that you’re acquainted with souplesse let’s discuss maintaining a consistent pace.
Start by keeping your posture balanced over the bike’s frame and keeping your abdominal muscles lightly engaged to support your posture. Keeping your elbows slightly bent with a light grip on the handlebars helps, too! Then, maintain a steady cadence instead of pushing too hard and burning out. Avoid speed fluctuations by keeping a smooth pedaling motion.
On the other hand, deliberate over-gear pedaling, which is intentionally pedaling in a higher gear than necessary, is also a pivotal element in executing the steady pace. Slow down your pedal speed while still under load to train your pedaling form, and try out pedaling with high resistance at a cadence of about 60 RPM.
8. Learn To Corner Properly
Cornering can initially seem intimidating for a newbie but don’t worry. This section will cover all the basics that one must know as a rookie cyclist—let’s get into it.
There are three phases to cornering: Start at the outside of the corner, aim towards the inside, and exit as far to the outside as you safely can.
As you approach a corner, shift your weight to the outside pedal and lean your bike into the turn. Bend your arms slightly and lower your upper body towards the inside of the corner to maintain balance and keep your eyes focused on the corner exit rather than directly in front of your bike to maintain a stable position and trajectory through the turn.
Then, lift your inside foot so the pedal is at 12 o’clock. It matters because you’ll avoid having your pedal hit the ground when you lean into the turn, ensuring a smooth and safe cornering. After lifting your inside foot, you must carve a smooth arc through its apex or the inside part of the turn.
Finally, when braking while cornering, avoiding heavy braking during the turn itself is recommended because it can reduce traction and stability, increasing the risk of losing control.
Instead, it’s best to reduce your speed before entering the corner by applying the brakes in a straight line. This helps shift the bike’s weight to the front, improving traction on the tires and allowing for better control during the turn.
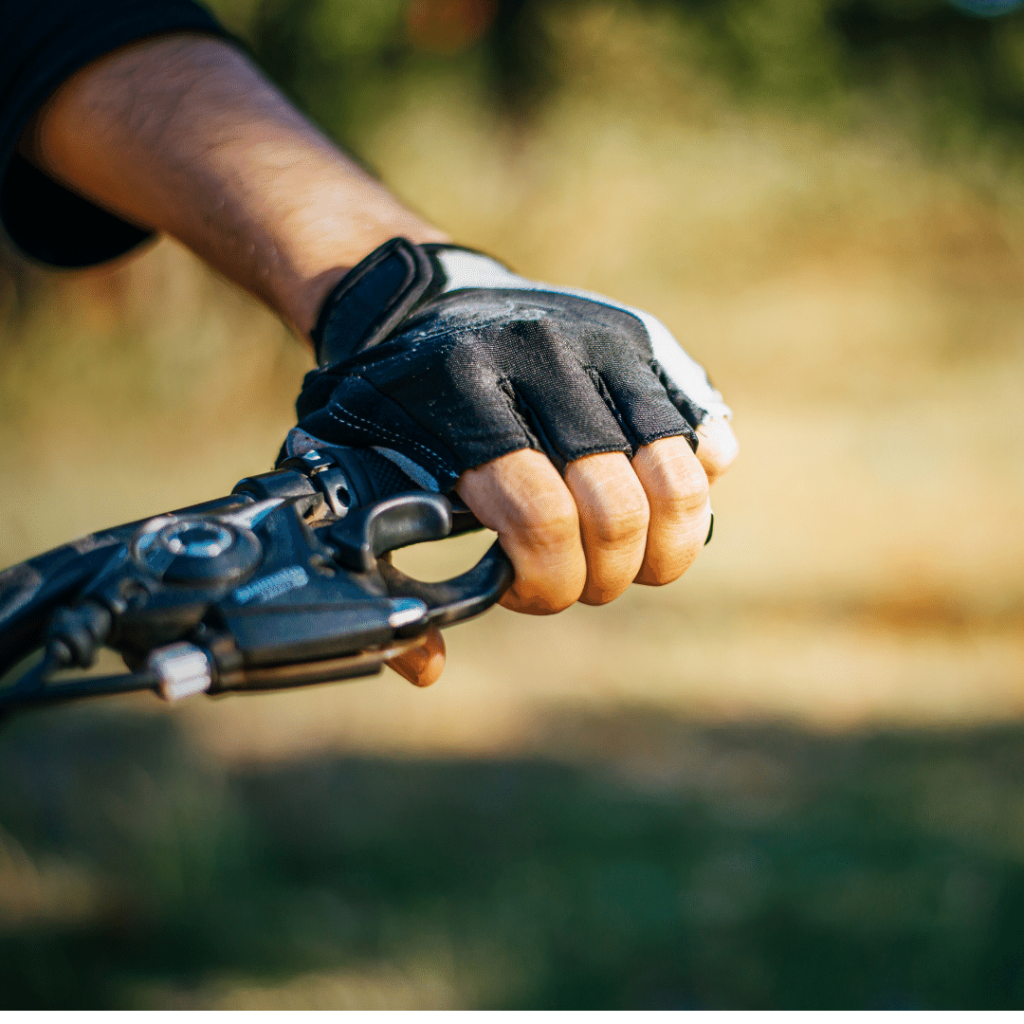
9. Learn To Brake Properly
Braking is an essential skill for any cyclist, especially beginners. Here is a handy guide for braking as a beginner:
Anticipate and Plan:
Look ahead and anticipate potential obstacles like potholes, debris, or situations you must brake, like a car pulling out from a side street or pedestrians crossing the road, to be prepared beforehand.
Hand Placement:
Always keep at least one or two fingers on the brake levers to quickly and easily engage the brakes when needed.
Brake Types:
Most bicycles have two brakes: rim and disc. Rim brakes use pads that squeeze against the wheel’s rim to slow you down, while disc brakes use pads that press against a rotor attached to the wheel hub. Regardless of the type of brakes on your bike, the basic principles of braking remain the same.
Brake Control:
When you need to slow down or stop, apply even pressure to both brake levers simultaneously to prevent your tires from skidding. And avoid squeezing the brakes too hard, as it can cause your wheels to lock up and lose control.
Weight Distribution:
Proper weight distribution is crucial while braking. Shift your body weight slightly backward during the initial braking stage to prevent your front wheel from skidding and the rear wheel from lifting. It prevents the rear wheel from lifting if most of your weight is at the front wheel, so shifting your weight is crucial.
10. Learn To Bike In A Group
Riding in a group can be fun and rewarding, especially for beginners. It’s a social activity that can help you meet new people, improve your skills, and enhance your riding experience.
Clear communication is vital in a group ride. When cycling with others, signaling your intentions using verbal or hand signals, such as turning, stopping, or pointing out hazards, is essential. Similarly, you should also listen and react accordingly to signals from other riders.
Here are a few examples of both verbal and hand signals you can use:
- Turning Left:
Extend your left arm straight out to the side or use your left hand to point left while verbally saying, “Left turn!” and vice versa for a right turn.
- Stopping:
Extend your left arm downward with your palm facing backward or use your left hand to point downward while verbally saying, “Stopping!”
- Slowing Down:
Extend your left arm out to the side and move it up and down repeatedly while verbally saying, “Slowing down!”
- Pointing out Hazards:
Use your left or right hand to point in the direction of the hazard while verbally saying, “Hazard on the left/right!” or “Watch out for [specific hazard] on the left/right!”
Here are a few more tips to remember when riding in a group:
- Stay aware of your surroundings
Keep a reasonable distance from the rider before you and pay attention to your position in the group. You must maintain a steady line, avoid sudden movements, and stay in your “lane.”
- Ride smoothly and predictably
Pedal with a steady cadence and maintain speed to keep the group’s rhythm consistent. It will make the ride more smooth and help prevent unexpected incidents.
11. Start Small And Build Up The Distance
As a beginner, start by cycling short distances to build confidence and stamina first. It doesn’t mean you can’t challenge yourself.
However, you must consider your physical and mental limitations before moving on to the challenging aspects of cycling, such as tackling steep inclines or hills, riding in difficult weather conditions, navigating technical terrains like rocky trails or tight corners, or participating in competitive races.
Assessing your capabilities, fitness, and skill level before taking on these challenges is important.
Start by paying close attention to how your body feels during your initial rides, as it will guide you to the right level of challenge and exertion. Your body will give you signals, such as fatigue or discomfort, which can help you understand if you are pushing yourself too hard or if you can handle more intensity.
For example, if you notice that your legs are feeling fatigued or your breathing is getting too heavy, it might be a sign to shift to a lower gear or reduce the distance. A higher cadence with low power will make you less tired than a low cadence and constant muscle work. A lower gear also provides more mechanical advantage, making it easier to pedal and reducing the strain on your tired legs.
On the other hand, if you’re feeling like you have more energy to spare, you can shift to a higher gear. Though pedaling requires more effort, it allows you to generate more power, thus increasing your speed.
Also, consider setting small milestones to track your progress. They don’t have to be huge: begin with cycling 5 miles, then 10, and so on. After every new milestone, your sense of accomplishment will naturally motivate you to push further.
Remember that rest days are essential, too! When planning the distances of your rides, account for some recovery time in between. Even if you are a beginner or a seasoned cyclist, your muscles need at least 24 to 48 hours to replenish and repair.
Then, gradually add more distance to your rides, building your endurance. The increased endurance will help you sustain your effort for extended periods without feeling as tired.
12. Carry A Spare Tube Or Patch Kit
One essential tip every cyclist should remember is always to carry a spare tube or a patch kit. Trust me, you’ll thank yourself later. A patch kit is your trusty sidekick for those more minor punctures. It can quickly help you fix those little issues that don’t require changing the entire tube. Plus, patch kits are usually small and lightweight, which makes carrying them a breeze.
On the other hand, having a spare tube is also handy when your tire gets a puncture that’s too large to fix with a patch. It’s a compact item to carry, easily fitting in a small space in your backpack or even attaching it to your bike frame.
Remember to carry the essentials to help you change or repair your tube, like a bike pump, wrench, pliers, tire levers, and a mini-tool to ensure you are prepared for any flat tire situations.
13. Keep Your Bike Well-maintained
A well-maintained bike ensures a smoother ride, enhancing your performance on the road. One example of keeping your bike in tip-top shape is following a regular cleaning routine. After all, nobody likes a dirty bike!
Here’s a detailed guide on how to clean your bike:
- Gather your supplies:
You’ll need a bucket, a mild soap or bike-specific cleaner, a sponge or soft brush, a hose or bucket of water, a chain cleaning tool, a degreaser, a clean cloth, and lubricant.
- Start with a pre-rinse:
Use a hose or a bucket of water to gently rinse your bike, removing any loose dirt or debris.
- Clean the frame:
Fill the bucket with water and add mild soap or bike cleaner. Dip the sponge or soft brush into the soapy water and gently scrub the frame. Then, rinse off the soap with clean water.
- Clean the drivetrain:
Apply a degreaser to the chain, cassette, and derailleur, and use a chain cleaning tool to scrub the chain. One popular brand of bike chain cleaning tools is “Park Tool.” They offer a variety of high-quality chain-cleaning tools that can help you keep your bike’s chain clean and running smoothly.
Then, use a brush to clean the cassette and derailleur. Finally, rinse off the degreaser thoroughly. Lubricating your bike’s chain is also essential to reduce friction, prevent rust, and prolong its life.
Apply lubrication every 100-150 miles or once a week. If you often ride in wet or muddy conditions, lube and clean your bike after every ride, as the dirt and mud can cause the chain to wear out faster.
- Dry the bike:
Use a clean cloth to dry the frame, drivetrain, and other components. Make sure to remove any excess water to prevent rust.
14. Carry A Lock And Lights (Just In Case)
Before you hit the road, there’s a little something extra you should always carry with you: a lock and lights. Why? Let me explain.
First, you never know when you need to lock up your bike and step away for a moment—it could be for a quick coffee stop with friends or running an unexpected errand. With a sturdy bike lock, you can have peace of mind knowing that your ride is secure.
Now, about those lights. Your bike lights are essential for visibility to other road users, so be prepared for cycling in low-light conditions or after dark. A bright front light will help you see the path ahead, while a rear light will ensure you are visible to vehicles approaching from behind.
As for mounting your lights, a good rule of thumb is to point the front light toward the ground 20 feet ahead. This will guarantee optimal visibility without blinding oncoming traffic. For visibility, you can also wear reflective clothing or accessories to enhance your presence on the road.
Also, carrying a small light backup flashlight ensures you have a handy backup to get you home safely if your leading lights go out.
You can mount the flashlight on your bike as various bike mounts can securely attach a flashlight to your handlebars or other bike parts. Just make sure to choose a mount compatible with your flashlight. Remember to charge it regularly!
15. Treat Other Road Users With Care
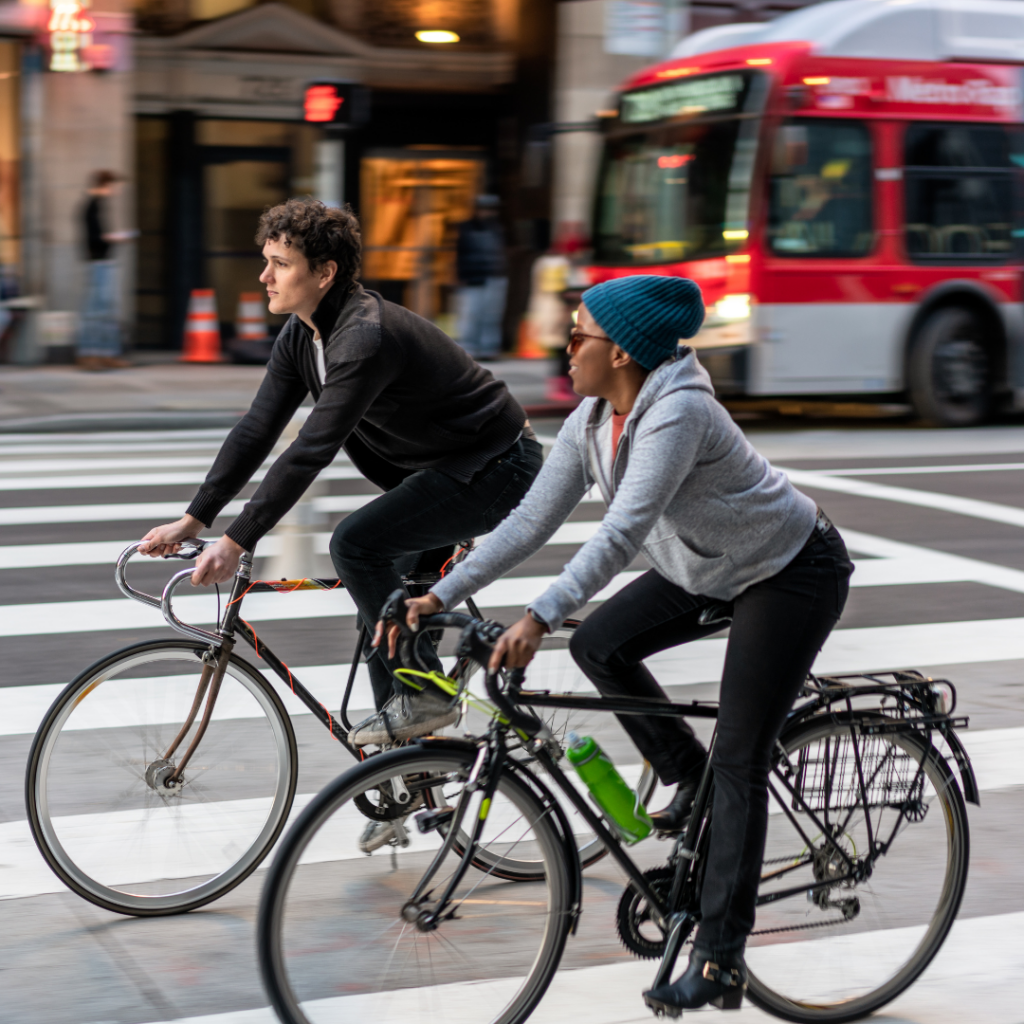
Every cyclist, seasoned or beginner, should treat other road users with care for a safer and more harmonious road environment. Follow these tips to ensure a smooth and enjoyable ride while keeping yourself and others safe:
First and foremost, always follow the rules of the road, like obeying traffic signs, signals, and markings as you would when driving any other vehicle. Along with that, familiarize yourself with common cycling rules, such as signaling turns and staying in the respective bike lane where available.
Next, watch for pedestrians, especially in congested areas or where sidewalks meet the road. When approaching a crosswalk, be prepared to slow down or stop to let them pass.
Additionally, maintain a safe distance from cars and other vehicles to give you ample space to react to sudden stops or changes in direction. Remember to use hand signals like extending your left arm straight out to the side for a left turn or extending your left arm downward at a 90-degree angle, with your palm facing backward for a stop signal to alert other riders or vehicles.
Also, make eye contact to communicate your intentions to drivers. It’s all about making yourself visible and predictable in traffic.
16. Proper Energy Consumption
When cycling, fueling your body with the proper nutrition and staying hydrated helps sustain your energy and yields your muscles to perform optimally.
Here is a handy guideline to ensure proper energy consumption:
- Begin your cycling session with adequate nourishment and a balanced diet of carbohydrates, proteins, and healthy fats.
You must include sources like whole grains, fruits, and veggies to receive the carbs you need for your ride. Also, incorporate lean protein sources like chicken, fish, or plant-based options to repair and recover muscles. Healthy fats in foods like avocados and nuts are also known to sustain energy.
- Regularly hydrate before, during, and after your ride to replace lost fluids and prevent dehydration. Take a sip of water regularly or every 15-20 minutes whenever you feel thirsty, as everyone’s hydration intake needs may vary. A good rule of thumb is to consume 24-28 ounces of water per hour or 6-7 ounces every 15 minutes.
Remember to include electrolytes (500-700 mg of sodium) with your fluid intake, especially when cycling for over an hour.
- Caffeine is effective when you need an energy boost. However, there is no specific recommendation for caffeine intake for cyclists, as it varies depending on individual tolerance and preferences. However, moderate caffeine consumption, such as 3-6 milligrams per kilogram of body weight, boosts performance before a ride.
However, excessive caffeine can lead to dehydration because it acts as a diuretic, which means it increases urine production. This results in more fluid being expelled from the body, leading to a higher risk of dehydration if you don’t drink enough water to compensate.
- Always carry some snacks when you go for longer rides. Some examples of snacks are bananas, trail mix, Greek yogurt, or peanut butter and jelly sandwiches.
Here’s an average breakdown of the macronutrients in those snacks:
– Bananas: Approximately 93% carbohydrates, 4% protein, and 3% healthy fats.
– Trail mix: It varies depending on the ingredients, but on average, it contains around 34% carbohydrates, 11% protein, and 55% healthy fats.
– Greek yogurt: Typically, Greek yogurt contains about 16% carbohydrates, 37% protein, and 47% healthy fats.
– Peanut butter and jelly sandwiches: On average, they have around 41.7% carbohydrates, 12.4% protein, and 18.4% healthy fats.
Remember, these percentages are approximate and vary depending on the brands or recipe. Check the nutrition labels or consult a nutritionist for more precise information if interested.
- Replenish your energy post-ride with a high-protein meal or snack to repair and rebuild your muscles. Some high-protein meals are grilled chicken or fish with steamed vegetables, a tofu stir-fry with quinoa, or a lean beef or turkey burger with a side salad.
17. Winning the Mind Games
A strong mindset plays a crucial role in cycling as a beginner. You can take a few approaches, such as positive self-talk, setting goals, visualizing success, and embracing the journey, which maintains your concentration, drive, and toughness, particularly during challenging rides.
Here are some strategies to win the mind game:
- Cultivate clear goals: Set objectives for your cycling journey, whether for leisure or competition. You must consider short-term and long-term goals when setting objectives.
One example of a short-term goal for cycling could be to increase your average speed by 1 mile per hour within the next month. On the other hand, for a long-term goal, aim to complete a century ride (100 miles) within the following year. It’s a challenging but achievable goal that requires consistent training and dedication.
- Practice positive self-talk: Instead of focusing on negative thoughts or doubts like “I’m not strong enough for this hill” or “I’ll never be as fast as other cyclists.”, reinforce confident and constructive thoughts like “I’ve trained hard for this, I can handle it” or “I’m improving with every ride, I’m getting stronger.” to keep yourself motivated.
- Use visualization: Visualize yourself executing perfect techniques in various scenarios before hitting the road. Close your eyes and picture yourself smoothly navigating turns, maintaining solid and efficient pedaling, and conquering challenging climbs confidently. Let that positive imagery guide you on the road.
Conclusion

Cycling is a fun, healthy way to get around and a fantastic way to explore your surroundings. To make your cycling journey enjoyable, always ensure your bike is in good working condition—a well-maintained bike is safe and reliable.
The more time you spend cycling, the more comfortable and confident you’ll become on the road. Start with shorter rides and gradually increase your distance as you build your skillset. Also, connect with like-minded riders who can offer invaluable support and advice.
Soon, you will be soaring through the road like a true champ! Happy Cycling!
Frequently Asked Questions
1. How can a beginner cyclist build endurance?
You can achieve building endurance as a beginner cyclist by gradually increasing your ride duration and distance. Start with shorter, easier rides and slowly progress to longer more challenging ones.
Incorporate a mix of flat and hilly terrain to strengthen various muscle groups such as quadriceps, hamstrings, glutes, calves, and core muscles. Make sure to include rest days and cross-training activities, like swimming or running, to avoid overtraining and maintain overall fitness.
2. How do I handle hills as a beginner cyclist?
When you encounter a hill, make sure to shift to an easier gear before you start climbing. It will make you pedal and maintain a steady cadence easier. Take it slow and steady, finding a comfortable rhythm and pace. Remember to stay seated while climbing unless the hill is super steep. Keep your upper body relaxed, maintain good posture, and focus on spinning the pedals smoothly.
3. What are some tips for riding in traffic or busy areas?
When riding in traffic or busy areas, ensure you’re visible to drivers by wearing bright clothes and lights on your bike. You must also signal your intentions with hand signals so drivers know when you’re turning or changing lanes. Keep an eye out for blind spots and try to stay out of them, especially around larger vehicles.
And, of course, always follow traffic rules, stay focused, and be predictable in your movements. Take it easy at intersections, and be patient with the hustle and bustle around you.
4. What are some helpful exercises for improving cycling strength and fitness?
To improve your cycling strength and fitness, incorporate the following exercises into your routine:
- Squats and lunges to build leg strength and power.
- Planks and other core exercises to enhance stability and balance on the bike.
- Deadlifts and hamstring curls strengthen your posterior chain and support overall cycling performance.
- Upper body exercises, like push-ups and pull-ups, for better control and comfort while riding.
- Flexibility exercises, such as yoga or dynamic stretching, improve range of motion and prevent injuries.
5. Why is better traction and grip necessary for wet roads?
Better traction and grip are necessary for wet roads because when the road is wet, it becomes slippery. This can make it harder for your tires to maintain contact with the road surface.
Good traction and grip help prevent your bike from sliding or skidding, allowing you to maintain control and stability while riding. It’s important to have tires with adequate tread. Consider using wider tires for better grip on wet surfaces.