
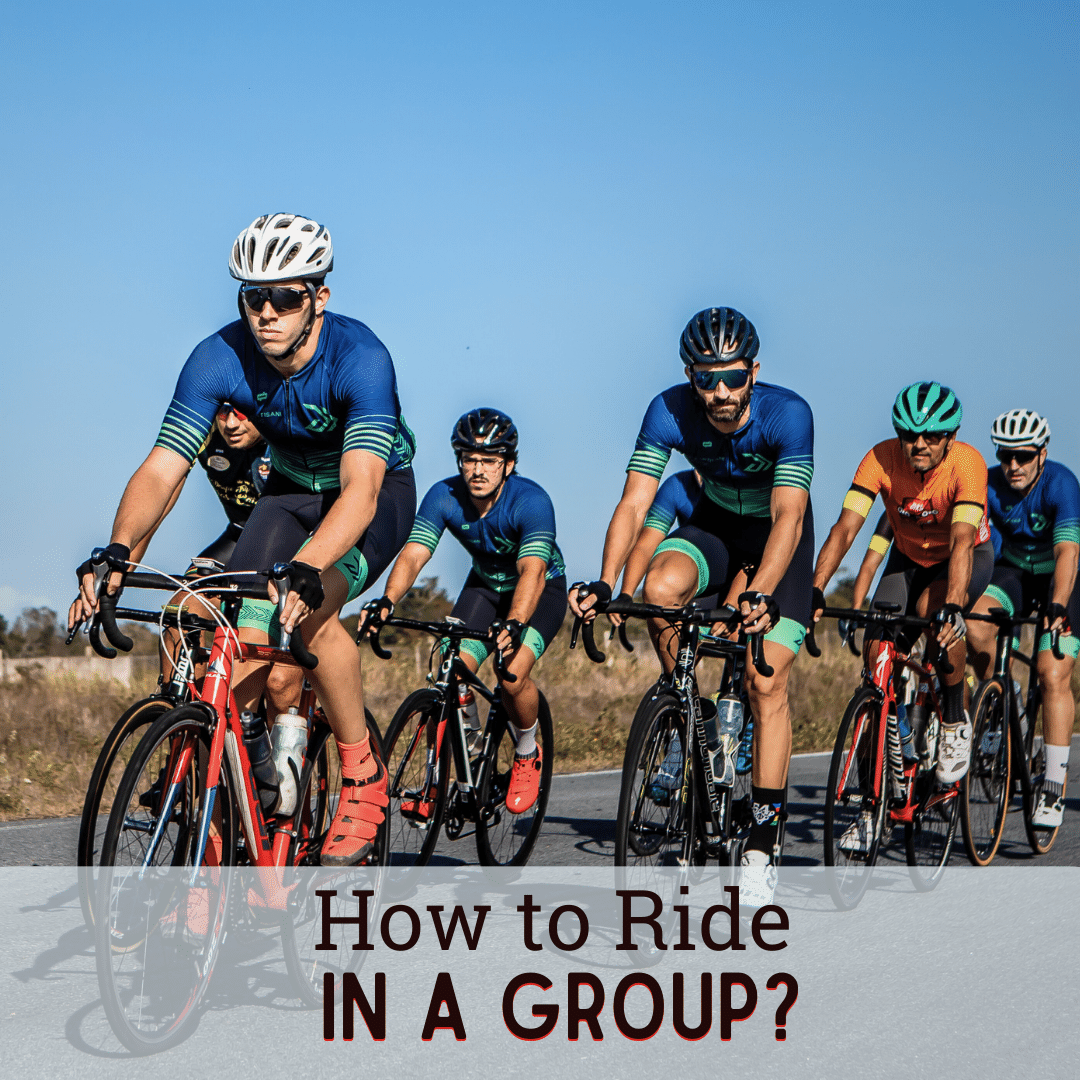
Over the years, I have acquired valuable group riding skills, like pace line, drafting, safety tips, and problem-solving abilities, which I will discuss in the article.
Below is a guide to riding in a group, eight tips to enhance your group riding experience, advanced skills, and the solutions to a few problems that may occur along the way.
How Riding In A Group Works:
8 Tips When Riding in a Group:
Advanced Group Riding Skills:
Problems and Solutions When Riding in a Group
How Riding In A Group Works
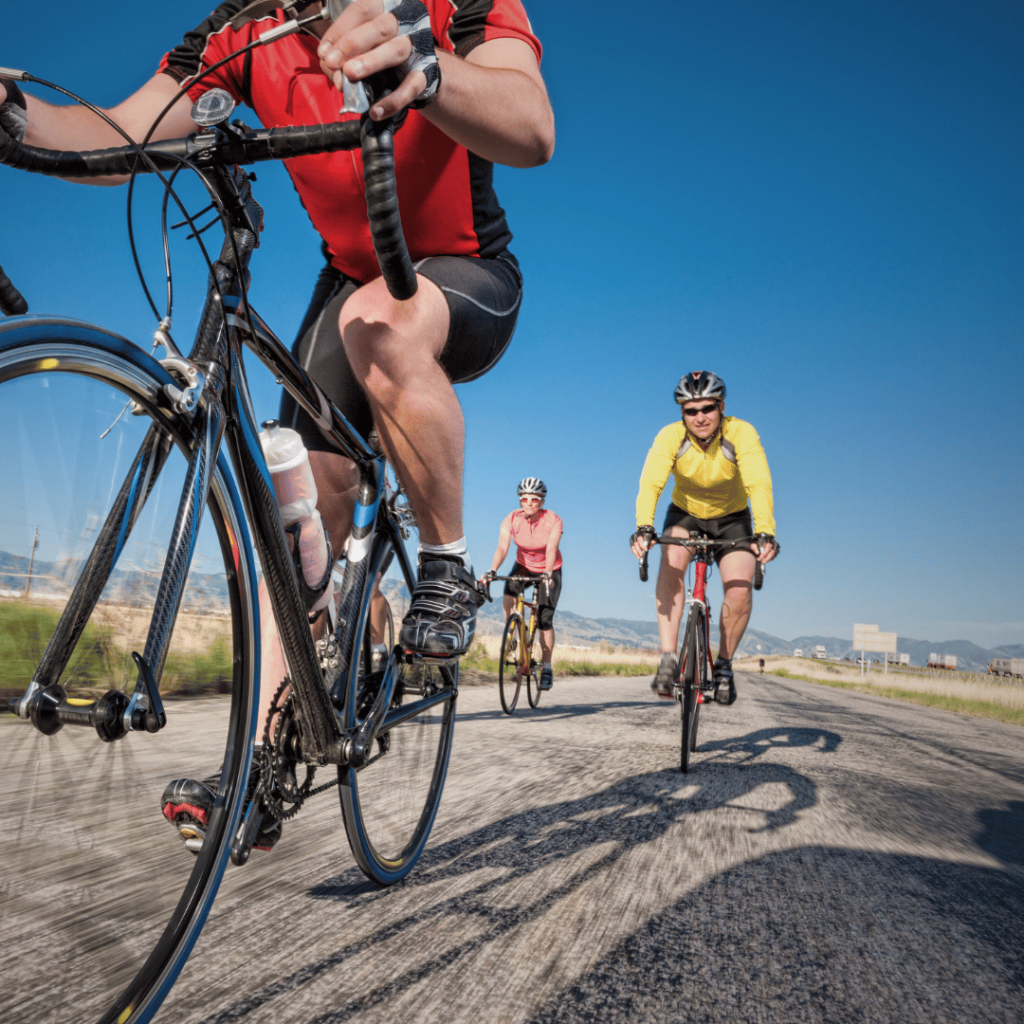
Cycling in a group is also called pace lining, when riders form a line, riding closely together in a single or double file. The lead rider sets the pace and communicates using hand signals or verbal cues while the other riders follow closely behind, taking advantage of the draft created by the rider in front.
Here’s a guideline to refer to when riding in a group:
Starting:
When the group is ready to start, the lead rider will give a signal saying, “Let’s go!” or using a hand gesture such as extending your arm and pointing in the direction that the paceline will be moving towards.
The leader then starts moving slowly, and the other riders follow behind at a consistent pace, taking up their positions in a double file or a single file. This is decided based on factors like traffic and the width of the road or lane by the lead riders.
Cyclists typically need to get into a single file when the road is narrow, if there is heavy traffic, or if there isn’t enough space for motorists to pass safely. Single file formation is more compact and aerodynamic, offering more control and stability, especially in windy or hilly conditions.
However, remember to maintain a bike length between each rider when riding a single file. And when there is heavy traffic, the pack can revert to riding a double file.
The broader width of the group in a double line makes the riders more noticeable on the road. It also improves communication because riders can easily talk to each other while riding side by side.
Formation:
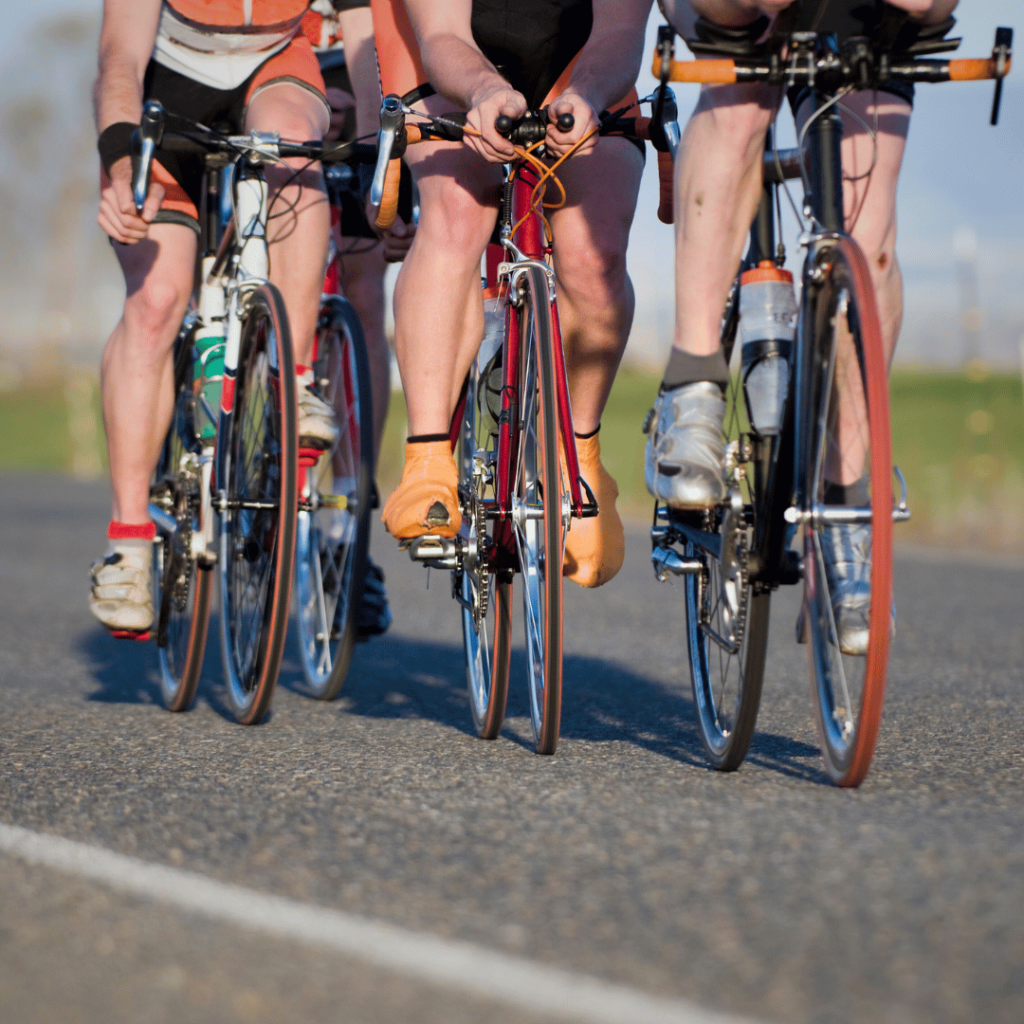
Pair off in a 2×2 formation and keep a distance of about 0.5 to 1.0 meters behind the rear and slightly to the side of the rider in front of you (increase the distance in wet conditions) for better visibility and more time to react to potential hazards. Follow the rider in front and avoid sudden changes in speed or direction.
During the formation, remember to avoid half-wheeling, that is, riding with your wheels aligned horizontally to the wheels of the cyclist next to you. Then, position yourself slightly away from the road’s center line (a painted line that divides the road into two lanes) to create a safety zone between you and oncoming traffic.
Rotation:
Rotation is when riders take turns at the front of the group to reduce wind resistance and allow all cyclists to have a chance to lead the group. You must rotate the lead riders frequently to prevent fatigue.
When it’s time to rotate, the outside lead rider calls out “ROTATE” and moves up and across in front of the inside rider. The inside lead rider will then call out “CLEAR” when it’s safe for the outside rider to move to the inside position. Outside riders move up one place, inside riders move back one place, and the inside rider becomes the tail rider.
When it is your turn to take the lead, avoid rapid speed changes because they disrupt the formation flow by causing speed surges for the riders behind you.
Maintain a safe distance:
Keep a safe distance of at least a few bike lengths between you and the rider in front to react to sudden movements or obstacles. Maintain a consistent and predictable pace, allowing the rider behind you to anticipate your movements.
Also, remember to communicate and indicate any changes in speed or direction to ensure the rider behind you has enough space to respond and adjust your pace by gently applying the brakes to slow down or pedaling faster.
Communication and awareness are vital in maintaining a safe distance in a group ride. Use verbal cues like saying “slowing” or “stopping” to tell them your intentions. Use hand signals like extending your arm downward to indicate braking or pointing out a turn to alert other riders.
Uphill:
If you’re the lead rider during an uphill section, adjusting your effort to sustain the sprint up the hill is essential. Maintain a steady cadence of around 80-90 RPM for the sprint uphill.
Start by increasing your effort by about 10-20% compared to your flat terrain. However, finding a sustainable intensity comfortable for the group is essential. Avoid going too fast or pushing harder than the group can keep up, as it may cause the group to split up.
Communicating with the riders behind you is essential, letting them know if you need them to take over or if you will push through. And if you’re in the middle of the pack, match your pace with the lead rider to ensure a smooth transition when it’s time to rotate without breaking the flow.
If you’re the tail rider during uphill sections, gear down to maintain a steady pace with the lead riders. A good starting point could be shifting down to a lower gear, but remember that the exact gear number will depend on your bike’s setup and the steepness of the climb.
If the formation breaks up, regroup at the top of the hill. Remember not to leave slower riders behind. Slower riders should stay to the right unless they want to pass someone. This allows for faster riders to pass safely on the left.
Remember to always check for riders behind you before passing on the left, and never pass on the right.
Downhill:
During downhill sections, the lead riders often take advantage of the descent to pick up speed and maintain a fast pace. They tuck into an aerodynamic position, pedal lightly or not at all, and use their body positioning to navigate the turns and maintain control.
The lead riders need to maintain a smooth and controlled descent while being aware of other riders to keep the formation from breaking.
If you’re the tail rider and your speed becomes too fast, don’t break formation and pass others abruptly, just gradually slow down. Maintain a safe distance from the riders in front of you, anticipating the movements of lead riders.
Ride smoothly and avoid erratic movements:
When starting or crossing rough tracks, lead riders should accelerate slowly to allow tail riders to catch up.
Aim for a cadence between 80-100 rpm on flat terrain. This may drop to 60-80 rpm or lower on uphills. On downhill terrain, let gravity pull you downwards and pick up speed without pedaling as much.
Remember to make smooth and gradual changes in speed and direction, avoiding sudden movements, like switching lanes or sudden braking.
8 Tips when Riding in a Group:
Now that you know how group riding works, let’s level you up with these advanced techniques.
1. Pacelines and Drafting
Pacelining is where riders ride closely together in a double or single-file line, taking turns at the front. Drafting is riding closely behind another rider to take advantage of their slipstream. Combining pace lining and drafting conserves energy, increases speed, and reduces wind resistance.
Pacelining is taking turns at the front and falling back into the draft to recover. This can be done with just two riders, but it’s even more effective with a larger group. Each rider can conserve energy and benefit from the draft by rotating the lead.
Cyclists reduce wind resistance by 25-30% by creating a slipstream that blocks the air movement and creates a low-pressure area behind the lead rider. For instance, if the lead rider maintains a speed of 20 mph, the following rider might only need to put in the effort of riding at around 14 mph to maintain the same speed.
2. Keep A Steady Pace
Maintain a consistent pace and avoid sudden accelerations or decelerations when riding in a group.
It’s important to be attentive to group dynamics changes, like pace shifts, formation, and leadership roles. Keep your eyes on the road, check your mirrors if you have, and use your peripheral vision to stay aware of what’s happening beside and behind you so you can change your pace accordingly.
For instance, if you encounter a strong headwind, you might need to put in more effort and pedal harder to maintain your desired pace. When riding in traffic or congested areas, you may need to slow down or even stop to ensure your safety and the safety of others.
Also, avoid sudden braking, and instead, practice feathering your brakes by applying gentle pressure to the brake levers.
3. Pulling and Rotating
Pulling is leading the paceline and breaking the wind for the other riders, where the lead rider sets the pace and creates a draft for the following riders.
While rotation is changing positions in the paceline, the lead rider takes the front position and sets the pace, for example, 20 km per hour, and other riders rotate positions, taking turns to lead for a specific duration.
For instance, if there are four riders and they have decided to rotate every 12 minutes. Each rider spends 3 minutes in the front and 9 minutes drafting. This rotation allows each rider to recover while in the slipstream.
If you’re the lead rider, pull for a short time (a few seconds to a few minutes) and inform the other riders through verbal cues like “Short pull!” or “I’ll take a quick turn” or hand signals like clenched fist or palm on the hip to indicate that you’ll be leading the group for a shorter time before switching the lead position with another rider.
Then, when your leading turn is over and it’s time to rotate, signal to the rider behind you that you’re ready to rotate to change positions by extending your elbow out to the side and giving it a little flick.
Remember that if you want riders to come through on the left side, give a little flick with your left elbow. And if you prefer them to come through on the right, just flick your right elbow.
This way, other riders can adjust their pace and prepare to take over.
You must then gradually move to the side and slightly slow down, allowing the rider behind you to smoothly approach the front. Once you’ve peeled off, let the rest of the group ride past you while maintaining a slower speed and rejoin the back of the paceline.
4. Cornering and Descending In a Group

Cornering is navigating a turn on your road bike. To corner properly, lean your body and bike into the turn, shift your weight, and choose the right line/route. Descending, on the other hand, is riding downhill at high speeds.
Cornering:
Follow the rider’s line in front of you as you enter a corner, and avoid crossing or changing lanes as it disrupts the flow of the group to corner properly. Then, scan the road ahead to prepare for upcoming obstacles like debris or potholes. In case of any bumps, bend your knees and use your arms as shock absorbers to absorb the impact.
When entering the corner, adjust your speed by slowing down slightly to maintain control. Position yourself by leaning your body and bike into the turn, shifting your weight towards the inside of the curve. Slow down before entering the corner rather than braking while turning.
Remember to take a wider line at the beginning of the corner. Gradually cut towards the inside apex, and finally, exit the corner on the wider side again.
Descending:
You must use your front and rear brakes to slow down while descending but remember that most of your stopping power comes from the front brake. By applying more pressure to the front brake, we can take advantage of the weight transfer and the increased traction between the front tire and the road, which allows us to stop faster.
Also, maintain a balanced and centered position on the bike, with your hands on the drops (the lower part of the handlebars), for better control. Keep your elbows slightly bent and your weight evenly distributed between the front and rear wheels for better control.
5. Safety Communication: Hand Signals and Verbal Cues
Alert other riders to avoid accidents by clearly stating your intentions, such as indicating turns or upcoming obstacles using hand signals or verbal cues.
Now, here are some commonly used hand signals:
For a left Turn:
Extend your left arm straight to the side.
For a right Turn:
Extend your left arm to the side and bend it upwards at a 90-degree angle.
To Stop or Slow Down:
Extend your left arm to the side and bend it downwards at a 90-degree angle.
Here are some commonly used verbal cues:
- Use simple and clear phrases to communicate. For example, you can say “left turn” or “right turn” if you’re about to take a turn.
- Waving or saying “car back” or “car passing” to warn about approaching vehicles to alert the group to be prepared by moving to the side of the road if necessary.
- If the lead rider calls out “stopping” or “slowing,” you must gear down, brake gently, and stop pedaling to not disrupt the flow.
Remember to wave your hand or call out for help if you have a mechanical issue or need a break, and speak loudly and clearly to ensure you are heard in noisy environments. It allows others to be aware of your situation and provide necessary support.
Communication synchronizes the group’s actions and movements, preventing accidents and frustration among riders. However, while it’s important to communicate and alert others to potential hazards, excessively pointing out every little detail can create a tense atmosphere of constant danger and anxiety, making the riders feel on edge. So, avoid overdoing it.
6. Always offer help
Offering help to other riders fosters a sense of camaraderie and creates a supportive cycling community. It shows that we care and are willing to be there for them, strengthening the connection between the cyclists.
Here are a few tips for offering help:
- Frequently ask your fellow riders if they need assistance or if everything is okay.
- Be respectful, attentive, and supportive in your approach to create a positive cycling community.
- If they indicate they need help, offer to fix a mechanical issue and share supplies like spare tubes or tools. Also, guide rookie cyclists on navigating the route and share tips.
- Be patient with your fellow riders. Some riders may have different levels of experience and fitness levels, so it’s important to be supportive and help them improve.
- Provide positive reinforcement and encouragement such as “Great job, keep up the good work!”, “You’re doing awesome, keep pushing!” or “You’ve got this, don’t give up!” to boost morale and motivate your fellow riders—make sure they aren’t anxious or overwhelmed.
7. Fixing Mechanical Issues
Carry a basic toolkit with essential tools like a multitool, tire levers, and a spare tube if you need to fix a mechanical issue. Some common mechanical problems are flat tires, loose bolts, or a misaligned derailleur.
Follow this guideline:
Flat tire:
In case of a flat tire, remove the wheel from your bike and use tire levers to remove the tire from the rim. Once the tire is off, inspect the inner tube for any punctures or damage. If the puncture is small, use a patch kit to repair it.
First, locate the puncture by inflating the tube slightly and listening or feeling for any air leaks.
Once you’ve found the puncture, clean and dry the area around it, and apply the patch according to the instructions on the patch kit, which often ask you to deflate the tube completely and clean the area around the puncture rubbing alcohol or a similar solvent first.
Then, roughen the area with sandpaper or an abrasive tool from the patch kit, apply a thin layer of adhesive, let it dry until tacky, and then firmly press the patch over the puncture, ensuring no air bubbles. Give the adhesive enough time to fully cure, inflate the tube, and check for leaks.
However, if the damage is severe and the tube has multiple punctures, with the tread pattern barely visible, or the sidewalls of the tires are cracking and bulging, replace it with a new one. Ensure to check the new tire for any sharp objects that may have caused the puncture before reinstalling the tube.
Then, carefully put the new tire back onto the rim and inflate it to the recommended pressure before reattaching the wheel to your bike. The recommended tire pressure is usually indicated on the tire’s sidewall or the owner’s manual. However, a general guideline is a tire pressure between 65-95 PSI (pounds per square inch).
Loose bolts:
A few bike parts, like the handlebars, stem, seat post, and pedals, commonly have loose bolts. So, in case of a loose bolt, use a wrench or an Allen key to tighten the bolts securely, but be careful not to overtighten and risk damaging the threads. Start with a snug fit, then tighten it to ensure everything is secure.
Make sure to periodically check all the bolts on your bike to ensure they aren’t loose.
Chain issue:
To fix a broken chain, use a chain tool and spare quick links; a type of chain connector that installs and removes the chains for cleaning or replacing.
Use the chain tool or link pliers to remove the broken link, and then connect the spare chain using the quick link. Give it a gentle tug to ensure it’s secure, and rotate the pedals to check if the chain moves smoothly. Remember to regularly clean and lubricate your chains.
Misaligned derailleur:
In case of a misaligned derailleur, shift your bike to the biggest chainring and smallest cog. Then, use the barrel adjuster or shifters to make minor adjustments, clockwise or counterclockwise, until the jockey wheel aligns with the smallest rear cog.
If the alignment is still off, you may need to adjust the limit screws on the derailleur. The high-limit (H) screw adjusts how far the derailleur can move toward the smallest cog, while the low-limit (L) screw adjusts how far it can move toward the largest cog.
Make minor adjustments until the shifting of the gears is smooth and accurate. Position the cage very close (1mm to 2mm) to the chain. But ensure it isn’t causing friction or rubbing against the chain.
If it’s rubbing, just loosen the screw slowly by turning it counterclockwise until the rubbing stops. And if there’s too much of a gap, tighten the screw by turning it clockwise.
Adjusting brakes:
Start by loosening the bolt that holds the brake cable in place using a wrench or Allen key. Then, squeeze the brake lever and observe the distance between the pads and the rim.
If the pads are too far from the rim, tighten the cable by turning the barrel adjuster on the brake caliper clockwise. If the pads have no gap and are rubbing against the rim, loosen the cable by turning the barrel adjuster counterclockwise.
Adjusting gears:
Similar to fixing a misaligned derailleur, start by shifting your bike to the smallest chainring and the smallest rear cog (typically 11(11t) or 12 (12t) teeth). Then, use the barrel adjuster on the rear derailleur to fine-tune the shifting.
If the chain has difficulty moving onto larger gears, turn the barrel adjuster counterclockwise to increase tension. If the chain struggles to move onto smaller gears, turn the barrel adjuster clockwise to decrease tension.
8. How to Find a Group Ride?
Finding people with similar cycling schedules and skill levels might sound challenging, but finding group rides that suit your preferences and abilities is easier than it may seem.
Follow the following tips to find a group ride:
- Join a cycling club or team that organizes regular group rides for its members by researching local clubs online, reaching out to them, and participating in club events. These clubs usually cater to different skill levels and welcome everyone.
- Search online directories or ask fellow cyclists in your area. Popular cycling apps like Strava often have features that allow you to connect with local cycling clubs or groups.
- Use social media platforms like Facebook to search for pages dedicated to cycling in your area to make plans with fellow riders or jump in on a ride. Follow the cycling pages so you don’t miss out on new posts and updates.
- Ask around at bike shops, cafes, or events for recommendations or invitations to group rides. Your local bike shop might also host beginner-friendly, no-drop rides that don’t leave riders behind.
Before selecting a group ride, consider the following factors to ensure you are fit for the chosen group:
- The date, time, and location of the ride that suits your schedule and is convenient for you to attend.
- The distance, duration, and difficulty of the ride to ensure it aligns with your fitness level and goals. If you’re a beginner, you might want to start with shorter and less challenging rides and slowly make your way up.
- The pace, style, and etiquette of the ride. Some groups may have a more relaxed pace, while others may focus more on training or competitive riding. Choose one that matches your preferences and riding style.
- The size, composition, and skill level of the participants in the group. If you’re looking for a supportive and inclusive environment, find a group that welcomes riders of all levels.
Once you’ve made the decision, reach out to the group or the club contact to express your interest in joining the specific ride. You can also contact the leader or organizer of the group for more information if needed.
Remember to be honest and realistic about your skills and abilities, and choose a group ride you can handle and enjoy.
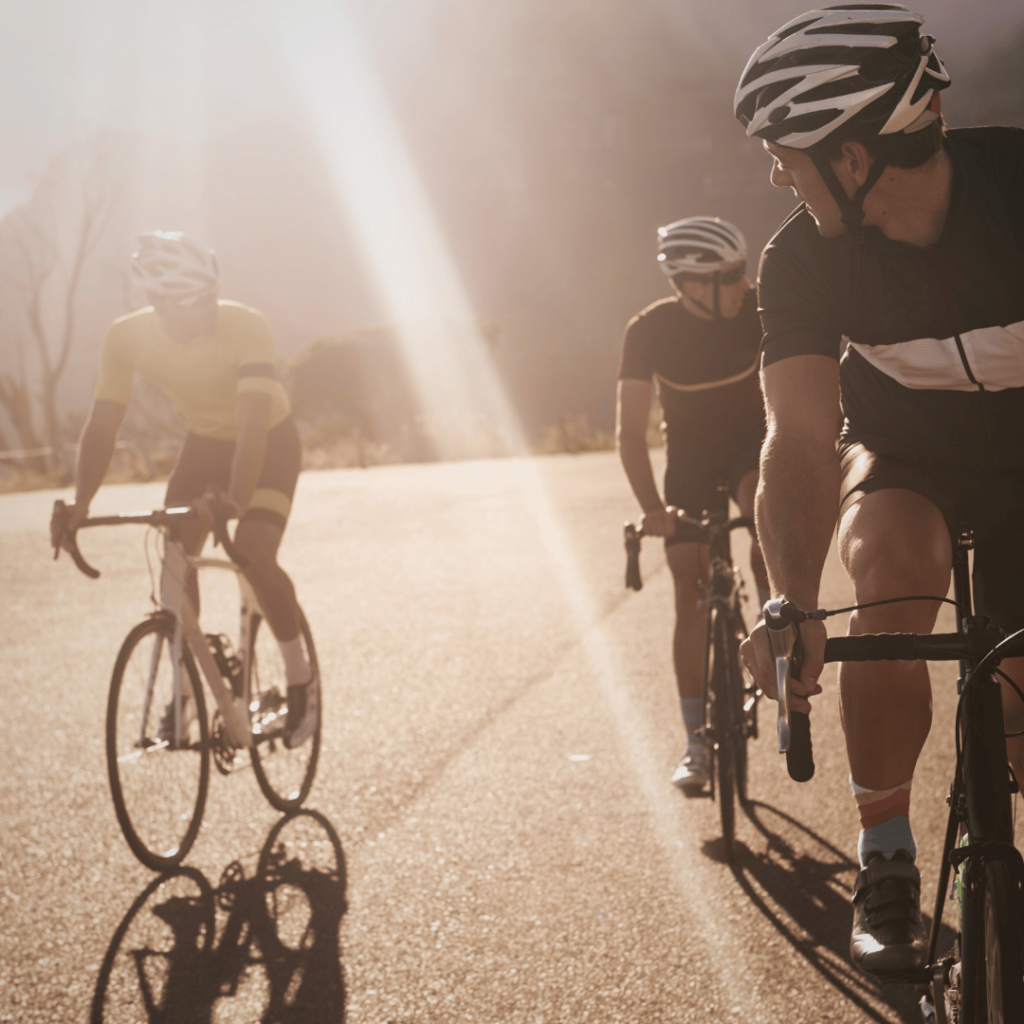
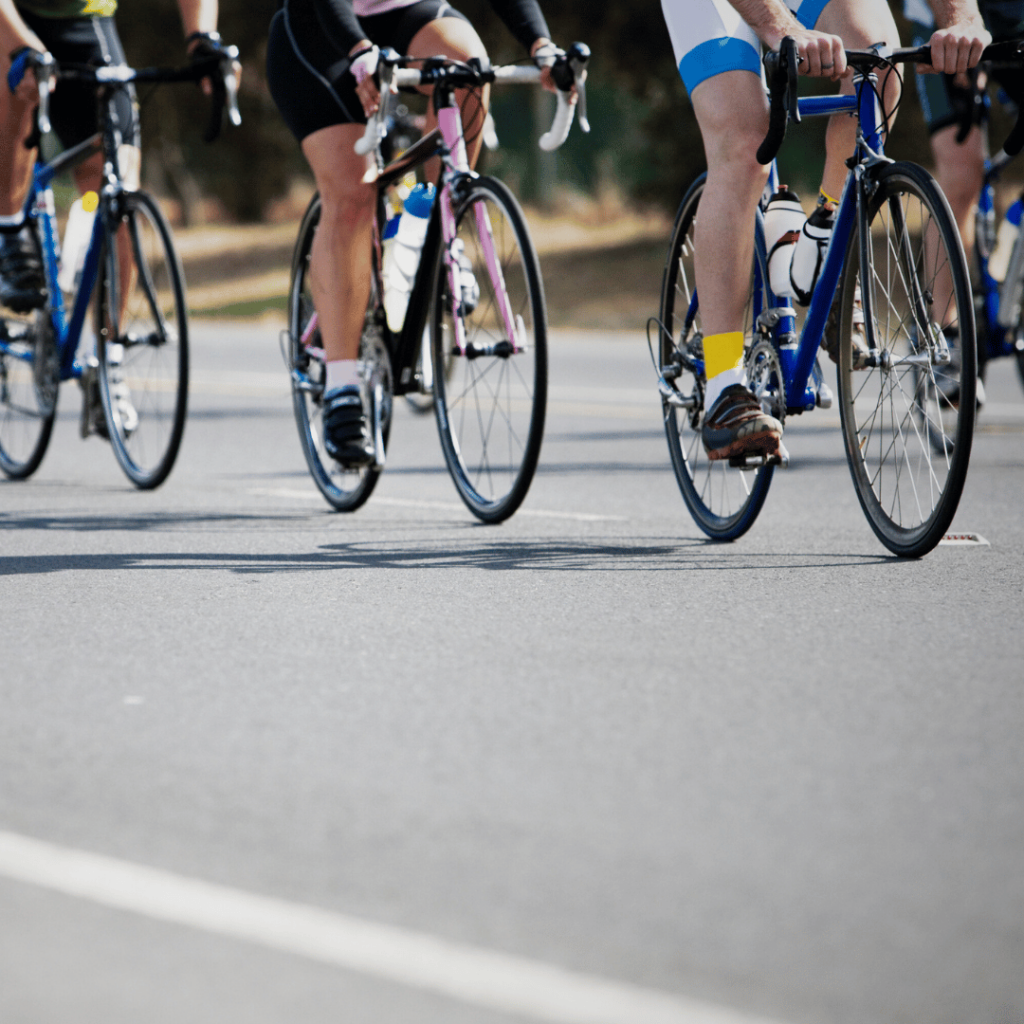
Advanced Group Riding Skills:
[image]
Let’s look at advanced techniques that can significantly enhance your group riding experience and boost overall performance.
The through-and-off technique
Is a variation of the paceline where two parallel lines of riders rotate in opposite directions. It is also known as “pull and peel” or “rotating paceline,” where the riders take turns at the front, pulling for a set amount of time, then rotating to the back of the line and letting the next rider take their turn to lead.
Skipping pulls
Is intentionally skipping your turn at the front of a paceline. It is a helpful technique when you’re tired or unable to keep up with the group’s pace, and it can be done by either dropping to the back of the line when it’s your turn to pull or by not taking the turn at all.
However, it’s important to note that skipping pulls disrupts the rhythm and cooperation of the group. It’s generally considered poor etiquette in a paceline because it burdens the other riders unfairly.
Sag climbing
Is climbing hills at your own pace rather than trying to stay with the group. It is also known as “sagging,” which refers to receiving support or assistance during a climb from a support vehicle or a designated support station.
Sag climbing is commonly done in organized cycling events or races where riders can take a break and receive food, water, or mechanical assistance from the support vehicle or station. This allows riders to replenish their energy or address any issues before continuing the climb.
Echelons and crosswinds
It refers to a specific formation and the effect of wind on riders.
Echelons is the diagonal line formation that riders adopt when facing strong crosswinds. It is done by positioning themselves slightly to the side of the rider in front, creating a staggered line that helps reduce the impact of the wind.
Crosswinds, on the other hand, are winds that blow across the direction you are moving along while cycling. When cycling in crosswinds, riders need to be aware of the potential for gusts and their impact on stability.
Riders must adjust their body position by leaning slightly into the wind to counter its force and keeping a firm grip on the handlebars to maintain balance.
Problems and Solutions When Riding in a Group
Riding in a group can be an enjoyable experience, but it also comes with its share of challenges.
Let’s explore some common problems and solutions to help make your group rides smoother and safer.
Crashes
Occur due to contact with other riders, vehicles, or objects on the road. Check yourself for injuries and your bike for any damages in case of a crash. If you can continue riding, try to rejoin the group or find another easier way back to your destination by checking your navigation app or asking locals for alternative routes that may have less traffic or challenging terrain.
If you cannot continue riding, assess yourself for injuries and seek medical attention immediately. Find a safe place off the road and contact a friend, family member, or emergency services for assistance,
You can avoid crashes by following basic group riding techniques like proper spacing and keeping a distance of about one to two bike lengths behind the rider in front of you.
Remember to pay attention to the other rider’s movements and anticipate any changes in pacing or body positions. Effective communication improves cyclists’ cooperation and awareness, like hand signals or verbal cues. (Refer to the 5th tip section: Safety Communications).
Mechanical issues
Like flat tires, broken chains, or loose bolts also cause problems during group rides. (Refer to the 7th section of tips: Fixing Mechanical Issues)
You can avoid these issues by thoroughly checking your bike before every ride. If there is a mechanical problem, signal other riders and pull over safely to fix it.
Physical health
Being mindful of your physical health is crucial. When you’re in good shape, you’ll likely have improved speed and performance on the bike. Your muscles will be stronger, and your cardiovascular system will be more efficient, allowing you to push harder and ride faster.
Remember to prioritize recovery, as cycling can be demanding on your body. Your muscles will get time to repair, reducing the risk of injury and allowing you to bounce back quickly after intense rides.
Psychological issues
Like stress or anxiety can negatively impact your mood or confidence when riding in a group. Cycling should be enjoyable, so keep a positive attitude. If you struggle with fear, anger, or frustration, take a moment to calm down.
Cycling can improve your mental well-being because it helps you disconnect from daily pressures, enjoy the outdoors, and release endorphins, which boost your mood and reduce anxiety.
Riding with a group provides social interaction and connection with fellow cyclists. This can contribute to a sense of belonging, camaraderie, and support, positively impacting your overall well-being.
Conclusion

Riding in a group is a rewarding and enjoyable experience for cyclists of all levels. As you venture into group cycling, learning and practicing the necessary skills and techniques is crucial.
By being open to new experiences and respecting the dynamics of the group, you’ll likely find group riding to be an enjoyable and beneficial addition to your cycling routine. So gear up, and remember always to keep it fun and exciting. Happy cycling!
Frequently Asked Questions:
1. How do we handle intersections or traffic lights during a group ride?
When approaching intersections or traffic lights, ride in a single-file line and obey traffic laws. The group should stop together at red lights and proceed through green lights as a unit, maintaining a safe distance from other riders. Communication and hand signals are essential to ensure everyone knows when to stop, turn, or proceed.
2. How much distance should I maintain between riders in wet or slippery conditions?
Increasing the distance between riders is vital for added safety when riding in wet or slippery conditions. A good rule of thumb is to maintain a distance of at least 2-3 bike lengths between you and the rider in front of you. This gives you more room to maneuver and reduces the risk of collisions.
3. What are common safety tips for group rides?
Always follow traffic laws and prioritize your safety and your fellow riders. Signal and call out turns or upcoming hazards to keep everyone informed.
4. What should I do if I get separated from the group?
If you find yourself separated from the group, don’t panic! Slow down and look for visual cues or landmarks to help guide you back to the group. You can also use your phone to call or message them for assistance.
5. What are the best ways to handle turns and intersections?
When approaching turns and intersections, announce your intentions with hand signals and callouts. Slow down gradually, avoiding sudden braking. Once the group starts moving through the intersection, follow the same line and speed as those ahead, keeping the formation tight but safe.