

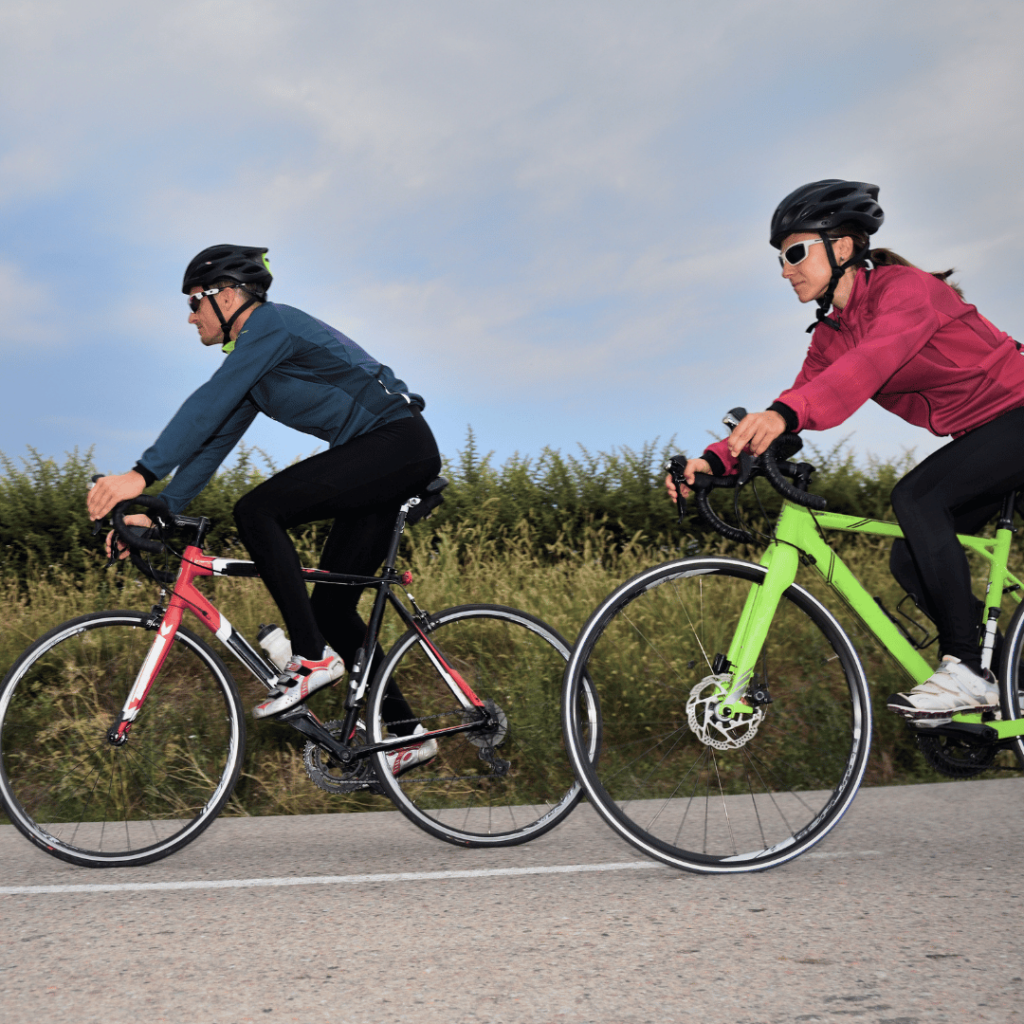
Position yourself closely behind the rider in front to reduce wind resistance and conserve energy, allowing you to go faster. Maintain a consistent distance and focus on matching the rider’s pace in front. The closer you are to the rider in front, the more benefit you’ll get from drafting.
Now, let’s dive deeper. I will introduce you to the step-by-step guide, eight advanced tips, drafting etiquettes, and drafting in different road conditions.
Master the Art of Drafting
Advanced Tips
Cycling Drafting Etiquettes
Drafting in Different Road Conditions
Master the Art of Drafting
Riding in a group has significant perks; one of the best is drafting. When you stick close to another cyclist, you slip into their low-pressure zone, the area behind a cyclist where the air pressure is relatively lower than the surrounding air. The leading cyclist creates a disturbance in the air, decreasing the air pressure behind them, which reduces wind resistance.
You must take turns leading the paceline so that everyone in the group experiences the benefits of reduced wind resistance of drafting. During headwinds, aim to stay within 10 cm of the rider in front and maintain a slight offset by positioning yourself slightly to the side, opposite the direction of the wind.
Drafting can reduce your pedaling effort by 30-40%. And even if you’re three bike lengths away, you can still enjoy a 20% reduction in effort. Even the cyclist at the front can save up to 3% effort, thanks to the riders behind breaking up the air current.
Here is a handy step-by-step guide on how to draft on a road bike:
1. Find riding partners:
Before diving into larger groups, gain some experience with a smaller group. Riding with just one other friend or 2 to 3 riders will help you focus on getting comfortable riding close to other cyclists.
Attending a local bike shop or ride club can be an excellent opportunity to find a riding partner. You can also connect with other riders through social media, online forums, or platforms like Strava or Meetup and pair up with a cyclist riding at a similar or slightly faster pace than you.
2. Maintain a steady pace:
Avoid sudden changes in direction or braking. Pedal at a steady pace for stability. Keep a relaxed grip on the handlebars and maintain a stable body position by keeping your core engaged and shoulders relaxed.
Also, excessive coasting leads to a loss in momentum, which makes it harder to maintain a steady pace. So, avoid unnecessary coasting by maintaining a steady pedal rhythm throughout.
3. Position yourself:

Ride closely behind the rider in front and stay within their slipstream without overlapping the wheels to enjoy up to 30% energy savings. Aim for a distance of about one to two bike lengths; the closer you get to their wheel, the more energy you conserve.
4. Keep your eyes ahead:
Keep your eyes on the rider before you and anticipate their movements, such as changes in speed, shifting positions within the group, or making turns.
Then, make necessary adjustments, like adjusting your speed, maintaining a safe distance, and changing your position to stay in sync with the rider in front.
5. Communicate:
Use hand signals or verbal cues to communicate with the rider in front, especially when you plan to overtake or if obstacles are ahead.
For instance, use hand signals like pointing to indicate a direction or waving to signal that you’re about to pass and verbal cues such as “passing on your left” to alert riders or pedestrians that we are overtaking them from the left side.
6. Share the workload:
When riding with a group, distribute the workload by taking turns leading at the front and letting everyone benefit from the reduced wind resistance. Rotating the lead rider lets everyone rest and recover.
Advanced Tips:
Now that we are familiar with the basic steps of drafting. Let’s dive into some advanced tips to elevate your drafting skills further.
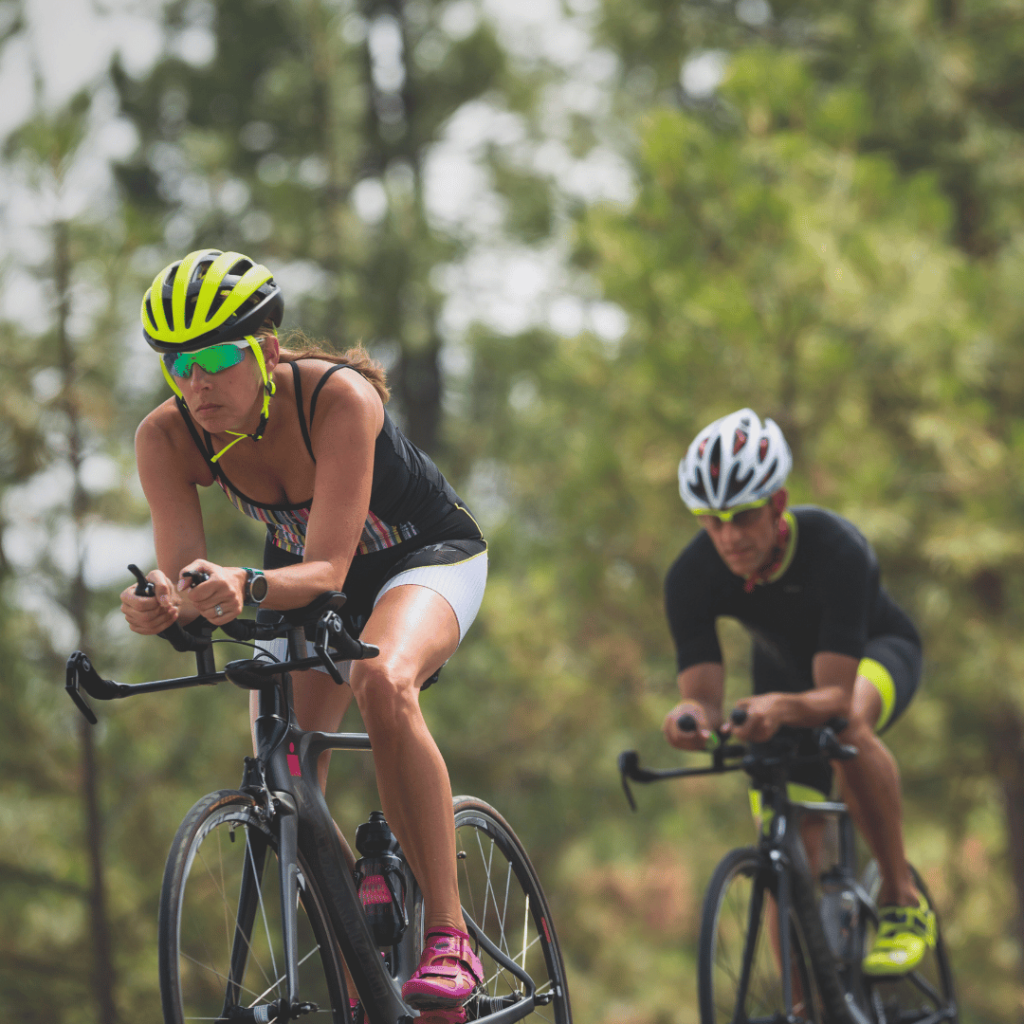
1. Start By Drafting With One Rider
Start by drafting with one rider and not a larger group. Riding with only one rider first allows you to focus on the fundamentals of drafting and understand the benefits of riding in someone else’s slipstream.
Here is a handy guideline for drafting with one rider:
- First and foremost, pair up with a seasoned rider because they will provide guidance on techniques like bike handling, pacing, body positions, drafting, etc. You should observe their riding style and learn.
- Start riding at a moderate speed on a safe, empty road to practice drafting. Then, position your front wheel approximately 3 feet (1m) behind the back wheel of the rider in front to maintain a safe distance.
- As you ride, familiarize yourself with the drafting and pay attention to how the air feels. You’ll feel a stronger draft when you ride closer to your partner’s wheel. As you drift back, the current becomes less powerful.
Then, gradually decrease the gap to 2 feet (66cm), as it is a good balance between maintaining the draft and reducing wind resistance while ensuring you have enough space to react to sudden changes in the road.
2. Pedal and Brake Smoothly
Smooth pedaling ensures a consistent flow within the group. At the same time, gentle and controlled braking allows for seamless adjustments without causing abrupt speed changes.
For instance, if your pedaling is uneven when drafting behind your partner, you might come too close to their rear wheel and have to brake. This creates a gap between you and the rider in front. You’ll then pedal harder to close the gap, only to have to slam the brakes again.
Break free from this cycle by focusing on pedaling smoothly at the same speed as the leading rider.
Here’s a handy guideline for pedaling and braking smoothly:
- Match your pedaling speed with the leading rider by paying attention to their pedaling cadence and mirroring them. Aim to synchronize the pedal strokes.
- Maintain a steady and consistent effort throughout your pedal strokes and apply even pressure throughout each rotation. Sudden bursts of power or aggressive pedaling disrupts the draft and causes instability as the changes in speed and power create turbulence, making it harder for the riders behind you to maintain their position.
- Pay attention to the road ahead to anticipate any upcoming obstacles or turns that may require you to brake.
Instead of slamming on the brakes, gently squeeze the brake levers once you’ve slowed down, and “feather” the brakes by lightly and intermittently applying pressure, maintaining a smooth deceleration.
3. Practice Lead Rotation
Lead rotation is the practice of taking turns being in the front position. Riders cycle in a rotating pattern, with each person spending a designated amount of time leading the group before moving to the back of the line.
By regularly switching positions, riders can benefit from the aerodynamic advantage of drafting while allowing everyone to rest and recover.
Now, here is a helpful guide to practicing lead rotation:
- Start by establishing a communication system, such as hand signals or verbal cues, to indicate when to rotate. If you’re the rider in the front, look back to ensure there’s no traffic, and shift to one side, considering factors like wind, road conditions (gravel, wet, bumpy), and traffic.
You can choose the best side to shift to by being aware of these conditions. For instance, If you’re the lead rider and notice that the wind is blowing from the left side and the road conditions on the left side have some gravel, you should shift slightly to the right side of the road.
- Then, maintain a consistent line by keeping your bike parallel to the road and avoid unnecessary swerving or zigzagging. Keep your eyes ahead to look for the smoothest and safest path on the road. After your designated time or distance, signal to the rider behind you that it’s their turn to take the lead.
The designated time or distance for lead rotation varies depending on the group’s preference and the specific riding conditions, like terrain and weather. If riding on a hilly route or with strong headwinds, it is better to rotate the lead more frequently to distribute the workload among riders.
And if the route is relatively flat or the wind is calm, longer intervals between lead changes are fine. It also depends on the group preference, as some groups may prefer to rotate every 5 minutes or every 5 miles. Discuss and agree upon a rotation schedule with your fellow riders before the ride.
- If you’re the current leader, maintain a consistent pace. And you must ensure that lead changes are done smoothly and without sudden accelerations or decelerations.
As the rotation begins, the rider on the right side should smoothly move forward to take the lead position while the riders on the left move slightly to the right. And as the current leader, gradually drift back to the back of the group, allowing enough space for the new leader to come forward.
The new leader should seamlessly pick up the pace and maintain the group’s speed to ensure an uninterrupted transition.
- Once you’re out of the draft and riding to the back of the group, pedaling may feel slightly more challenging because you no longer benefit from the reduced wind resistance.
So, stay close to your fellow riders. The closer your shoulders are, the less wind you both face. It also makes your combined width narrower, which is crucial on narrow roads for the convenience of motorists.
4. Pay Attention to Wind Direction
Pay attention to the direction of the wind, as it will dramatically affect drafting. By positioning yourself in the right spot considering the wind direction, you maximize the benefits of drafting and ride more efficiently.
Here are some tips that you must follow when it comes to paying attention to the wind during drafting:
Wind direction:
Always be aware of the wind direction. If the wind comes directly from the front, position yourself behind the lead rider. If the wind is coming from the left, position yourself slightly to the right side of the road, and if the wind is coming from the right, cycle slightly to the left side.
You must look around for the wind indicators, such as flags, trees, or grass around you, to understand the direction and intensity of the wind.
Positionings during different wind conditions:
In a crosswind, position yourself slightly to the side of the lead rider, opposite the direction the wind is coming from. This reduces the impact of the crosswind.
Remember to never cross the yellow line for a draft. Always stay within your lane to avoid the oncoming traffic. Safety should always be the priority, so losing the draft is better than risking a car collision.
And in a headwind, tuck your body into a more aerodynamic position to reduce wind resistance and pedal with a steady cadence. Bend your elbows, lower your torso, and align your body with the bike to reduce the air drag.
And, if you find yourself in a tailwind, take advantage of the extra push from the wind by maintaining a steady pace.
5. Different Drafting Techniques

Drafting techniques, such as complete drafting, half drafting, and side drafting, offer varying degrees of aerodynamic advantage, giving you the flexibility to find the right balance between speed and control.
Follow these tips:
Complete Drafting:
This position is tucking closely behind the rider in front, almost touching the rear wheel. It offers the maximum aerodynamic advantage and reduces wind resistance significantly.
Your body position for this technique should be low and aerodynamic. You must keep your elbows bent, tuck your head down, and keep your back as flat as possible to reduce wind resistance.
Half Drafting (partial drafting):
This is when you maintain a position that is a slightly greater distance from the rider ahead, typically around 1-2 bike lengths, while staying within their slipstream. This helps you still benefit from reduced wind resistance while having more freedom to maneuver if needed.
Your body position should be low, similar to complete drafting. Keep your elbows bent, tuck your head down, and keep your back as flat as possible.
Side Drafting:
This technique is when you position yourself to the side of the lead rider, taking advantage of the wind created by their movement. You can take advantage of the airflow the rider next to you creates by riding in their “slipstream.”
This can be useful when strategically moving during a race, like overtaking the rider next to you.
As for the body position, tuck your body in and position yourself close to the rider you’re drafting off of.
6. Wheel Woes To Avoid
Wheels play a significant role in drafting, creating a phenomenon known as “synchronized spinning.” When you ride closely behind another cyclist, your front wheel and their rear wheel align in a way that the air flows smoothly between them, reducing wind resistance.
However, we should remember a few wheel-related blunders to avoid to ensure a smooth and safe ride.
Here are a few points you must remember:
Avoid Half-Wheeling:
Half-wheeling can occur when riding in a double paceline or simply cycling alongside a partner. When one person consistently has their wheel slightly ahead of the other rider, it causes the other rider to catch up to them constantly. This leads to an uneven cadence within the group and disrupts the flow.
Maintain good communication and ride in sync with your cycling partner to avoid half-wheeling. Ensure you agree on a steady pace and stay aware of each other’s positioning.
Avoid overlapping wheels:
Overlapping wheels is when your front wheel overlaps with the rider’s rear wheel in front. This occurs when riders are closely spaced in the line, increasing the risk of a collision in case of sudden maneuvers.
Maintain a distance of about 0.5 to 1.0 meters between your front wheel and the rear wheel of the cyclist in front of you, and ride parallel to each other without overlapping wheels.
This distance can vary depending on the speed, road conditions, and the riding experience of the cyclists involved. For instance, if you’re riding with a group on a fast-paced road, increase the distance by 0.5 meters. This extra space allows for a more significant margin of safety.
Avoid staring down at the wheel in front of you:
It’s not necessarily “bad” to do so, but it’s not ideal if you do it constantly. When you focus solely on the wheel in front, you miss essential signs and cues from the road and other riders.
Look ahead by looking over the front rider’s shoulders. By doing so, you can anticipate stop signs, curves, potholes, etc.
7. Avoid the Slinky Effect
The slinky effect is the wave-like motion when the lead cyclist brakes abruptly or slows down, causing the cyclists behind to brake to prevent colliding.
This also creates unwanted gaps between the riders, reducing wind resistance while drafting. To avoid this, all cyclists must maintain a consistent pace and communicate effectively within the group.
Here is a helpful guideline to avoid the slinky effect:
- Maintain an even gap of around 1 to 2 bike lengths between riders. However, the distance can vary depending on wind conditions and the riders’ speed.
For instance, increase the distance between the bikes when riding against a tailwind or crosswind to allow for better maneuverability.
- Instead of abruptly braking, lighten up on your pedal strokes or lift your chest to slow down.
- Make smooth transitions. While rotating the lead, avoid sudden changes in speed or direction and be aware of your surroundings. Remember to communicate with your fellow cyclists using hand or verbal signals.
For instance, when it’s your turn to take the lead, smoothly transition without sudden surges and gradually increase your speed to maintain the flow of the paceline.
- Keep a steady pedaling rhythm if you’re the lead rider. Pay attention to your breathing and synchronize the rhythm of your breaths with the rotation of your pedals. Take a deep breath as you start the downward pedal stroke, and exhale as you complete it.
8. Anticipate and Communicate
Anticipating and communicating help you coordinate your movements with your fellow cycling partners and make working together more efficient. By anticipating what your fellow riding partners might do, you can adjust your movements and react accordingly, creating a smoother and more synchronized group dynamic.
Here is a guide to anticipating and communicating properly while drafting:
Anticipating:
- Pay attention to the movements and signals from the rider before you.
The signals of the the riders in front could be extending their arm to signal a left or right turn, verbal cues such as calling out “stopping” or “ slowing, indicating speed changes, or leaning slightly to one side and adjusting their body position, suggesting a shift in direction.
- If the rider before you starts to slow down or indicate a turn, slow down and maintain a safe distance to avoid collision.
Communicating:
- Use hand signals to indicate your intentions, such as pointing out obstacles or signaling turns.
For example, extend your left arm straight out to signal a left turn or extend your right arm straight out to signal a right turn. If you see an obstacle or hazard, point to the ground with your left or right hand. And when you need to stop, make a motion with your hand, palm facing backward.
- Use verbal cues to communicate. For example, if you’re approaching a stop sign or a red light, call out “stopping” to let the riders behind you know you’ll be coming to a halt. Similarly, if you need to reduce your speed, call “slowing” to alert those riding nearby.
- Establish clear communication signals with your riding group before the ride. Agree on the hand signals or verbal cues to indicate turns, stops, or hazards. Discussing and practicing these signals beforehand promotes group coordination and ensures everyone is on the same page.
Cycling Drafting Etiquettes:
Along with proper technique, drafting has a few etiquettes every cyclist should remember. Cycling etiquettes are a set of unspoken rules and guidelines that help promote safety, respect, and cooperation amongst cyclists.
Here are some helpful and unique drafting etiquettes you must remember:
1. Be predictable:
Whether standing up, turning, or changing body position, aim for a consistent and controlled approach without unnecessary braking or accelerating. Being predictable ensures everyone’s safety.
2. Obeying the traffic rules:
You must follow traffic signals and yield to pedestrians to prevent accidents and ensure a smooth traffic flow. Remember to stop at all red lights and stick to the appropriate roadside.
3. No spitting or snotting on the road:
Spitting in public is considered unsanitary and disrespectful. If you feel the need to clear your throat or spit, find a private area, like a restroom, where it won’t bother others.
Similarly, if you need to clear your nose or sneeze out a snot, it’s best to do so discreetly and away from others. Find a private spot or use a tissue/handkerchief to handle nasal secretions.
4. No earbuds or headphones:
Avoid using earbuds or headphones to be aware of your surroundings. By keeping your ears free, you hear essential sounds like approaching vehicles, honks, or other cyclists’ signals to changes on the road. This helps you react quickly to potential hazards and always stay alert.
5. Show gratitude:
A drafting etiquette that isn’t talked about as often is to show gratitude to the rider in front of you. A simple nod, wave, or a friendly “thank you” goes a long way in acknowledging their effort and cooperation. It helps foster a positive, respectful, and supportive cycling community.
Drafting in Different Road Conditions
Different road conditions can affect your drafting. On smooth roads, you can ride closer to the rider in front, benefiting from reduced wind resistance. However, it’s crucial to maintain a safe distance on rough or uneven roads to avoid accidents.
Here are some handy tips:
1. Smooth Roads:
Drafting becomes easier on smooth roads as there are fewer obstacles and bumps compared to gravel or slippery roads.
Pedal in sync with the rider in front and maintain a steady rhythm by matching the rider’s speed. You must also maintain a consistent distance from the rider. Make minor adjustments in your speed to keep a safe distance and keep your focus on their back wheel to anticipate any changes in positioning and speed.
2. Wet or Slippery Roads:
In damp or slippery conditions, increase your following distance to about three bike lengths for extra braking time. Slow down, be aware of decreased traction, and take wider corner lines to maintain stability.
3. Gravel or Rough Roads:
Be prepared for less predictable traction and keep a wider gap of 2-3 bike lengths between you and the rider in front to avoid any sudden changes in direction or obstacles.
Be cautious, as the bike might slide or skid on the gravel. So, it is essential to keep a steady pedaling rhythm and maintain balance by keeping a firm grip on the handlebars. Always remember to choose a line that avoids the rough patches of the road.
4. Uphill Sections:
When climbing, drafting becomes less effective due to the reduced speed. Instead, focus on maintaining a steady pace and finding a rhythm that works for the group. Always communicate with the rider in front ahead of time to ensure you’re both in sync.
5. Downhill Sections:
Be prepared to ride here faster than in uphill sections. On downhill sections, while drafting can be challenging due to the increased speed, just let gravity assist you while maintaining control of the bike. So, maintain a relaxed grip on the handlebars, distributing your weight evenly on the bike for a balanced posture.
Also, maintain a safe distance of at least two bike lengths for increased braking time and bike maneuvering.
Conclusion

Drafting is a skill that can significantly enhance your cycling experience. By following these guidelines, you can enjoy the benefits of drafting and improving your overall cycling performance. Remember to prioritize safety as you pedal through the open road by maintaining a safe distance and communicating with the rider in front.
I hope this article has given you valuable insights to level your drafting skills and take your cycling to new heights! Happy cycling!
Frequently Asked Questions:
1. Should you include drafting in your regular cycling routine?
The answer is a big yes! Drafting has physical and psychological benefits; it is recommended to include it in your cycling routine at least once a week. If you want to excel in group rides, you can even incorporate drafting up to three times a week.
2. How does speed affect drafting?
The faster you and the rider in front go, the greater the drafting effect. However, it’s essential to maintain a speed that you’re comfortable with and can handle safely.
3. Why is it essential to have good tires while drafting?
Good tires while drafting are essential because high-quality tires with good traction and grip will provide better stability, especially when riding in wet or slippery conditions. This is crucial when you’re closely following another rider and need to react quickly to any changes in speed or direction.
4. Does the last rider benefit from drafting?
Yes, the last rider can also benefit from drafting. While they may not receive as much benefit as the riders in front, they still experience some reduction in effort due to the disrupted air current created by the riders ahead.
5. How many riders are ideal for drafting?
The ideal number of riders for drafting can vary, but generally, riding in a group of 4-6 cyclists is considered optimal for experiencing significant drafting benefits.